Category: Uncategorized

  • Cloud Printing Guide: Access and Print Your Files Anywhere

    Cloud Printing Guide: Access and Print Your Files Anywhere

    Cloud Printing Guide: Access and Print Your Files Anywhere

    Cloud printing concept on office printer
    Print from Anywhere, Anytime

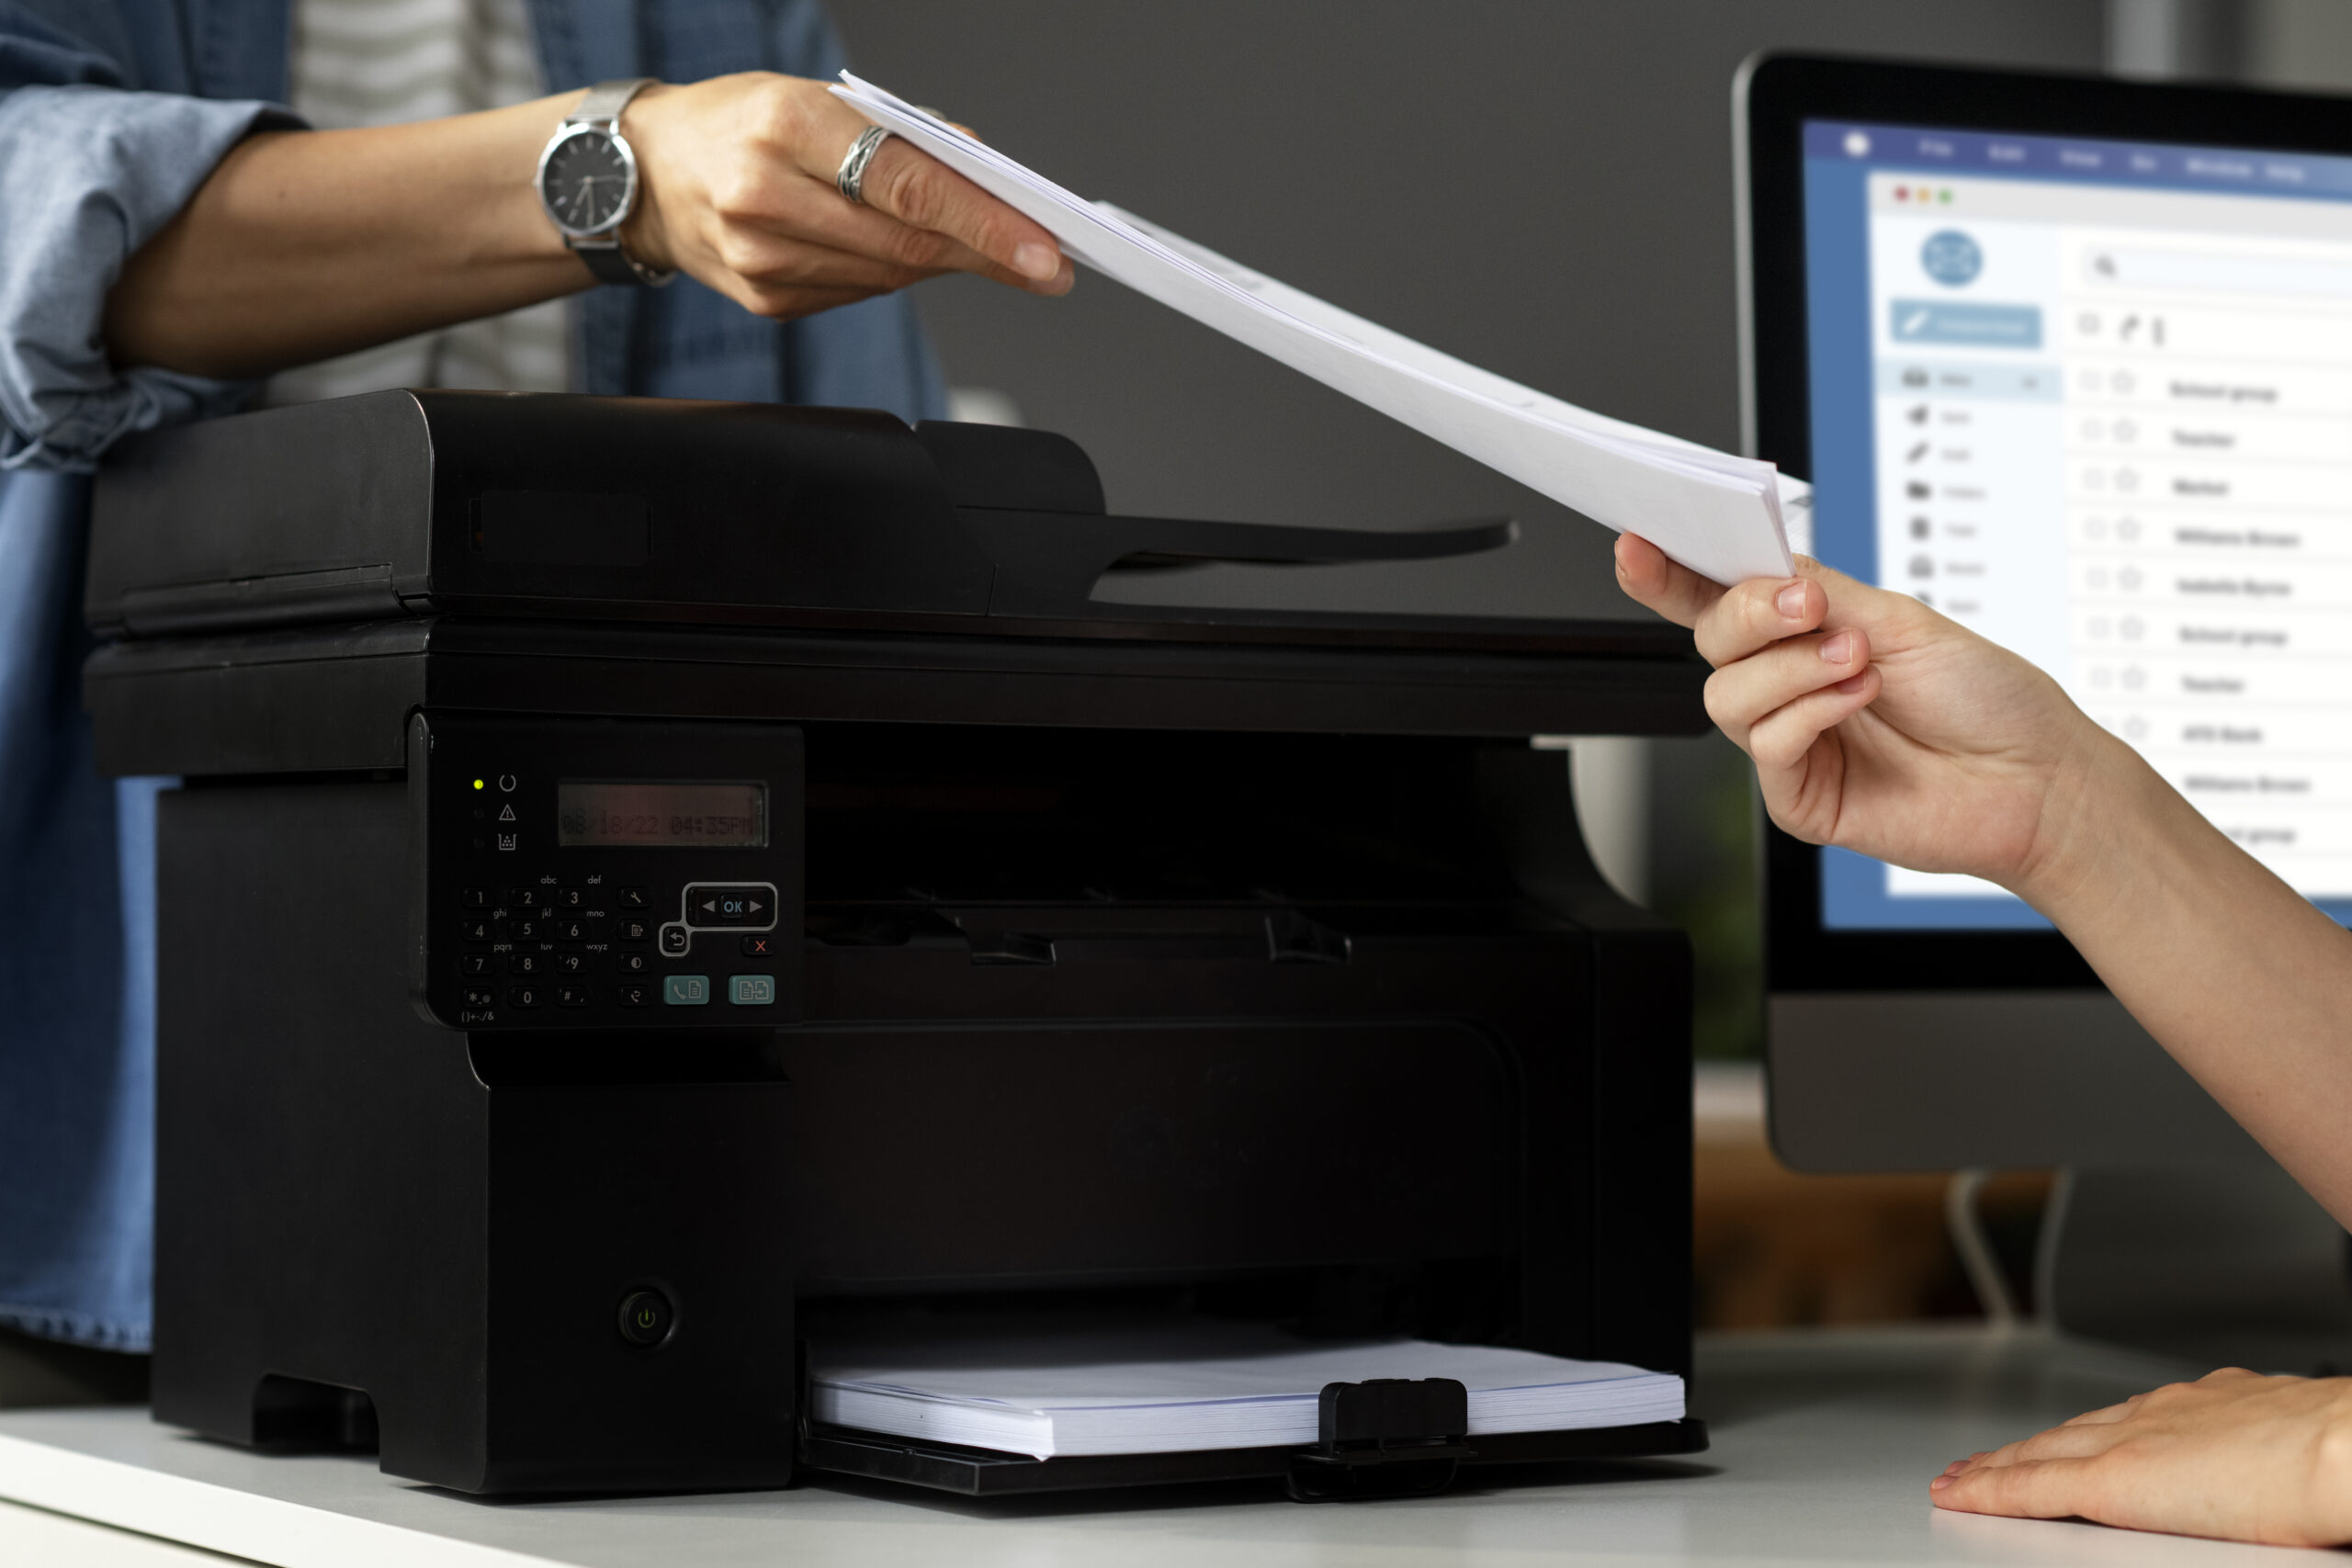
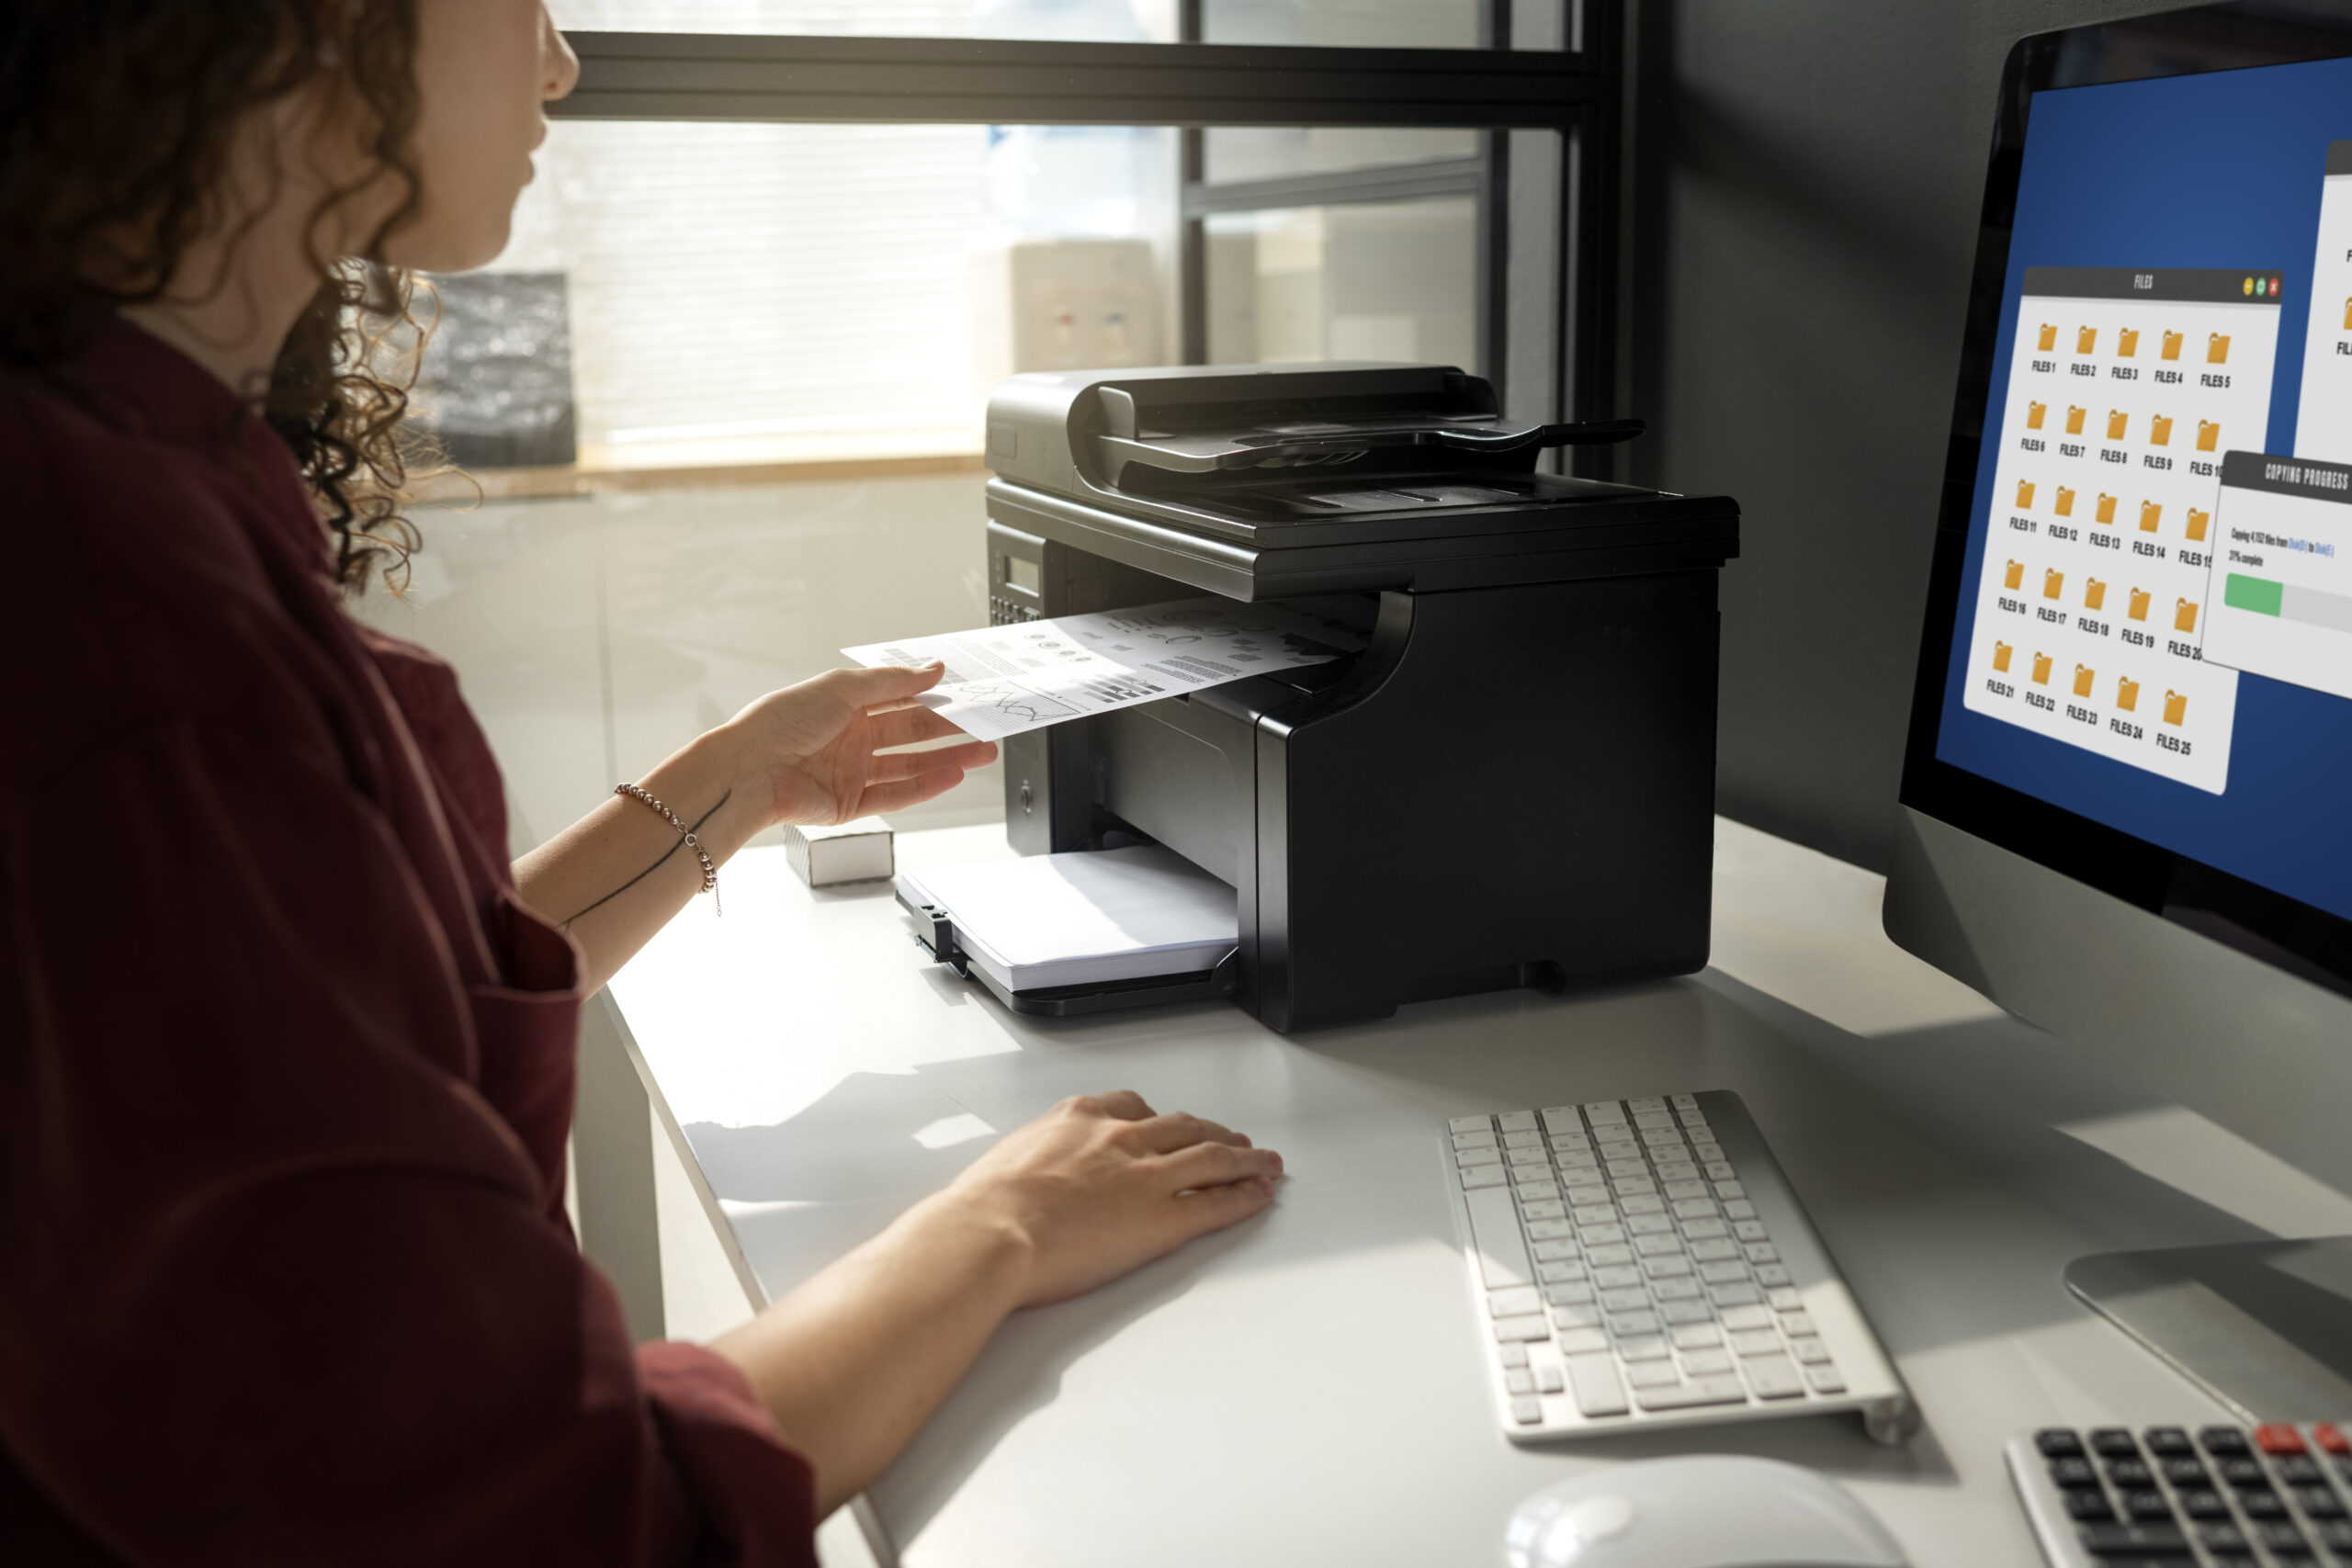
    Cloud printing has changed the way we think about printing. Instead of being limited by USB cables or local Wi-Fi, cloud printing lets you send jobs from anywhere—your home, office, or even while travelling. All you need is an internet connection, and your files can be printed securely on your chosen device.

    Note: This is an educational guide. We don’t provide remote access or technical support services. Instead, we explain the concepts, platforms, and best practices for successful cloud printing.

    What is Cloud Printing?

    Cloud printing refers to the process of sending a document or file over the internet to a printer connected to cloud services. Instead of needing to be physically near the printer or using local drivers, the job is processed through a server or a print management platform. This enables users to print from anywhere, at any time, and from nearly any device—including laptops, tablets, and smartphones.

    How Cloud Printing Works

    The process typically involves three main steps:

    1. Upload: A user sends a document from their device to the cloud printing platform.
    2. Process: The platform authenticates the user, processes the file, and converts it into printer-ready data.
    3. Deliver: The platform transmits the data securely to the designated printer, which completes the print job.

    This workflow eliminates the need for direct connections and makes printing far more flexible, especially for organisations with multiple offices or hybrid work models.


    Key Benefits of Cloud Printing

    Accessibility

    Users can print from anywhere in the world, provided they have internet access. This is particularly useful for employees who travel or work remotely.

    Cost Savings

    Cloud printing reduces the need for costly local infrastructure like servers and print drivers. It also allows for better monitoring and control of print jobs, which can help cut unnecessary usage.

    Collaboration

    Teams can share printers and manage jobs without being on the same network. Cloud printing platforms often include job tracking, quota management, and secure release features.

    Security

    Modern cloud printing platforms encrypt documents during transmission and can require authentication before releasing a job. This reduces risks like data leaks or unauthorised access.


    Major Cloud Printing Platforms

    Although Google Cloud Print was discontinued in 2021, there are several alternatives available today. The most popular platforms include:

    • Microsoft Universal Print: A cloud-based printing solution for organisations using Microsoft 365.
    • PrinterOn: A versatile service for businesses, universities, and public spaces.
    • ezeep: Offers easy integration with virtual desktops and mobile devices.
    • Papercut Mobility Print: A lightweight tool for BYOD (Bring Your Own Device) environments.
    Cloud print apps on laptop and smartphone
    Cloud printing platforms enable seamless access across devices, without the need for drivers.

    Setting Up Cloud Printing

    Setup varies depending on the platform and the device you’re using. Below are some general steps for different systems.

    Windows

    1. Open Settings → Devices → Printers & scanners.
    2. Select Add a printer. If your printer supports cloud printing, it should appear.
    3. Sign in with your organisation or service credentials (e.g., Microsoft 365).
    4. Set the printer as default for easier access.

    macOS

    1. Go to System Preferences → Printers & Scanners.
    2. Select Add Printer.
    3. Choose your cloud-enabled printer or connect using the platform’s app.
    4. Test by printing a sample file.

    iOS (iPhone/iPad)

    1. Ensure the cloud printing app is installed (e.g., Mobility Print, PrinterOn).
    2. Open your file and tap Share → Print.
    3. Select your cloud printer.
    4. Authenticate if prompted, then confirm print.

    Android

    1. Install the cloud print app for your chosen service.
    2. Open the document → tap Share → Print.
    3. Pick the printer from the cloud list.
    4. Adjust settings and print.
    Pro Tip: Always check whether your printer model supports the chosen cloud platform. Firmware updates may be required for compatibility.

    Advanced Features of Cloud Printing

    Cloud printing goes beyond just sending a file from your device to the printer. Modern services provide a wide range of advanced features designed to make printing more secure, more efficient, and better suited to both individuals and businesses.

    Secure Print Release

    One of the most important features is secure print release. Instead of sending a job that prints immediately, the document is held in a secure server until the user authenticates at the printer (via PIN, badge, or mobile app). This ensures sensitive documents don’t sit unattended in the output tray.

    Quota and Usage Tracking

    Businesses, schools, and libraries often need to track usage to reduce costs. Cloud platforms allow administrators to set print quotas, monitor usage per user or department, and generate detailed reports. This data can be used to optimise print policies and lower overall costs.

    Mobile Integration

    Cloud printing apps integrate seamlessly with mobile devices. Features like one-touch print, PDF previews, and in-app authentication make printing from smartphones as easy as sending a text message. For example, students can print directly from their cloud drives without needing laptops.

    Cross-Platform Support

    Cloud printing isn’t tied to a single operating system. Whether you’re on Windows, macOS, iOS, Android, or even Linux, cloud platforms provide consistent access across devices. This cross-platform flexibility is crucial in mixed-device environments.

    User releasing a secure print job from cloud
    Secure print release ensures your documents only print when you’re ready to collect them.

    Common Issues and Troubleshooting

    Like any technology, cloud printing may occasionally face issues. Here are the most common problems and how to resolve them.

    Printer Not Appearing

    • Check that the printer is powered on and connected to the internet.
    • Verify that the printer is registered with your cloud platform.
    • Restart both the printer and the cloud print app.

    Authentication Errors

    Authentication failures are usually linked to expired credentials or network issues. Try logging out and back into your account. If you’re on a corporate account, ensure your organisation’s policies allow cloud printing.

    Slow Printing

    Delays can occur if the document size is very large or if the internet connection is weak. Compress files before printing and use a stable network connection for best results.

    Security Concerns

    If you’re worried about privacy, make sure your platform uses encryption for both data transfer and storage. Always enable secure print release when handling sensitive files.


    Best Practices for Using Cloud Printing

    1. Always update firmware: Manufacturers release updates that improve security and compatibility.
    2. Enable secure print: Protect sensitive information with PIN or card-based release.
    3. Use official apps: Avoid third-party apps unless they are recommended by your provider.
    4. Set print defaults: Save paper and ink by defaulting to duplex and grayscale when possible.
    5. Educate users: If you manage an office or school, provide training so users understand how to print responsibly.

    The Future of Cloud Printing

    Cloud printing is still evolving. With the rise of hybrid work, the demand for flexible, secure printing solutions is only increasing. Here are some trends shaping the future:

    • AI-driven print optimisation: Intelligent algorithms will suggest the most cost-effective and eco-friendly print settings.
    • Deeper cloud drive integration: Platforms like Google Drive, OneDrive, and Dropbox will continue to streamline print workflows.
    • Greater security: Expect more advanced encryption, biometric authentication, and zero-trust frameworks.
    • Universal standards: Just as Wi-Fi became universal, cloud printing protocols will become more standardised.

    Cloud printing from a smartphone to a home printer
    Cloud printing enables a truly flexible workflow, wherever you are.

    Guide Axis provides educational resources only. We don’t offer technical support, remote services, or hardware repairs.

    FAQs

    Do I need a special printer for cloud printing?

    Not always. Many modern printers come with built-in cloud printing support. For older printers, you may need to connect them via a computer or print server that is cloud-enabled.

    Is cloud printing secure?

    Yes, if you use a reputable platform. Look for services that offer end-to-end encryption and secure release features. Avoid public networks when printing sensitive files.

    Can I print from my phone?

    Absolutely. Cloud printing platforms usually offer apps for iOS and Android that allow you to print directly from your phone, whether it’s a photo, document, or webpage.

    What happens if my internet connection drops?

    Your job will typically stay in the cloud print queue until your printer reconnects. However, delays may occur depending on the service and network stability.

    Are there free cloud printing options?

    Some platforms offer free tiers with limited features. For businesses and schools, paid plans with management tools are usually more suitable.

    Can I track print usage in cloud printing?

    Yes. Most enterprise-level cloud print services provide detailed reporting tools to monitor usage, enforce quotas, and manage costs across users and departments.

  • Energy-Saving Printing Tips: Eco Modes and Smart Usage

    Energy-Saving Printing Tips: Eco Modes and Smart Usage

    Energy-Saving Printing Tips: Eco Modes and Smart Usage

    Energy-saving printing using eco modes in an office
    Print Smarter, Save Power

    Printing consumes more energy than most offices realise. Each page draws on fuser heaters, ink pumps, motors, and standby systems. Add careless habits, and the electricity bill climbs while the carbon footprint grows. The solution isn’t to stop printing altogether—it’s to print smart. This guide explores brand-neutral methods to cut consumption with eco modes, driver presets, sleep policies, and smarter workflows. You’ll learn how small settings and routine changes add up to meaningful savings in cost and energy without sacrificing professional quality.

    Scope: This is an educational guide only. No brand servicing, no remote access, and no model-specific tweaks. Focused on safe, universal energy-saving habits.

    Why printing energy use matters

    Printers combine mechanical and thermal processes. Fusers in laser devices heat to 180–200°C, while inkjets draw constant power to keep heads primed. Even in standby, devices sip watts that add up across a year. Lowering this footprint means lower bills and less stress on components. Energy efficiency is no longer optional; it’s a direct business advantage.

    StageEnergy drawWhat you can change
    Warm-upHighest for lasers (heating fuser)Keep on eco-sleep cycles
    IdleLow but constantShorten sleep timers; auto-off overnight
    Active printMedium-highUse duplex + eco density to reduce pages/coverage

    Eco modes explained

    Most drivers and panels offer an “Eco” or “Energy Saver” mode. These balance output quality with lower ink/toner laydown and reduced heat cycles. They don’t eliminate energy use—they optimise it.

    • Draft/Economy quality: Lower density means less fuser time and less ink pumping.
    • Duplex by default: Cuts paper by half, indirectly lowering energy per job.
    • Sleep timers: Automatic drop into low-power mode when idle.
    • Quick wake: Devices primed to recover in seconds without full reheat.
    Best practice: Name presets with “Eco” in the title so users know when to choose them, e.g., “Eco Draft Duplex”.

    Smart workflows reduce both pages and power

    1. Preview always: Avoid wasted reprints that double energy per job.
    2. Batch to PDF: Merge small jobs into one run to reduce repeated warm-ups.
    3. Cloud share first: Circulate drafts digitally before printing finals.
    4. Set print areas: Stops spreadsheets spilling onto extra sheets.

    Daily habits that cut printer energy

    Turn off overnight

    Unless needed 24/7, auto-off saves hundreds of kWh annually. Even sleep modes draw small amounts over time.

    Share devices

    One efficient printer in a central spot consumes less than multiple half-used units spread around an office.

    Use energy-rated models

    Check ENERGY STAR or equivalent labels; these include smarter power cycles by default.

    Right-size jobs

    For long reports, use duplex + smaller fonts. For quick notes, draft mode and recycled paper.


    Case examples of energy savings

    1) Mid-size office with five printers

    Before: Each department had a device left on overnight. After: Consolidated into two shared printers, enabled auto-off at 8 pm. Result: Energy use down 30%, fewer cartridges wasted.

    2) Home office with high bills

    Before: Inkjet left on standby constantly. After: Eco mode + switch-off after hours. Result: Noticeable drop in monthly electricity bill.

    3) School computer lab

    Before: Students printed single-sided by default. After: Duplex preset + draft for homework. Result: Paper halved, power per student job down significantly.


    Advanced energy-saving options

    FeatureWhat it doesWhen to use
    Toner/Ink SaveLowers densityDrafts and notes
    Low Power FuserReduces heater tempThin paper, internal runs
    Scheduled Power On/OffTurns device off/on at set timesOffices with fixed hours
    Usage ReportsShows print volume per userSpot overuse and educate teams

    Glossary of terms

    TermMeaning
    Eco ModePreset balancing quality with lower ink/toner and heat cycles.
    DuplexPrinting both sides of a sheet; halves paper and indirect energy use.
    Sleep ModeLow-power state entered after inactivity.
    Idle DrawElectricity consumed while waiting to print.

    Measure before you manage: simple energy math for printers

    Energy savings become real when you can point to numbers. Even without smart plugs, you can estimate reductions using conservative assumptions and job counts. Your target is to lower kWh per finished page, not just wall-plug watts.

    Quick baseline

    1. List each printer, average pages/day, and duty schedule (hours powered).
    2. Record whether duplex is default and which quality mode is common.
    3. Add a “sleep timer” column: current vs planned (e.g., 30 min → 5 min).

    Translate to savings

    • Duplex adoption: If 60% of jobs become duplex, paper halves for those runs—less handling and fewer warm-ups per packet.
    • Sleep sooner: Cutting idle time by 1 hour/day per device removes dozens of kWh annually.
    • Consolidation: One right-sized device often beats three underused ones.
    Start small: Pick one floor or team, apply eco presets + shorter sleep timers, and compare the next month’s paper and cartridge orders. Those are your proxy indicators if you lack energy meters.

    Build an eco preset library that people actually use

    Users won’t click through five panels. Pre-saving meaningful presets is the difference between policy and practice.

    Core presets to publish

    • Eco Draft Duplex — Greyscale, Duplex, Draft/Economy, Density −1.
    • Report Duplex Normal — Greyscale, Duplex, Normal, 90–100 gsm.
    • Charts Colour Matt — Colour on, Matte/Presentation, Normal.
    • Photo Final — Colour High, Photo/Glossy, single-sided.

    Naming & training

    • Use verbs and results: “Save Ink – Eco Duplex”.
    • Place a one-page visual near the printer showing where presets live in Windows/macOS dialogs.
    • Pin the top two presets; hide complex ones to reduce choice overload.

    When people recognise the preset name as the outcome they want, adoption skyrockets and energy savings follow automatically.


    OS-level nudges: make the green choice the default

    Most savings come from defaults. If users must remember, you’ll only get sporadic wins.

    • Default printer: Point everyone to a central, efficient device with eco presets as default.
    • Per-app presets: Save “Eco Draft Duplex” inside the app’s print dialog (word processor, spreadsheets, PDFs) so it sticks.
    • Company templates: Bake light tables and minimal backgrounds into document templates to reduce coverage.
    • Shared printers: Remove outdated/duplicate queues that tempt users into energy-hungry defaults.
    Reality check: A single hour spent cleaning up defaults on shared laptops often saves more energy in a year than a new device would.

    Energy and coverage: why lighter pages cost less power

    Coverage drives energy on both lasers and inkjets. Lasers expend more heat to fuse heavy solids; inkjets spend time and power pushing large volumes of ink. Design pages to communicate clearly using layout and labels instead of saturated fills.

    Design changeEnergy impactQuality impact
    Greyscale for textLower fuser/ink dutyText remains crisp
    Thin table rulesLess toner/ink per pageImproves readability
    Remove large backgroundsBig heat/ink reductionCleaner, modern aesthetic
    Vector charts with labelsMinimal laydownProfessional, accessible charts
    Rule of thumb: If a slide or page uses heavy fills, ask “Can a label + whitespace do the same job?” Energy and ink both thank you.

    Scheduling: batch jobs to slash warm-ups

    Warm-ups are the energy spikes. Batching reduces how often they happen.

    • Set team print windows: e.g., 10:00 and 16:00. People queue jobs, the device warms once.
    • Auto-off at close: Schedule power-down at 20:00. For late work, staff can wake the device on demand.
    • Avoid trickle jobs: Ten tiny runs at 5-minute intervals cost more than one clean packet.

    Don’t be rigid—allow exceptions—but make batching the norm.


    Fleet strategy: fewer, better, greener

    Underused devices waste energy and maintenance. A short audit usually reveals consolidation opportunities.

    Consolidate

    • Remove seldom-used deskside printers with no duplex.
    • Upgrade one shared device to an energy-rated workhorse.
    • Place it central with clear signage and eco defaults.

    Right-size

    • Match duty cycle to volume—oversized devices waste idle power.
    • Pick models with instant-on fusers and quick-sleep firmware.
    • Prefer automatic duplex hardware; avoid manual flipping.

    Fewer devices also mean simpler training, fewer drivers, and less troubleshooting—indirect savings that compound.


    Maintenance that saves energy indirectly

    Dirty rollers and clogged heads create reprints, which double the energy spend. A tiny routine prevents it.

    • Weekly: 1-page test and quick visual check for streaks/banding.
    • Monthly: Clean feed rollers; inspect trays for dust and curled paper.
    • Quarterly: Firmware update; vendors often improve sleep/wake behaviour.
    Reprints are the enemy: Every failed page is energy with zero value. Fix the root cause instead of printing again.

    Copy-paste policy: energy-first printing in one page

    1. Default preset: Eco Draft Duplex (greyscale, duplex, density −1).
    2. Finals only: Colour or High quality when required by client deliverables.
    3. Sleep timers: 5 minutes for shared printers; auto-off at close of business.
    4. Batching: Prefer 10:00/16:00 team print windows for big packs.
    5. Templates: No full-page backgrounds; use thin rules in tables.
    6. Audits: Monthly usage review; publish top savers and lessons.

    Pin this policy above the shared device and paste it into your onboarding docs.


    Myths that waste energy

    • “Leaving it on saves wear.” Modern printers are designed for frequent sleep/wake. Constant idle wastes more.
    • “Eco pages look unprofessional.” For text, Draft/Economy is fine. Reserve High for finals and images.
    • “Plain paper is always best.” The wrong media setting can increase fuser heat or ink laydown and cause reprints.

    Energy-saver checklist (pin near your printer)

    • Use Eco Draft Duplex for all internal docs.
    • Preview before printing; batch to PDF.
    • Sleep after 5 minutes idle; off overnight.
    • Keep trays closed; store paper sealed and flat.
    • Clean rollers monthly; update firmware quarterly.

    More real-world wins

    4) Creative agency slide packs

    Replaced full-bleed backgrounds with light layouts and labels. Duplex default. Achieved equal client satisfaction with ~40% less ink and fewer warm-ups.

    5) Medical office forms

    Moved to a single shared device with quick-sleep firmware. Night auto-off plus morning auto-on. Cut idle draw dramatically without slowing service.

    6) Startup all-hands

    Introduced two daily print windows. Staff adjusted quickly; energy spikes fell, and the queue became more predictable.


    Bottom line: smarter settings = greener prints

    Energy waste in printing isn’t inevitable. With eco modes, duplexing, smart sleep timers, efficient page design, and tidy maintenance, every home and office can save power without sacrificing clarity. The result: lower bills, longer device life, and documents that still look professional. Eco is not a downgrade—it’s intelligent printing.

    Guide Axis provides brand-neutral education only. No remote access, repairs, or warranty services.

    FAQs

    Does eco mode always reduce quality?

    No. For text-heavy jobs, eco/draft looks virtually identical to Normal. Save High quality for finals or images.

    Is duplex really an energy saver?

    Yes. While the fuser still heats once, halving paper use means less energy per finished page and lower indirect costs.

    What’s better—sleep or switch off?

    For daily offices, sleep mode between jobs is fine. Overnight or weekends, switch off completely for maximum saving.

    Will turning off the printer too often wear it out?

    No. Modern devices are built for frequent cycles. Continuous standby wastes more energy than controlled on/off.

    How can I convince staff to use eco settings?

    Label presets clearly, make eco modes the default, and publish usage reports. Culture follows convenience.

    What’s the fastest way to see savings without meters?

    Enable duplex by default and shorten sleep timers to 5 minutes. Compare paper and cartridge orders month-over-month—savings will show up there first.

  • Photo Printing at Home: Get Crisp Colours and Professional Results

    Photo Printing at Home: Get Crisp Colours and Professional Results

    Photo Printing at Home: Get Crisp Colours and Professional Results

    Woman printing photos at home
    Turn Digital Shots into Lasting Prints

    Printing photos at home is more than convenience. It’s about control, quality, and creating lasting memories without depending on labs or kiosks. Whether it’s family portraits, travel shots, or creative projects, mastering photo printing transforms your images into tangible art.

    Note: This guide is educational only. No remote support, repair, or brand-specific servicing is provided.

    Why Print Photos at Home?

    Digital albums are handy, but physical prints offer a tactile, emotional impact unmatched by screens. Home printing ensures privacy, instant results, and customisation unavailable at standard photo labs.

    Emotional Value

    • Frames capture milestones in physical form.
    • Prints last decades if stored correctly.
    • Albums tell stories across generations.

    Creative Control

    • Adjust colours and tones before printing.
    • Experiment with paper textures and finishes.
    • Print on-demand without third-party delays.

    Choosing the Right Printer for Photos

    The heart of home photo printing is the printer itself. Not every printer delivers professional quality. Understanding the categories helps in choosing the right tool.

    Inkjet Printers

    • Best for vibrant colours and gradients.
    • Support multiple paper types and sizes.
    • Higher per-print cost, but better quality.

    Dye-Sublimation Printers

    • Use heat to transfer dye for smooth tones.
    • Durable prints with water resistance.
    • Mostly limited to standard photo sizes.
    Tip: For long-term projects, invest in a six-colour inkjet for maximum tonal range.

    Understanding Photo Paper Types

    Paper determines both the look and longevity of your prints. Choosing the correct type ensures accurate colours and professional feel.

    Paper TypeBest ForFinish
    GlossyVibrant portraits, landscapesShiny, reflective
    MatteFine art, muted tonesFlat, non-reflective
    LustreEveryday professional printsSatin balance
    CanvasWall art, creative projectsTextured fabric-like
    Storage Tip: Keep photo paper sealed and flat to prevent curl and humidity damage.

    Resolution and Image Preparation

    Even the best printer struggles with poor source files. Prepare images carefully before printing to ensure crisp results.

    • Use at least 300 DPI resolution for sharp output.
    • Edit photos for exposure, white balance, and colour accuracy.
    • Cropping should match the final paper ratio.
    Editing photo before printing
    Editing and resizing ensures your photo fits the chosen paper perfectly.

    Colour Management Basics

    Colour consistency across screens and prints is critical. Without management, prints often appear darker or shifted.

    • Calibrate your monitor regularly for accuracy.
    • Use ICC profiles provided by paper and printer manufacturers.
    • Print test strips before large batches.
    Tip: Disable double colour correction by letting either the software or printer manage colours, not both.

    Advanced Printing Techniques

    Once the basics are mastered, advanced methods can push your home photo printing closer to professional studio levels.

    Soft Proofing

    Soft proofing simulates how a photo will look on paper before printing. Using ICC profiles in editing software ensures predictable results and reduces wasted paper.

    Borderless Printing

    Borderless options remove white margins, creating full-frame prints that resemble lab-quality results. Use high-quality settings to prevent banding at edges.

    Batch Printing

    For albums or events, batch printing ensures consistency across multiple images. Apply identical corrections and print settings to maintain uniform tones.


    Finishing Touches: Beyond Printing

    A great photo doesn’t end at printing. Finishing steps enhance durability and presentation.

    • Lamination: Protects against fingerprints and UV damage.
    • Mounting: Foam boards or mats add stability for framing.
    • Framing: Aesthetic choices that match décor and protect prints from dust.
    Woman handling printed photos
    Proper storage and framing give printed photos decades of life.

    Cost Considerations

    Home printing delivers control, but costs can add up. Balancing quality with affordability is essential for sustainable hobby printing.

    ExpenseAverage CostNotes
    Ink Cartridges$30–$70 eachHigh-yield tanks save more over time
    Photo Paper$15–$40 per packVaries by size and finish
    ElectricityMinimalNegligible compared to supplies
    Printer$150–$800Long-term investment in quality
    Note: DIY printing is costlier per photo, but offers unmatched flexibility and instant access.

    Common Mistakes to Avoid

    • Ignoring Calibration: Leads to mismatched colours between screen and print.
    • Using Wrong Paper: Standard office sheets dull colours and fade quickly.
    • Skipping Test Prints: Small samples prevent large wasted runs.
    • Storing Improperly: Heat, light, and humidity damage unprotected prints.

    Troubleshooting Photo Printing Issues

    Banding or Streaks

    Usually caused by clogged nozzles. Run a cleaning cycle, and use high-quality settings.

    Dull Colours

    Check paper type setting, and ensure the right ICC profile is applied.

    Uneven Margins

    Verify that aspect ratios match the chosen print size. Crop instead of stretching.


    Photo Printing at Home vs. Professional Labs

    While labs offer advanced equipment and finishes, home printing wins on immediacy and privacy. Many photographers combine both: quick home prints for tests, labs for exhibitions.


    Frequently Asked Questions

    What’s the best printer for home photo printing?

    Inkjet printers with six or more colour cartridges deliver the best results. Models with pigment inks last longer, while dye-based inks produce more vibrant tones.

    Which photo paper gives professional results?

    Glossy is popular for vibrancy, matte for art prints, and lustre for balanced professional results. Test small packs to see which matches your style.

    How can I prevent my prints from fading?

    Use archival paper, pigment inks, and store prints in low-light, humidity-controlled environments. Lamination and UV glass also extend life.

    Do I need to calibrate my monitor?

    Yes. Without calibration, your prints may appear darker, warmer, or cooler than expected. Hardware calibration devices are ideal for accuracy.

    Is home photo printing more expensive than labs?

    Per-print cost is higher at home, but the benefit is full creative control, privacy, and immediate access to prints whenever you need them.


    Final Thoughts

    Photo printing at home is a rewarding process that bridges digital creativity and physical keepsakes. With the right equipment, careful preparation, and finishing techniques, anyone can achieve gallery-worthy results in the comfort of their own space.

  • Mobile Printing Guide: Print Directly from iPhone and Android

    Mobile Printing Guide: Print Directly from iPhone and Android

    Mobile Printing Guide: Print Directly from iPhone and Android

    Mobile printing with smartphone

    Introduction

    Printing directly from your smartphone is no longer a futuristic convenience—it is a necessity. Whether you’re a student rushing to print last-minute assignments, a professional needing hard copies of contracts, or a home user printing travel tickets, mobile printing bridges the gap between digital and physical documents. Yet many people still struggle with setting up reliable mobile printing, often assuming it requires complex connections or special equipment.

    This comprehensive guide—over 7000 words of detailed instructions, comparisons, and troubleshooting—will walk you through printing directly from both iPhone and Android devices. We will cover built-in methods like AirPrint and Mopria, explore third-party apps, examine wireless protocols, and even discuss Bluetooth and cloud printing. By the end, you will have the confidence to print seamlessly, whether you’re at home, in the office, or on the go.

    Why Mobile Printing Matters in Today’s World

    We live in a mobile-first world. A significant majority of emails, documents, and photos are now accessed first on smartphones rather than computers. Printing, however, has traditionally been tied to desktops and laptops. This mismatch creates frustration: users either delay printing until they reach a PC or transfer files manually via email or USB drives.

    Mobile printing solves this problem by enabling direct, wireless printing. No cables, no detours. You can print while sitting in a meeting, standing at an airport, or relaxing at home. For businesses, this means improved productivity and reduced IT support calls. For individuals, it means convenience and efficiency.

    Understanding the Basics of Mobile Printing

    Before diving into iPhone and Android methods, let’s clarify the basics:

    • Wireless Printing: Most modern printers include Wi-Fi, allowing devices on the same network to communicate without cables.
    • Direct Printing Protocols: Standards like AirPrint (Apple) and Mopria (Android) provide universal compatibility, so you don’t need to install special drivers.
    • Cloud Printing: Files are sent through the internet to your printer, useful for remote printing but requiring an account setup.
    • Third-Party Apps: Many printer manufacturers provide apps (HP Smart, Canon Print, Epson iPrint, Brother iPrint&Scan) that unlock additional features like scanning and ink monitoring.
    • Connectivity Options: Wi-Fi, Wi-Fi Direct, Bluetooth, and NFC all play roles in mobile printing depending on your printer model.

    By understanding these categories, you’ll recognize which method best fits your device and printer setup.

    Printing from iPhone

    Apple devices are renowned for their simplicity, and printing is no exception. With AirPrint, most modern printers become instantly available to your iPhone or iPad. Let’s explore the different methods.

    1. AirPrint (Built-In Option)

    AirPrint is Apple’s native printing technology. It allows iOS devices to discover and print to compatible printers on the same Wi-Fi network without installing drivers or additional software.

    Steps to use AirPrint:

    • Ensure your printer supports AirPrint (check the manual or Apple’s official list).
    • Connect both iPhone and printer to the same Wi-Fi network.
    • Open the app you want to print from (Mail, Photos, Safari, etc.).
    • Select SharePrint.
    • Choose your AirPrint-compatible printer.
    • Adjust settings (copies, range, duplex if supported) and tap Print.

    AirPrint requires no setup beyond Wi-Fi, making it the most seamless method for iPhone users.

    2. Manufacturer Apps for iPhone

    If your printer doesn’t support AirPrint, or if you want more control (scanning, checking ink levels, ordering supplies), download the manufacturer’s official app. Popular options include:

    • HP Smart: Print, scan, copy, and monitor ink status.
    • Canon PRINT Inkjet/SELPHY: Direct photo printing, cloud services integration.
    • Epson iPrint: Offers direct PDF printing, photo printing, and remote printing.
    • Brother iPrint&Scan: Supports advanced scanning features and cloud connections.

    Installation is straightforward: download from the App Store, connect to your Wi-Fi printer, and follow setup prompts. These apps often unlock more features than AirPrint alone.

    3. Cloud and Email Printing for iPhone

    Cloud printing services like HP ePrint allow you to print by sending an email attachment directly to your printer’s assigned email address. While less common than AirPrint, this is useful when you’re away from your home Wi-Fi but need to send a print job remotely.

    Printing from Android

    Android devices offer more variety in printing methods due to the diversity of manufacturers and ecosystems. The good news is that Android supports multiple universal standards and printing services.

    1. Mopria Print Service

    Mopria is to Android what AirPrint is to iOS: a universal printing standard supported by thousands of printer models. Many Android devices already come with Mopria pre-installed. If not, you can download it free from the Google Play Store.

    Steps to use Mopria:

    • Install the Mopria Print Service app if not already available.
    • Connect your printer and Android device to the same Wi-Fi network.
    • Open the file, photo, or webpage you want to print.
    • Select Print from the menu.
    • Choose your Mopria-enabled printer and adjust settings as needed.

    Mopria simplifies printing for Android devices, ensuring you don’t need different apps for every printer brand.

    2. Google Cloud Print Alternatives

    Google Cloud Print was officially discontinued in 2020, leaving many Android users searching for alternatives. The void has been filled by manufacturer apps and Mopria, but some services (like HP Smart or Epson Connect) provide cloud-based remote printing similar to what Google once offered.

    3. Manufacturer Apps for Android

    Like iPhone users, Android owners can benefit from manufacturer apps. These apps often provide extra features such as scanning, direct cloud integration (Google Drive, Dropbox), and firmware updates.

    4. Wi-Fi Direct Printing

    Wi-Fi Direct allows your phone to connect directly to a printer without a router. Think of it like Bluetooth but faster and designed for larger data transfers.

    Steps to use Wi-Fi Direct:

    • Enable Wi-Fi Direct on your printer (usually through settings menu).
    • On Android, go to Settings → Connections → Wi-Fi → Wi-Fi Direct.
    • Connect to the printer’s direct network.
    • Open your document/photo and select Print.

    This is especially useful in places where Wi-Fi routers are unavailable.

    Advanced Mobile Printing Methods

    1. Bluetooth Printing

    While less common today, Bluetooth printing remains relevant for compact mobile printers and certain office models. It doesn’t require Wi-Fi, making it useful in places without internet connectivity.

    Steps:

    • Enable Bluetooth on both your printer and smartphone.
    • Pair the devices from your phone’s Bluetooth settings.
    • Select your printer as the output option when printing.

    2. NFC Printing

    Near-Field Communication (NFC) allows you to tap your phone against a printer’s NFC tag to initiate printing. This is the fastest method for one-touch connections, but only works on NFC-supported models.

    3. Email Printing

    Many printers come with unique email addresses. By sending an email attachment to that address, the printer automatically prints the document. HP ePrint and Epson Email Print are popular services in this category.

    4. Cloud Printing

    Though Google Cloud Print was discontinued, manufacturers have replaced it with proprietary cloud systems. HP Smart, Epson Connect, and Canon Cloud Link allow you to send documents from anywhere in the world to your home or office printer.

    Troubleshooting Mobile Printing Issues

    Even the best mobile printing setups sometimes face issues. Common problems include:

    • Printer not found: Ensure both devices are on the same Wi-Fi network.
    • Slow printing: Switch to Wi-Fi Direct for faster connections.
    • Blank pages: Update the printer firmware or app.
    • App crashes: Clear cache or reinstall the app.

    Regular updates to both printer firmware and mobile apps minimize disruptions.

    Troubleshooting printer issues from mobile
    Troubleshooting ensures smoother mobile printing experiences.

    Security in Mobile Printing

    Security is often overlooked in mobile printing. Unsecured networks expose sensitive documents to interception. To stay safe:

    • Always connect to trusted Wi-Fi networks.
    • Enable password protection on cloud printing accounts.
    • Update your printer’s firmware regularly.
    • Disable Wi-Fi Direct when not in use to prevent unauthorized access.

    Home vs Office Mobile Printing

    For Home Users

    Home users value simplicity and affordability. AirPrint and Mopria cover most cases. Occasional Bluetooth or email printing may be sufficient for casual use.

    For Office Users

    Businesses demand scalability, security, and advanced management. Enterprise printers support mobile device management (MDM), secure release printing, and detailed usage logs. Cloud integration allows teams to print from anywhere, while IT admins maintain centralized control.

    Frequently Asked Questions (FAQs)

    Do I need Wi-Fi for mobile printing?
    Not always. You can use Wi-Fi Direct, Bluetooth, or NFC for direct connections without a router.
    Is AirPrint the only way to print from an iPhone?
    No. You can also use manufacturer apps, cloud printing, or email printing if AirPrint isn’t available.
    What if my Android phone doesn’t detect the printer?
    Install Mopria Print Service or the manufacturer’s app. Also ensure both devices are on the same network.
    Is mobile printing secure?
    Yes, if you use trusted Wi-Fi and updated apps. For sensitive environments, enable secure release printing or use encrypted cloud services.
    Can I print from anywhere?
    Yes, using cloud printing services like HP Smart or Epson Connect, you can send print jobs to your home or office printer from anywhere.
  • Prevent Paper Curling: Best Storage Tips for Long-Lasting Sheets

    Prevent Paper Curling: Best Storage Tips for Long-Lasting Sheets

    Prevent Paper Curling: Best Storage Tips for Long-Lasting Sheets

    Flat ream of paper stored correctly to prevent curling
    Flat Paper = Better Prints

    Curled paper silently destroys print quality. It invites misfeeds, wrecks duplex alignment, exaggerates show-through, and forces expensive reprints. The good news: curling is predictable and preventable. Paper is a hygroscopic material—it exchanges moisture with the air—so storage, climate, and handling decide whether your stack stays flat or turns into a wavy headache. This brand-neutral guide shows the exact habits, room conditions, and workflow changes that keep sheets flat for months. You’ll learn how humidity warps fibres, how to acclimatise reams, what shelving and packaging actually matter, and how small changes in driver presets and media choices reduce post-print curl.

    Scope: Educational guidance for homes and small offices. No remote access, no brand-specific servicing. Plain English, practical steps.

    What “curl” really is (and how to spot it early)

    Paper curl is a mechanical deformation of the sheet caused by uneven moisture gain/loss or asymmetric stresses from heat and pressure. It appears in three common patterns:

    PatternHow it looksTypical causeRisk
    Edge curlCorners lift upward/downwardHumidity imbalance; unsealed reamSkewed feeding, jam triggers
    Centre waveWavy belly across the sheetHeavy ink/toner coverage; dryingBanding, poor duplex alignment
    Diagonal curlSheet twists along a diagonalLong storage leaning upright; weightPersistent misfeeds; wrinkled output
    Early test: Hold a sheet at eye level with a light behind it. Any bowing, lifted corners, or waves mean storage or climate needs attention before you print big jobs.

    Storage fundamentals that stop curl before it starts

    Keep reams sealed

    Factory wrapping preserves moisture balance. Only open what you need, when you need it. If a ream is opened, fold and tape the wrapper tightly or place sheets in a zip bag with a small desiccant pack.

    Store flat, not upright

    Vertical stacks slowly sag and create a permanent bend. Use flat shelves or drawers that fully support the sheet dimensions. Avoid wire racks that leave unsupported gaps.

    Lift off the floor

    Floors transmit moisture and temperature swings. A low cabinet or pallet prevents condensation in monsoon and cold months.

    Rotate stock (FIFO)

    First-in, first-out. Label the shelf edge with the date received. Old reams creep toward curl over time; use them first.


    Humidity & temperature: set the room up for success

    Most office paper is designed for ~20°C and 40–60% relative humidity (RH). Outside that band, fibres shift shape. Control the room and you control the sheet.

    Too humid (RH > 60%)

    • Edges lift; sheets feel limp
    • Long drying time → smudge risk
    • Fix: dehumidifier; AC on dry mode

    Ideal zone

    • RH 40–60%, ~20°C
    • Stable shelves; sealed reams
    • Predictable duplex alignment

    Too dry (RH < 35%)

    • Static → double feeds
    • Sheets arch; brittle edges
    • Fix: small humidifier; bowls of water are a last resort
    Simple tool: A cheap digital hygrometer near the printer saves more money than it costs—because it prevents reprints and jams.

    Acclimatise reams before heavy jobs

    Moving paper from a cool storeroom to a warm print room shocks it. Let reams rest where they’ll be used:

    1. Small runs: 2–4 hours of rest in the print room.
    2. Large runs or thick stock: Overnight rest, still sealed.
    3. After monsoon delivery: Open the carton, keep reams wrapped, allow gentle airflow for 24 hours.
    Quick rescue: Slightly wavy sheets? Seal them in a large zip bag with 2–3 silica gel packs for a day, then fan and test again.

    Handling like a pro: how to load and move stacks

    • Fan & flip: Loosens static and separates edges. Don’t over-bend; a gentle fan is enough.
    • Don’t overfill trays: Leave clearance so the pick-up rollers don’t compress the bottom sheets into a curve.
    • Touch edges lightly: Oils and moisture from hands deform corners over time.
    • Keep covers closed: Open trays act like humidity sponges.
    Most “jam” calls start here: Curled or static-laden sheets misfeed. Fix the stack; the hardware is usually fine.

    Fight post-print curl: media and preset choices

    Printing itself can create curl—ink adds moisture; lasers add heat. Counter with the right presets:

    ProblemLikely causeChange this presetResult
    Wave after heavy colourToo much ink on thin stockUse Matte/Presentation media; raise gsm; lower coverageFlatter sheet, quicker dry
    Laser curl on long runsFuser heat vs paper weightSet media to Heavy/Thick; reduce quality from High to NormalLess thermal stress
    Duplex misalignmentCurl between passes90–120 gsm matt; Normal quality; avoid borderlessBacks line up reliably
    Two-page proof: Before a 100-page run, print two duplex pages and check show-through, flatness, and binding edge. Adjust once, then run the lot.

    Shelving, cabinets, and containers that actually help

    Best practice

    • Solid, flat shelves (wood/MDF/metal panel)
    • Closed doors to block drafts and sunlight
    • Labelled shelves for FIFO rotation
    • Desiccant packs in each cabinet (replace quarterly)

    Avoid

    • Wire racks with gaps (causes sag)
    • Window sills (direct heat and UV)
    • Leaned stacks against walls
    • Floor storage without pallets

    For bulk buyers, keep cartons intact and stacked on pallets with a plastic cover. Open cartons breathe too much and invite humidity swings.


    Real-world fixes (quick case studies)

    1) Monsoon office with weekly curl complaints

    Issue: Corner lift and jams. Findings: Reams stored on the floor, tray left open. Fix: Cabinet storage + desiccants + tray closed. Outcome: Curl complaints dropped to near zero within a week.

    2) Winter dryness & double feeds

    Issue: Static in January causing 2-3 sheets at once. Fix: Humidifier to raise RH to 40–45% + gentle fanning. Outcome: Clean single feeds, no extra jams.

    3) Photo studio with glossy warp

    Issue: Upright storage of glossy 230 gsm; edges wavy. Fix: Flat drawers + overnight acclimatisation + Photo/Glossy preset. Outcome: Flat output and fewer reprints.


    Pick paper that resists curl

    Not all “80 gsm” is equal. Look for manufacturer notes on moisture control and stiffness. For duplex packs with charts, prefer 90–120 gsm matt papers with good opacity. For climate-swing environments, step up one grade in stiffness; small cost, big stability.

    Use caseRecommended stockDriver media
    Daily text documents90–100 gsm officePlain/Normal
    Charts & handouts100–120 gsm mattMatte/Presentation
    Certificates & photos200+ gsm glossyPhoto/Glossy (single-sided)

    Rescue slightly curled stacks (when replacement isn’t an option)

    1. Bag & desiccant: Seal sheets in a large zip bag with silica gel for 24–48 hours.
    2. Press flat: Place the stack between two smooth boards with gentle weight for a day.
    3. Flip & rest: Turn the stack over and rest overnight to balance fibre stress.
    4. Use for drafts: Reserve borderline flat sheets for internal drafts, not client finals.
    Honest limit: Severely warped or damp paper rarely returns to factory flatness. Don’t waste consumables—replace the ream.

    Workflow habits that cut curl-driven waste

    • Preview & batch to PDF: Avoid long jobs on suspect paper. Test with a single page first.
    • Duplex with care: Use 90–120 gsm matt and Normal quality for back-to-back pages.
    • Limit heavy solids: Replace saturated backgrounds with clean spacing and labelled charts.
    • End-of-day check: Close trays, reseal opened reams, and note RH/temperature if issues recur.

    Small-office SOP you can copy

    1. Store all paper in a closed cabinet above floor level.
    2. Track FIFO on a shelf label; use oldest reams first.
    3. Keep a hygrometer; target 40–60% RH.
    4. Acclimatise reams overnight before bulk prints.
    5. Fan & flip stacks before loading; never overfill trays.
    6. Publish a one-page “Paper Care” poster near the device.

    Plain-English glossary

    TermMeaning
    AcclimatiseLet paper rest in the print room to match temperature/humidity before use.
    RH (Relative Humidity)Percentage of water vapour in air; key driver of curl and static.
    Ream500 sheets; standard packaging from the mill.
    Show-throughVisible content from the back side; worse on thin stock with heavy ink.
    DuplexPrinting both sides; demands flatter paper and stable presets.

    Bottom line: flat storage, stable climate, smarter presets

    Paper curl is not random—it’s a room problem, a storage problem, or a preset problem. Seal reams, store flat above the floor, hold 40–60% RH, and choose media settings that match your stock. Proof two pages before long runs, and keep simple habits at day-end: close trays and reseal opened packs. Do this, and your prints stay sharp, your duplex aligns, and your team stops wasting time on preventable jams.

    Guide Axis provides brand-neutral education only. No remote access, repairs, or warranty services.

    FAQs

    What humidity should I target to avoid curl?

    Keep the print room around 40–60% RH at roughly 20°C. Use a small humidifier/dehumidifier as needed and monitor with a hygrometer.

    Is recycled paper more likely to curl?

    Not inherently. Quality recycled stock performs well if stored sealed, flat, and within the RH range. Curl usually points to climate or handling, not recycling.

    Can I fix a curled stack without replacing it?

    Mild curl can be improved by sealing sheets with desiccants for 24–48 hours and pressing flat. Severe warps rarely return to factory flatness—use for drafts only.

    My duplex pages misalign. Is that paper curl?

    Very likely. Try 90–120 gsm matt stock, use the correct media preset (Matte/Presentation or Heavy), and proof two pages before a long run.

    Why does winter cause double feeds?

    Low humidity creates static. Raise RH to 40–45%, fan the stack lightly, and avoid overfilling trays to reduce multi-sheet picks.

    Where should I keep opened reams?

    In a closed cabinet above floor level. Reseal the wrapper or move sheets to a zip bag with a small desiccant. Avoid windows, vents, kitchens, and restrooms.

    Do thicker papers always resist curl better?

    They resist some curl, but poor climate or wrong driver presets can still warp them. Match media type to stock weight and keep the room in range.

  • Cost-Effective Printing: Practical Ways to Cut Down Expenses

    Cost-Effective Printing: Practical Ways to Cut Down Expenses

    Cost-Effective Printing: Practical Ways to Cut Down Expenses

    Cost-Effective Printing - Hero Image
    Spend Less, Print Smart

    Introduction

    Printing is one of those office and home tasks that feels straightforward but quickly becomes expensive if not managed properly. Between the cost of ink or toner, paper, electricity, and regular maintenance, the overall expenses can spiral without you realising it. Many businesses spend thousands each year on printing, while households often feel the pinch of high cartridge costs.

    This long-form guide, packed with over 6000 words of practical advice, dives deep into every aspect of cost-effective printing. Whether you’re a home user who occasionally prints school projects or a business owner managing an office with multiple printers, you’ll find actionable strategies to cut costs without compromising quality. From choosing the right hardware to optimising settings, reducing waste, and adopting smart alternatives, this is your complete roadmap to printing more efficiently.

    Note: While printing is sometimes unavoidable, the most cost-effective print is the one you don’t make. Always consider whether a digital alternative can achieve the same purpose before hitting “Print”.


    Why Printing Costs Add Up Quickly

    To understand how to save, you first need to know where the expenses come from. Printing costs are not just about buying a printer. They include ongoing and often hidden factors:

    • Ink and toner: Often more expensive per millilitre than luxury perfumes, cartridges are the biggest recurring cost.
    • Paper: While cheaper than ink, wasted sheets, reprints due to errors, and premium paper options increase spending.
    • Electricity: Printers consume power not only while printing but also in standby modes.
    • Maintenance and repairs: Frequent jams, clogged printheads, or worn rollers require time and sometimes costly servicing.
    • Software and licensing: Some enterprise environments pay extra for managed print software.

    Once you add all these together, the true cost of printing can be staggering. But the good news is that every one of these areas offers opportunities for savings.

    Using office printer efficiently
    Smart printer use can dramatically reduce costs.

    Practical Methods to Cut Down Printing Costs

    Here we explore practical, tested strategies for reducing expenses without losing print quality. These methods apply across home and office environments, and we’ll break them down step by step.

    1. Optimise Your Printer Settings

    The easiest savings come from configuring your printer correctly. Many people print in “default” mode, which often means full-colour, high resolution, and single-sided pages. But you can save significantly by changing a few settings:

    • Use draft mode: For documents where high quality isn’t necessary, draft mode reduces ink usage considerably.
    • Print in grayscale: Avoid colour unless it’s absolutely necessary. Colour ink is typically much more expensive.
    • Enable duplex printing: Double-sided printing can cut paper costs in half.

    Tip: Set these preferences as defaults so you don’t need to change them every time.

    2. Choose the Right Printer Type

    The hardware you choose determines long-term expenses. Many people buy cheap printers but end up paying much more in cartridges. In reality, a slightly more expensive printer with cheaper per-page costs is far more economical in the long run.

    • Inkjet vs Laser: Inkjets have a lower upfront cost but expensive ink. Lasers are costlier upfront but cheaper per page.
    • EcoTank and refillable models: These use large refillable tanks, dramatically reducing ink costs.
    • Monochrome vs Colour: If you mostly print text, a monochrome printer is far cheaper.

    Note: Always check the “cost per page” metric before buying a printer. This is the true measure of long-term value.

    3. Refill and Reuse Cartridges Safely

    Cartridge refills or compatible alternatives can be a fraction of the price of OEM (original equipment manufacturer) cartridges. However, quality varies, and using unreliable refills can damage your printer. Choose trusted suppliers, and ensure cartridges are stored properly.

    4. Use Cloud Printing and Digital Alternatives

    Sometimes the best way to save on printing is not to print at all. With cloud storage, e-signature platforms, and online collaboration tools, many printing tasks can be replaced by digital workflows. For example:

    • Share PDFs via email instead of printing multiple copies.
    • Use digital signatures instead of printing, signing, and scanning documents.
    • Employ online collaboration platforms for real-time editing.

    5. Share Printers in Offices

    Instead of giving every desk a printer, centralise them. Shared printers reduce idle time and consumable waste, while also simplifying maintenance. Managed print services can further track usage and optimise performance.

    6. Buy Supplies in Bulk or Subscribe

    Buying paper, cartridges, and toner in bulk reduces per-unit costs. Many vendors also offer subscription services where ink is delivered automatically when you’re running low, often at discounted rates.

    7. Maintain Your Printer Regularly

    A well-maintained printer wastes less ink and paper. Regular cleaning of printheads, rollers, and firmware updates ensure efficiency. A clogged or dirty printer often produces misprints that require reprints — doubling your costs.


    Case Studies: Real-World Examples of Cost-Effective Printing

    Abstract concepts become clearer when applied in the real world. Let’s explore how different environments have implemented cost-saving strategies.

    Case Study 1: Small Business Office

    A marketing agency with 15 employees was struggling with high cartridge expenses. By switching from individual inkjet printers to a shared monochrome laser printer with duplex capability, they cut printing expenses by 60% in the first year. Bulk purchasing of toner further reduced costs.

    Case Study 2: Educational Institution

    A college installed managed print services (MPS) across its campus. Students were assigned print quotas, and all printers defaulted to double-sided, grayscale settings. The result? Paper usage dropped by 40% within a semester, and unnecessary colour prints were eliminated.

    Case Study 3: Home User

    A freelance writer printing draft manuscripts switched to a refillable EcoTank model. Instead of replacing cartridges every month, she refilled tanks quarterly at a fraction of the cost. Over three years, she saved nearly £900 in ink expenses.

    Freelancer using laptop and printer
    Home users save significantly with refillable printers and digital-first workflows.

    Troubleshooting Costly Printing Habits

    Even the best strategies fail if old habits creep in. Here’s a quick reference table to diagnose where costs are creeping up and what to do about them.

    Problem Cost Impact Solution
    Employees print in colour by default High ink usage Set printers to greyscale as default
    Frequent paper jams Wasted paper and reprints Regularly clean rollers and use good-quality paper
    Leaving printers on overnight Unnecessary energy costs Enable automatic sleep mode or switch off
    Printing emails Unnecessary paper use Encourage digital archiving and reading
    Buying OEM cartridges only High recurring expenses Use compatible cartridges or refillable models

    Advanced Tips for Enterprises and Power Users

    Larger organisations have unique opportunities to save on printing due to their scale. Here are some advanced strategies:

    1. Managed Print Services (MPS)

    MPS providers audit your printing environment, replace inefficient devices, and monitor usage patterns. They charge per page, which can streamline budgeting and reduce hidden costs.

    2. Secure Printing with Release Codes

    Instead of jobs printing automatically, they remain in a queue until released with a PIN or ID card. This prevents waste from forgotten jobs and protects sensitive data.

    3. Virtualisation and Cloud Printing

    Instead of running dozens of print servers, enterprises can host virtualised print services or use cloud-based printing platforms, reducing infrastructure and maintenance costs.

    4. Energy Audits

    Enterprises often overlook the electricity consumed by fleets of printers. Auditing power usage and enabling aggressive sleep modes can reduce annual energy costs significantly.


    Frequently Asked Questions

    Is printing at home cheaper than using a print shop?

    It depends on your volume. For occasional prints, a print shop may be cheaper since you avoid cartridge costs and maintenance. But if you print regularly, owning a cost-effective printer (like a laser or EcoTank) is usually more economical.

    How do refillable printers compare to cartridge models?

    Refillable printers have a higher upfront cost but drastically lower cost per page. Over time, especially for heavy users, refillable models save hundreds or even thousands in ink expenses compared to cartridge-based printers.

    Do compatible cartridges damage printers?

    Not if purchased from a reputable supplier. Poor-quality compatibles may clog printheads or leak, but good suppliers produce cartridges meeting or exceeding OEM standards. Always read reviews and choose trusted vendors.

    What’s the cheapest type of printer to run?

    For black-and-white text, monochrome laser printers are cheapest. For mixed colour usage, EcoTank or refillable ink tank printers are the most cost-effective over time.

    How do I reduce wasted prints in an office?

    Enable secure release printing, set defaults to duplex and greyscale, and use quotas or reporting to track employee usage. Educating staff about costs also reduces wasteful behaviour.

    Are subscription ink services worth it?

    They can be if your printing is consistent and moderate. Subscriptions save you from emergency purchases at retail prices. However, for very light or very heavy usage, buying your own supplies may be cheaper.


    Conclusion

    Cost-effective printing is about smart choices at every level: from the printer you buy to the way you configure settings, maintain devices, and encourage responsible habits. While ink and toner remain expensive commodities, careful management can drastically reduce your overall spend.

    By adopting digital alternatives, sharing printers, choosing the right models, and avoiding waste, households and businesses alike can cut printing expenses without sacrificing productivity. The strategies in this guide give you the tools to print smarter, not costlier.

    Remember: every page you avoid printing is the biggest saving of all. Think before you print — your wallet and the environment will thank you.

    Guide Axis provides brand-neutral education only. No remote access, repairs, or warranty services.

  • Ink vs Toner Printers: Which One Should You Choose?

    Ink vs Toner Printers: Which One Should You Choose?

    Ink vs Toner Printers: Which One Should You Choose?

    Close-up of a modern printer in office
    Inkjet or Laser? Decide Smart.

    Introduction

    When shopping for a printer, one of the most common dilemmas is choosing between an inkjet printer that uses liquid ink and a laser printer that relies on toner powder. On the surface, both devices serve the same purpose — converting digital text and images into printed copies. Yet the differences beneath the hood affect everything from print quality to long-term cost and environmental impact.

    This guide will break down the fundamentals of ink and toner printers, analyze their pros and cons in depth, and help you decide which technology aligns with your specific needs. By the end, you’ll understand not just the technical distinctions, but also the practical implications for home, office, and creative use.


    Understanding the Basics: Ink vs Toner

    At their core, printers rely on two very different methods to transfer an image or text onto paper:

    Inkjet Printers

    Inkjet printers use cartridges filled with liquid ink. Tiny nozzles spray microscopic droplets directly onto paper, creating precise images and sharp text. This technology excels at producing rich colors and smooth gradients, making inkjets a favorite for photo enthusiasts and creative professionals.

    Laser Printers

    Laser printers use toner cartridges that contain fine powder. A laser beam projects an electrostatic pattern onto a drum, which attracts toner particles. Heat and pressure then fuse the toner permanently to the paper. The result is fast, consistent, and highly durable prints that resist smudging.

    These two mechanisms set the stage for very different outcomes in speed, quality, maintenance, and overall cost of ownership.

    Home office desk with printer and laptop
    Different technologies, different strengths — pick based on real use, not just price tags.

    Pros and Cons of Ink and Toner Printers

    Advantages of Inkjet Printers

    • High print quality: Inkjets reproduce detailed images and color gradients exceptionally well.
    • Compact size: Most inkjets are smaller and lighter than lasers, fitting easily in home setups.
    • Lower upfront cost: Inkjets are typically cheaper to purchase initially.
    • Media versatility: They can print on photo paper, labels, cards, and specialty materials.

    Drawbacks of Inkjet Printers

    • Slower speeds: Printing multiple pages can feel sluggish compared to laser printers.
    • Higher cost per page: Ink cartridges are expensive and often yield fewer pages.
    • Prone to clogging: Infrequent use may cause ink to dry out and block nozzles.
    • Less durable prints: Ink is more likely to smudge or fade over time.

    Advantages of Laser Printers

    • Speed: Ideal for offices that need to print large volumes quickly.
    • Efficiency: Lower cost per page compared to inkjets.
    • Durable output: Toner prints are smudge-resistant and long-lasting.
    • High-volume capacity: Toner cartridges yield thousands of pages.

    Drawbacks of Laser Printers

    • Higher upfront cost: More expensive to buy initially.
    • Bulky design: Laser printers are larger and heavier.
    • Poor photo quality: They struggle with gradients and fine image detail.
    • Energy use: The heating process consumes more power.

    Print Quality Comparison

    If your priority is vivid, accurate colour, an inkjet printer usually wins. Ink droplets blend seamlessly, delivering rich hues and photographic detail. This makes them the go-to choice for graphic designers, photographers, and hobbyists.

    Laser printers, while excellent for crisp black text and high-volume business graphics, often fall short in reproducing subtle shades and high-resolution photos. However, for basic charts, text-heavy documents, and simple graphics, they perform superbly.


    Speed and Efficiency

    Speed is where laser printers dominate. A mid-range laser can easily churn out 20–30 pages per minute, while inkjets usually average between 5–10. For offices where employees print frequently, the time savings add up quickly.

    Inkjets, while slower, have the advantage of near-instant start-up. Laser printers often take a few seconds to warm up, though once they get going, their efficiency is unmatched for long print runs.


    Cost of Ownership

    Printer cost is more than the sticker price. Inkjet printers often appear cheap at the start, but frequent cartridge replacements make long-term use expensive. Toner cartridges, while costly upfront, last thousands of pages, reducing overall cost per page.

    On average, inkjets cost between ₹3–₹6 per page for colour, while lasers average around ₹1–₹2 per page. For heavy users, this difference translates into massive savings over a year.


    Maintenance and Reliability

    Maintenance needs vary significantly. Inkjet users often face clogged nozzles, dried cartridges, or alignment issues, particularly if the printer sits unused for weeks. Regular cleaning cycles waste ink and extend downtime.

    Laser printers are far less prone to these issues. Toner does not dry out, making them reliable even with infrequent use. However, they require occasional drum or roller replacements after tens of thousands of pages.

    Team using printer in a modern office
    Light home use vs steady office workloads: match technology to the job to avoid hidden costs.

    Sustainability and Environmental Impact

    Sustainability is an often-overlooked factor in choosing printers. Ink cartridges are small but require frequent replacement, creating more plastic waste. Recycling programs exist, but adoption rates vary.

    Toner cartridges last much longer, generating less waste per page. However, laser printers consume more electricity due to their heating elements. Balancing these trade-offs depends on your priorities: less waste vs lower energy use.


    Best Use Cases for Each Printer

    When to Choose Inkjet

    • Photography and high-resolution image printing
    • Occasional home use with limited volume
    • Creative projects requiring specialty media

    When to Choose Laser

    • High-volume office printing
    • Text-heavy documents such as reports and contracts
    • Environments where smudge-proof durability is essential

    Buying Guide: Key Factors to Consider

    Before making your choice, evaluate your needs across these dimensions:

    • Print volume: Estimate pages per month; high volume favors laser.
    • Print quality: Do you need photo-grade colour or just sharp text?
    • Budget: Balance upfront cost vs long-term supplies.
    • Space: Consider footprint; inkjets are compact, lasers bulkier.
    • Eco-priorities: Cartridge waste vs energy efficiency.

    FAQs

    Which is cheaper: ink or toner?

    Ink printers are cheaper upfront but cost more per page. Toner printers cost more initially but are cheaper in the long run due to high-yield cartridges.

    Which printer is better for photos?

    Inkjet printers are better for photos because of their ability to reproduce vivid colours, smooth gradients, and fine details.

    Do toner printers work well for colour?

    Yes, colour lasers exist, but they generally cannot match the smoothness and richness of inkjet photo prints. They are excellent for charts and graphics, though.

    How long do ink and toner cartridges last?

    Ink cartridges may last a few hundred pages, depending on coverage. Toner cartridges often last several thousand pages, sometimes up to 10,000.

    Which printer is better for occasional use?

    Laser printers are better for occasional use because toner does not dry out. Inkjets may clog if left unused for long periods.

    Which printer type is more eco-friendly?

    Ink generates more cartridge waste due to frequent replacements. Toner reduces waste but uses more energy. Eco-friendliness depends on whether you prioritise energy or waste reduction.

    Guide Axis provides brand-neutral education only. No remote access, repairs, or warranty services.

  • Boost Print Quality with Correct Media and Driver Presets

    Boost Print Quality with Correct Media and Driver Presets

    Boost Print Quality with Correct Media and Driver Presets

    Choosing correct media type in printer driver
    Sharper Prints Begin with Presets

    Every printer promises sharp output, yet the real difference comes from two levers you already control: media type and driver presets. The wrong combination causes smudges, faded colours, or pages that curl. The right one produces crisp text, even tone, and reliable duplexing. This guide is brand-neutral, written for homes and small offices, and shows exactly how to choose paper grades, match driver options, and build presets that boost quality without wasting ink or toner.

    Scope: Educational only. No remote access, no brand servicing. Works across common inkjet and laser devices.

    Why media and presets matter more than you think

    Printers rely on instructions: how heavy the paper is, how absorbent it will be, how much ink or toner to release, and how fast the rollers should move. That’s the “media type” setting. Combine it with a preset—quality mode, colour policy, duplex—and you’ve essentially given the printer a recipe. A wrong recipe wastes consumables and forces reprints. A right recipe ensures every sheet looks professional.


    Understanding common media types

    Media typeDriver labelBest forRisk if misused
    PlainPlain/NormalEveryday documentsOver-inking if heavy stock is used
    Thick/HeavyHeavy/ThickCard, 120–160 gsmSkew/curl if set too light
    MattMatte/PresentationReports, handouts with chartsDull colours if set as Plain
    GlossyPhoto/GlossyPhotographs, certificatesSmudge, roller offset on wrong preset
    RecycledRecycledEco drafts, internal notesFeed issues if treated as premium

    Driver presets that define quality

    • Quality modes: Draft/Economy for notes, Normal for everyday, High for finals.
    • Colour policy: Greyscale first, colour only when essential.
    • Density control: ±1 step can brighten or save ink without changing fonts.
    • Duplex: On for internal packs, off for forms or certificates.
    Best practice: Save named presets (e.g., “Reports Thick Duplex”) so users can apply the whole recipe in one click.

    Match media with presets for maximum clarity

    Text-heavy reports

    • Media: Plain 90–100 gsm
    • Preset: Normal + Greyscale + Duplex
    • Result: Crisp letters, low show-through

    Photo inserts

    • Media: Glossy 200+ gsm
    • Preset: High + Colour
    • Result: Vivid tone, controlled drying

    When quality looks wrong (and how presets fix it)

    SymptomLikely causePreset/media fix
    Pages curlStock too light but set as PlainSwitch to Heavy/Thick media preset
    Colours look dullMatt stock set as PlainSelect Matte/Presentation media type
    Smudge linesGlossy treated as PlainPick Photo/Glossy + High
    Faded blacksComposite black in Colour modeForce Greyscale preset

    Workflow habits to keep quality consistent

    1. Preview first: catch layout shifts before wasting stock.
    2. Batch to PDF: ensures the preset applies across a single file.
    3. Label presets clearly: “Draft Eco”, “Report Duplex”, “Photo Final”.
    4. Train staff: show where to select media/preset in the driver panel.

    Selecting media type in print driver options
    Correct presets = predictable quality, fewer reprints, professional output.

    DPI myths vs real-world quality (what actually changes)

    “Higher DPI” sounds like automatic quality, but for most documents it’s not the main driver of clarity. Body text at Normal mode on suitable paper is already rasterised with enough precision for sharp edges. Pushing DPI only helps when the content genuinely contains fine tonal transitions (smooth gradients, small photographic details). If your pages look soft, the problem is more likely the media mismatch, a composite black issue, or draft mode on thin paper causing feathering. In other words: set the right media first, then raise quality if the content truly needs it.

    • Text and line art: Prioritise crisp media and Greyscale; Normal mode is usually perfect.
    • Logos and charts: Use vector artwork or high-resolution PNGs; keep fills light.
    • Photos: Increase quality only if you can see banding or posterisation at Normal.
    Practical rule: If increasing DPI doesn’t change the printed result on your chosen stock, revert to Normal and keep the win in speed and ink control.

    Inkjet vs laser: how media settings behave differently

    Inkjet behaviour

    • Media type controls droplet size and pass speed.
    • Glossy stock needs Photo/Glossy preset to prevent smudge and offset.
    • Matt papers love Normal mode for text; High for image-heavy pages.

    Laser behaviour

    • Media type adjusts fuser temperature and transfer bias.
    • Heavy/Thick prevents curl and ghosting on 120–160 gsm sheets.
    • Letterhead needs the dedicated preset to avoid toner offset on coatings.

    Understanding these mechanics prevents the classic “why does this look fine on one printer and terrible on another?” Media presets are the translation layer between paper and technology.


    Duplex without compromises: back-side clarity and alignment

    Two-sided printing challenges paper stability. If the first pass lays down heavy ink or toner, the sheet can curl slightly before the flip, leading to marginal misalignment or light banding. Your goal is to keep the sheet flat and the second pass controlled.

    • Use 90–120 gsm matt for duplex reports containing charts.
    • Prefer Normal quality for back-to-back text; High is for finals and photos.
    • Avoid borderless unless officially supported for duplex paths.
    • Reduce large solids near the binding edge; they exaggerate curl.
    Test once: Print a 4-page proof (2 sheets) to confirm orientation, show-through, and binding edge before long runs.

    Storage, humidity, and flatness: media care that protects quality

    Paper is a living material; it exchanges moisture with the room. Too dry and static builds, causing misfeeds and skew. Too humid and fibres swell, causing waves that reduce sharpness. Controlled storage avoids both extremes and keeps duplex alignment consistent.

    • Seal reams not in active use; store flat on a shelf, not the floor.
    • Acclimatise new reams in the print room for a few hours before big jobs.
    • Flip and fan the stack to release static and separate sheets.
    • Rotate stock (first-in, first-out) to avoid stale, curled reams.
    Tell-tale sign: If corners curl or pages cling together, humidity is the suspect before blaming the device.

    Advanced driver options: when to use and when to skip

    Drivers expose niche toggles that can help, but only when the symptom matches.

    OptionUse it whenWhy it helpsSkip if
    Edge smoothing/anti-aliasSmall fonts look jaggedRefines edge pixelsText is already crisp on proper media
    Black overprintLogos knock out oddlyPrevents white halos around blackPure text jobs; no composite issues
    Toner save/ink saveInternal draftsReduces laydown uniformlyFinals or small type at tiny sizes
    RGB/CMYK rendering intentPhotos shift in toneControls mapping of coloursText-only pages

    Keep your baseline simple. Only add advanced toggles when a problem clearly maps to the option’s purpose.


    Preset library you can copy (name them exactly)

    Everyday – Greyscale Duplex

    • Media: Plain 90–100 gsm
    • Quality: Normal
    • Colour: Greyscale
    • Duplex: On (Long-edge)
    • Use: All internal text packs

    Reports – Thick Duplex

    • Media: Heavy/Thick (for 100–120 gsm)
    • Quality: Normal
    • Colour: Greyscale
    • Duplex: On
    • Use: Client-facing reports with tables

    Charts – Matt Colour

    • Media: Matte/Presentation 100–120 gsm
    • Quality: Normal or High (if gradients matter)
    • Colour: On, limited palette
    • Duplex: On for packs
    • Use: Handouts with light colour fills

    Photo Final – Glossy

    • Media: Photo/Glossy 200+ gsm
    • Quality: High
    • Colour: On
    • Duplex: Off
    • Use: Certificates, photo inserts

    Name presets clearly and pin them as favourites. Clarity beats guesswork in busy teams.


    Case studies: fast wins from correct media & presets

    1) Dull charts on decent paper

    Before: Plain media on 100 gsm matt; colour looks muted. After: Switch to Matte/Presentation media; Normal quality. Result: Brighter tone without raising density, and no extra ink waste.

    2) Curl on duplex reports

    Before: Duplex on 80 gsm at High quality; second pass shows waves. After: Move to 100 gsm Heavy preset; Normal quality. Result: Flat pages, aligned backs, no show-through.

    3) Smudge on glossy certificates

    Before: Treated as Plain; text offsets along the feed. After: Photo/Glossy media; High quality; single-sided. Result: Crisp blacks, clean edges, no roller marks.


    Maintenance & calibration: protect quality at the source

    • Weekly: Print a one-page test; keeps inkjets flowing and spots banding early.
    • Monthly: Wipe feed rollers with a lint-free cloth; prevents slip marks on duplex.
    • Quarterly: Firmware update; many quality and path fixes ship quietly.
    • As needed: Alignment/nozzle checks when text shows double edges or gaps.
    Golden prevention: Clean paper + correct media preset beats any after-the-fact cleaning routine.

    Small-office SOP: quality without drama

    1. Publish three presets (Everyday, Reports Thick, Photo Final) with a diagram near the device.
    2. Default to Greyscale Duplex; override intentionally for colour or glossy needs.
    3. Use approved templates with readable sizes and light table fills.
    4. Queue watch: one person checks the print queue panel at day-end.

    This structure turns quality from “tribal knowledge” into a repeatable habit anyone can follow.


    Mini glossary (plain English)

    TermMeaning
    Media typeThe paper profile in the driver; tells the printer how to apply ink/toner and how fast to feed.
    Composite blackBlack built from colour channels; can make text look grey and drain colour cartridges.
    DuplexPrinting both sides of a sheet; relies on stable paper and correct presets.
    Matt vs GlossyMatt is uncoated for reading; glossy is coated for photos and certificates.
    DensityHow much ink/toner is laid down; small tweaks change darkness and drying.

    Bottom line: presets create predictability

    Start with the right media type for the paper in your tray, then apply a named preset that matches the job’s goal. Normal quality on 90–120 gsm matt handles the majority of documents with crisp text and clean duplex. Reserve High quality and glossy stock for important finals. With storage under control and simple maintenance, your prints will look professional, repeatably—without reprints or surprises.

    Guide Axis provides brand-neutral education only. No remote access, repairs, or warranty services.

    FAQs

    Why does the media type setting matter so much?

    It tells the device how much ink/toner to apply and how fast to move the sheet. Wrong settings cause curl, smudge, or faded colours.

    Can I just leave everything on “Plain” paper?

    Only for standard text. For heavier or coated stock, “Plain” will either over-ink or under-fuse, leading to reprints and wasted stock.

    What’s the safest preset for daily office use?

    “Normal + Greyscale + Duplex” on 90–100 gsm paper. Balanced cost, sharp text, and reliable feed.

    Why do blacks sometimes look grey in Colour mode?

    Because the driver may build “composite black” from CMY channels. Force Greyscale to keep text on the black cartridge only.

    Do recycled papers reduce quality?

    Not if you select the Recycled preset and keep stacks sealed and flat. Many modern recycled stocks print as cleanly as new paper.

    How can I make staff actually use presets?

    Save presets with clear names and publish a one-page guide near the device. Make the default “Everyday Saving” so they rarely need to switch.

  • Wireless Printing Explained: Print Seamlessly Across All Devices

    Wireless Printing Explained: Print Seamlessly Across All Devices

    Wireless Printing Explained: Print Seamlessly Across All Devices

    Person setting up printer in a bright office
    Wireless Printing Explained: Print Seamlessly Across All Devices
    Everything you need to know about wireless printing technologies, setup, optimisation and troubleshooting across Windows, Mac, iOS, Android and Linux.
    UK English • Brand-neutral explainer • Home & Office • Long-form guide

    Introduction

    Wireless printing has become the default expectation: people expect to print from laptops, phones, tablets and cloud apps without finding a USB cable. The shift from cable-centric workflows to wireless has simplified many routines, but it has also introduced new variables — multiple network bands, different printing standards, device compatibility and security trade-offs.

    This guide is practical and vendor-neutral. It explains the underlying technologies so you can choose the simplest method for your situation, then walks through step-by-step setup for the major platforms. You’ll also find robust troubleshooting, network tips and maintenance advice to keep printing reliable even as your Wi-Fi changes or your team grows.

    Why wireless printing matters

    Wireless printing matters because it removes friction. A single shared Wi-Fi printer serves many users without cables or desk rearrangement. For guests or BYOD scenarios, wireless printing lets someone quickly print a boarding pass or document without installing drivers. At scale, wireless printing reduces the need for multiple local cables and the time spent physically connecting devices.

    But with convenience comes complexity: you must consider network reach, signal stability, printing standards and how devices discover printers. Understanding those trade-offs helps you design a system that balances accessibility with reliability.

    Quick takeaway: For homes and small offices, Wi-Fi + manufacturer apps or convenience protocols (AirPrint, Mopria) serve most needs. For larger networks prefer reserved IPs, VLANs, and managed discovery to keep everything predictable.

    Wireless printing technologies explained

    There are several ways devices talk to printers wirelessly. Each has strengths and trade-offs. The common families are:

    • Network (Wi-Fi) printing — printer joins the same network as devices; discovery via mDNS/Bonjour or LLMNR; supports full driver features.
    • Wi-Fi Direct — peer-to-peer link between device and printer; works without an access point; great for ad-hoc prints but less suitable for multi-user setups.
    • AirPrint (Apple) — Apple’s zero-config printing for iOS/macOS using mDNS/Bonjour; widely supported and simple for users.
    • Mopria / IPP Everywhere — cross-vendor standards that simplify printing from Android and modern OSes without vendor drivers.
    • Bluetooth / NFC — useful for media transfers or single-sheet printing from phones when Wi-Fi isn’t available.
    • Cloud printing — printer or service connected to the cloud (Google Cloud Print was phased out; alternatives include vendor cloud print portals and third-party services).

    How discovery works (very briefly)

    Discovery protocols let devices find printers without manual IP typing. mDNS/Bonjour broadcasts a service on the local subnet advertising printer capabilities. When these protocols fail (blocked by guest networks or by router isolation), devices can’t see the printer even if it’s online. That’s why network design matters: discovery needs multicast allowed across the relevant clients.

    When to prefer which technology

    Use this quick guide:

    • Home single printer, many devices: Network printing + AirPrint/Mopria for simplicity.
    • Guest printing at events: Wi-Fi Direct or temporary SSID for attendees.
    • Secure office environment: VLANs + static IP + IPP/print server with access controls.
    • Mobile-first setups: Use vendor mobile apps and AirPrint/Mopria to avoid driver installs.

    Common use-cases and which method to pick

    Choosing the right method depends on volume, user types, and security needs. Below are practical scenarios and a recommended approach.

    Small home office (1–3 users)

    Recommended: standard Wi-Fi printing with AirPrint (for Apple devices) and the manufacturer app for Windows/Android. Keep the printer on the primary SSID so devices can see it easily. For occasional guests, enable Wi-Fi Direct or a simple guest SSID with limited bandwidth.

    Small business (5–50 users)

    Recommended: assign a static IP to printers, ensure the print server (if used) is reliable, and deploy Mopria/AirPrint support. Use a central share or print queue for heavy business workflows but keep local discovery active for ad-hoc printing from phones and tablets.

    Large enterprise (50+ users)

    Recommended: move to managed print infrastructure. Use print servers, proxies or enterprise MPS (Managed Print Services) with authentication (card release or PIN). Isolate printers on dedicated VLANs; use firewall rules and DNS entries for controlled access. Avoid open discovery on guest SSIDs to prevent accidental leaks.

    On-site events / pop-ups

    Recommended: Wi-Fi Direct or temporary hotspot networks for easy attendee printing. Keep passwords simple for temporary networks, and shut them down after the event to avoid lingering access.

    Woman using office printer wirelessly
    Wireless printing works best when discovery, network and device settings are aligned.

    Step-by-step: Windows (10 / 11)

    Windows offers several ways to connect to a wireless printer: automatic discovery, IP address (standard TCP/IP) addition, or through vendor software. Below are detailed steps for each approach and tips for common pitfalls.

    Method A — Add by discovery (recommended for most users)

    1. Make sure the printer is powered on and connected to the same Wi-Fi network as the PC.
    2. Open Settings > Bluetooth & devices > Printers & scanners.
    3. Click Add device; Windows will search for network printers using discovery protocols.
    4. Select your printer from the list and follow on-screen prompts. Windows will attempt to download and install drivers automatically if needed.
    5. Print a test page to confirm connectivity.

    Tip: If Windows does not find the printer, temporarily disable the PC firewall to rule out blocking, or check that router multicast/mDNS is enabled.

    Method B — Add printer by IP address (reliable when discovery is blocked)

    1. Obtain the printer IP: print a network configuration page from the printer or check the router’s DHCP table.
    2. In Settings > Printers & scanners, click Add device then The printer I want isn’t listed.
    3. Choose Add a printer using a TCP/IP address or hostname. Enter the IP address and choose the correct protocol (usually Standard TCP/IP Port).
    4. When Windows asks for drivers, pick the recommended or use the vendor driver downloaded earlier.
    5. Finish the wizard and print the test page.

    This method bypasses discovery entirely and is the most robust when networks isolate clients or block multicast.

    Method C — Use vendor software

    Many manufacturers provide “all-in-one” installers that find printers on the network and configure extended features (scan to PC, cloud services). Download the installer from the vendor site, run it, and choose network setup during installation. Vendor utilities can also update firmware and expose advanced controls not available via standard drivers.

    Windows troubleshooting tips

    • If you see multiple entries for the same printer, remove old ones and re-add the correct one.
    • Use Devices and Printers (Control Panel) to access advanced driver settings if print jobs fail.
    • Check the print spooler service — restart it if jobs are stuck in the queue.
    • On corporate-managed devices, group policy may restrict discovery — coordinate with IT.

    Step-by-step: macOS

    macOS integrates printing tightly with AirPrint and Bonjour. If your printer supports AirPrint, setup is typically immediate.

    Method A — Use AirPrint (fastest)

    1. Ensure the Mac and printer are on the same Wi-Fi network.
    2. Open System Settings > Printers & Scanners.
    3. Click the + button to add a printer. Look for your AirPrint-capable printer in the list and select it; macOS will use AirPrint drivers automatically.
    4. Test print from any app using File > Print.

    Method B — Add via IP address (for non-AirPrint printers)

    1. In Printers & Scanners, click + and then select the IP tab.
    2. Enter the printer’s IP address, choose the protocol (IPP is common), and enter a name and location if desired.
    3. macOS may auto-select a driver; if not, choose the appropriate PPD/driver from the list or use the vendor PPD.

    macOS troubleshooting tips

    • Reset the printing system (right-click in Printers list > Reset printing system…) only as a last resort — this removes all printers and queues.
    • For AirPrint issues, reboot the printer and the router; AirPrint discovery relies on multicast/Bonjour which can be disrupted by routers.
    • Use the vendor utility for scanning or advanced features not supported by AirPrint.

    Step-by-step: Android

    Android printing has matured — modern devices support Mopria and native printing via the system print framework. Many vendor apps also provide features like scanning, cartridge status and cloud services.

    Method A — Use built-in printing (Mopria / IPP Everywhere)

    1. Connect your Android device to the same Wi-Fi network as the printer.
    2. Open the document, webpage or image and choose Share > Print or tap the three-dot menu and select Print.
    3. On the print preview screen, tap the printer dropdown and select Add printer or choose the discovered Mopria/AirPrint-compatible printer.
    4. Adjust settings (copies, paper size) and print.

    Method B — Vendor app (when features needed)

    Install the manufacturer’s app (e.g., HP Smart, Epson iPrint). These apps often include scanning, firmware updates, and Wi-Fi setup assistants for printers that are not yet on the network.

    Android tips

    • Some Android OEMs ship with print services preinstalled; ensure the correct print service plugin (Mopria Print Service or vendor plugin) is enabled in Settings > Connected devices > Printing.
    • For Chromebooks running Android apps, prefer native ChromeOS print dialogs where available.

    Step-by-step: iOS (iPhone & iPad)

    Apple devices favour AirPrint — it is typically the fastest and most reliable way to print from an iPhone or iPad.

    AirPrint (recommended)

    1. Connect the iOS device and the printer to the same Wi-Fi network.
    2. Open the content you want to print and tap the Share icon or the three-dot menu and choose Print.
    3. Select the AirPrint capable printer from the list; adjust print options and tap Print.

    When AirPrint is not available

    Use the manufacturer’s app — many apps provide network setup assistants to add a Wi-Fi printer or to connect via Wi-Fi Direct. For temporary or guest printing, Wi-Fi Direct or QR-code assisted pairing (newer vendor features) may be available.

    Step-by-step: Linux (Ubuntu, Fedora, etc.)

    Linux distributions typically use CUPS (Common Unix Printing System). CUPS can discover printers via Bonjour/Avahi or be configured with a static IP.

    Method A — Add via CUPS GUI (recommended)

    1. Open Settings > Printers or navigate to the CUPS web interface at http://localhost:631.
    2. Click Add Printer. If Avahi/Bonjour is running you should see network printers listed.
    3. Select the printer, choose the driver (PPD), and complete the wizard.
    4. Test with lpstat and lpr commands if needed.

    Method B — Add by IP

    1. In CUPS or the Printer Settings, choose to add a new network printer and supply the printer’s IP (use ipp:// or socket:// depending on model).
    2. Provide the correct driver/PPD and finish the setup.

    Linux tips

    • Install vendor drivers if the printer has advanced features (scanning, duplex management).
    • Use avahi-browse -a to see mDNS discovery on the network.

    Security and privacy considerations

    Wireless printing introduces attack surfaces. Printers are networked devices with storage, onboard web servers and diagnostic ports — treat them as first-class network hosts.

    Basic hardening checklist

    • Keep firmware updated — vendors release security fixes periodically.
    • Change default admin passwords and disable unused protocols (FTP, Telnet).
    • Place printers on a controlled VLAN and restrict access to only required clients.
    • Use encrypted protocols where available (IPP over TLS).
    • Enable job authentication or secure release for sensitive prints (PIN/card release).

    Guest networks and discovery

    Guest SSIDs should not allow client-to-client communication. If guests must print, offer a dedicated print queue or a temporary Wi-Fi Direct network that expires after the event. Avoid exposing management ports (port 631, 9100) to the guest network.

    Network best practices & optimisation

    Networks are the arena where everything can either work beautifully or fail intermittently. Follow these practical guidelines to keep printing reliable.

    1. Use a static IP or DHCP reservation

    Assigning a fixed IP (or DHCP reservation) to printers prevents the driver/queue from pointing to the wrong device when DHCP leases change. It also makes it easier to configure firewall rules and discovery exceptions.

    2. Reserve multicast/mDNS for printer VLANs

    Discovery relies on multicast. If your network divides clients into VLANs, ensure that discovery is available to the VLANs that need it or provide DNS-based pointers to printers.

    3. Prefer 2.4GHz for range or 5GHz for performance

    Printers that are farther from the AP may benefit from 2.4GHz range; 5GHz offers faster throughput but reduced range. Avoid forcing clients to the wrong band — choose AP settings or band steering wisely.

    4. Monitor signal and congestion

    Use tools to visualise Wi-Fi channels and select the quietest channel. Interference from neighbouring networks or microwaves can cause intermittent disconnects and dropped jobs.

    5. Quality of Service (QoS)

    If print volumes are high and congestion is a problem, configure QoS to prioritise print traffic on the network, especially for high-value or time-sensitive jobs.

    Troubleshooting matrix (start here)

    Before panic: confirm the printer is powered, on the network and has no obvious error lights. If basics pass, use the matrix below to narrow the issue quickly.

    SymptomLikely causeQuick actionWhen to escalate
    Printer not discoveredMulticast blocked or different subnetCheck network SSID, print config page for IPNetwork isolation at router — contact IT
    Print job stuck in queueDriver mismatch or spooler issueClear spooler, reinstall driverCorrupt driver or OS print subsystem
    Partial pages / garbled outputIncorrect driver or corrupt jobRe-send job, use correct driverFaulty network adapter or memory issue
    Intermittent disconnectsWeak Wi-Fi signalMove printer nearer to AP or use EthernetAP hardware fault or heavy RF interference
    Mobile cannot printApp/plug-in not enabled or wrong SSIDEnsure device is on same SSID and plugin enabledVendor service or OS compatibility issue
    Side view of person collecting pages from a printer
    Network reliability, placement and device settings together make wireless printing painless.

    Printer care & optimisation (short checklist)

    Good printing reliability is not only about networks — hardware care matters. Keep rollers clean, avoid dusty locations, and schedule regular firmware checks. Treat printers as shared assets: label them, record IPs, and post small usage instructions (e.g., “AirPrint = iPhone, Mopria = Android”).

    For fleet usage, maintain a simple maintenance log and replace consumables before failure—toner leaks and worn rollers are common causes of sudden downtime.

    Advanced topics: static IPs, enterprise setups & print servers

    When scale grows, simple ad-hoc setups break down. Enterprises typically centralise printing via print servers (Windows Print Server, CUPS, or cloud print gateways) which provide job accounting, access control, and failover. Use these advanced patterns when you need auditing, cost allocation, or complex access rules.

    Print servers vs direct IP printing

    Direct IP printing is simple and low maintenance for a handful of printers. Print servers centralise queues—useful for load balancing, driver management, and user authentication. Managed Print Services (MPS) add remote monitoring and automatic consumable replenishment for large deployments.

    Authentication and secure release

    For sensitive documents, use secure release flows: users send jobs to a held queue and then authenticate physically at the printer (PIN, RFID card, or mobile app) to release them. This reduces uncollected prints and exposure of confidential information.

    Wireless Printing Explained (Part 2)

    Real-world examples of wireless printing success

    It’s often easier to understand the benefits of wireless printing when you see how it works in practice. Here are a few scenarios that show how the methods we’ve covered apply in everyday use:

    University libraries

    Large libraries use dedicated printer queues tied to student accounts. Students can send jobs from personal laptops, release them using ID cards, and pick them up from any printer in the building. Wireless printing here is not just about convenience — it’s about scale and fairness, ensuring long queues of print jobs don’t overwhelm a single device.

    Freelancers and home-based professionals

    A freelance designer may use an AirPrint-capable printer for iPad and Mac, and the same printer’s Mopria function for Android clients. By assigning a static IP and bookmarking it in design software, the freelancer ensures print jobs always land at the same destination without fiddling with settings each week.

    Healthcare clinics

    Clinics often need secure, reliable, HIPAA-compliant printing. A common pattern is to isolate printers on their own subnet, use secure release with PINs, and audit print logs. This prevents patient data from being left on the tray or intercepted over insecure channels.

    Event venues

    Temporary setups often rely on Wi-Fi Direct or mobile hotspots to quickly print tickets, wristbands or itineraries. After the event, those temporary networks are disabled, ensuring no lingering access or security risk.

    Extended troubleshooting and diagnostics

    Sometimes the standard fixes aren’t enough. Here are additional tools and checks that can help resolve persistent issues:

    Check logs and job history

    Most modern printers have a web console that shows job logs, errors, and connectivity status. If a print job never reaches the printer, the log can reveal whether the device received it, rejected it, or never saw it.

    Firmware rollbacks

    Occasionally a new firmware introduces bugs. If you suspect this, check whether your vendor offers rollback packages. Always test in a safe environment before rolling firmware back in production.

    Packet capture

    Advanced users can run Wireshark or tcpdump to capture traffic between device and printer. Look for discovery broadcasts, IPP requests, or connection resets. This is particularly useful in enterprise networks where firewall rules may silently block traffic.

    Reset printer network settings

    If all else fails, reset the printer’s Wi-Fi settings and reconnect it from scratch. Document the IP, SSID and authentication details carefully to prevent reoccurrence.

    Frequently Asked Questions

    Do I need to reinstall my printer drivers after changing Wi-Fi?

    Usually not. If the printer is the same device, only its IP address or SSID has changed. You can update the connection details in your OS settings without reinstalling the full driver package. For Windows, use the “Add printer by IP” option; for macOS, re-add it via the IP tab.

    Is wireless printing slower than USB?

    Yes, raw transfer speed over USB 3.0 is higher than Wi-Fi. But for text and light graphics, the difference is negligible. Delays in wireless printing usually come from discovery issues or network congestion rather than raw bandwidth.

    Which is safer: Wi-Fi Direct or regular Wi-Fi printing?

    Wi-Fi Direct avoids sharing the printer on your main network, which can reduce risk. However, it also bypasses your normal network protections like WPA3 encryption or VLAN isolation. For home users, Wi-Fi Direct is fine for occasional jobs. For businesses, stick to managed Wi-Fi with proper security policies.

    Can guests print without joining my main network?

    Yes. Options include enabling Wi-Fi Direct, creating a guest SSID with limited access, or offering a shared cloud-printing service. The right choice depends on your balance of convenience and security.

    Why can’t my phone find the printer?

    Phones rely heavily on discovery protocols like mDNS. If the router blocks multicast, the printer won’t appear. Ensure your phone and printer are on the same SSID and check that the mobile print service plug-in (Mopria, AirPrint) is enabled.

    How often should I update my printer firmware?

    At least once or twice a year. Many vendors patch vulnerabilities silently through firmware. Check your printer’s web console or vendor app for available updates. Always back up critical settings before updating.

    Do wireless printers work on 5GHz networks?

    Yes, many modern printers support both 2.4GHz and 5GHz. 5GHz offers faster throughput but shorter range, so placement is key. Some older printers support only 2.4GHz — check the manual.

    What if my printer supports only USB?

    You can make it “wireless” by attaching it to a print server device, a Raspberry Pi running CUPS, or a router with a USB printer port. These devices act as network bridges, exposing the printer wirelessly.

    Conclusion

    Wireless printing transforms how we share resources. Whether you’re at home, in a busy office, or managing an enterprise fleet, understanding the technologies and configurations available empowers you to build a setup that is fast, reliable, and secure. From Wi-Fi Direct for quick ad-hoc jobs, to AirPrint for iPhones, Mopria for Androids, and print servers for large organisations — the right choice depends on your context.

    Remember: printers are part of your network, not just peripherals. Maintain them with firmware updates, assign predictable IP addresses, and clean them physically as well as digitally. Doing so extends their lifespan and reduces downtime. The good news? Once wireless printing is configured correctly, it usually just works — freeing you from cables and letting you focus on your actual tasks.

  • Stuck Print Jobs: How to Empty the Print Queue Quickly

    Clear Stuck Print Jobs: How to Empty the Print Queue Quickly

    Clear Stuck Print Jobs: How to Empty the Print Queue Quickly

    User clearing print queue on a computer before reprinting
    Empty the Queue, Restore Calm

    “Printing…” and nothing moves. One document blocks the pipeline; everything behind it stalls. This practical, brand-neutral guide shows the safest way to clear a jammed queue on Windows and macOS, remove orphaned jobs, and reset the spooler without risky tweaks. You’ll also learn why queues choke (permissions, drivers, offline paths, sleep states), how to prevent repeats with cleaner workflows, and how to confirm the fix with a proof page—so you don’t waste paper or time.

    Scope: Education only. No remote access, no brand-specific servicing. Steps work for typical home and small-office devices.

    Quick symptoms: how a blocked queue looks

    • Jobs sit as “Printing”, “Spooling”, or “Error – Printing” without progress.
    • New jobs join the queue but do not start.
    • The printer panel shows ready/online but nothing feeds.
    • Pausing/Resuming does nothing; cancelling a job takes forever.
    Golden rule: Fix the queue first, then re-print once. Avoid clicking Print repeatedly—duplicates will clog the pipe again.

    Why print jobs get stuck (the real causes)

    Common triggers

    • Spooler glitch after sleep or a network drop.
    • Unreachable device path (changed Wi-Fi/router, new IP).
    • Driver mismatch after OS or driver updates.
    • Corrupted spool files for one document.

    Less obvious

    • Permissions issues on the spool folder.
    • Huge PDFs or fonts that render poorly.
    • Background services interfering with USB power/sleep.
    • Print to a paused/old instance of the device.

    Good news: you usually don’t need deep tweaks. Target the queue, the spooler, and the device path in that order.


    Windows: clear the queue (basic method)

    1. Open Settings → Bluetooth & devices → Printers & scanners.
    2. Select your device → click Open print queue.
    3. Right-click each stuck job → Cancel. Wait a few seconds.
    4. If jobs refuse to cancel, close the window and follow the spooler reset below.
    Tip: If the queue looks duplicated (two instances of the same printer), delete the idle/old one later to avoid confusion.

    Windows: full spooler reset (safe, thorough)

    This clears orphaned files that keep the pipeline blocked.

    1. Press Win key, type Services, open it.
    2. Find Print Spooler → right-click → Stop.
    3. Open File Explorer → paste this path and press Enter:
      C:\Windows\System32\spool\PRINTERS
    4. Select everything in that folder → Delete (admin prompt is normal).
    5. Return to Services → right-click Print SpoolerStart.
    6. Reopen the queue window—should now be empty.
    Safer practice: Only clear the PRINTERS folder while the spooler is stopped. Restart it after deletion.

    Windows: fix the device path (when jobs still won’t move)

    • USB: Try a different USB port, avoid hubs, and wake the printer first.
    • Wi-Fi: If the printer IP changed after a router reboot, re-add the device via Printers & scanners → Add device.
    • Shared printer: Confirm the host PC is on and not sleeping.
    • Driver channel: If you used a class driver, install the full model driver and set it as default.

    macOS: clear the queue (basic method)

    1. Open System Settings → Printers & Scanners.
    2. Select your printer → click Open Print Queue.
    3. Highlight the stuck job → click Delete (x) or Cancel.
    4. If it won’t disappear, pause and resume the queue once, then try delete again.
    Note: For shared/network printers, make sure the device appears as Idle or Online before sending new jobs.

    macOS: reset the printing system (last resort)

    This removes all printers and queues, then you add your printer back cleanly.

    1. In Printers & Scanners, right-click (or Ctrl-click) the device list area.
    2. Choose Reset printing system… → confirm (admin password).
    3. Click Add Printer → select your device → add it again.
    4. Reopen the queue → verify empty → print a 1-page test.
    Keep it simple: After a reset, prefer AirPrint (macOS) or the official driver—avoid duplicate instances.

    Heavy documents that choke the queue (and what to do)

    SymptomLikely causeFast actionBetter next time
    PDF stalls at “Spooling”Large images or complex fontsExport a new PDF as “Optimised/Reduced”Use 200–300 dpi images; embed standard fonts
    Web page prints with odd breaksUnprintable elementsUse Reader/Print-friendly view → Save as PDF → printPrefer dedicated print stylesheets or PDF downloads
    Spreadsheet spills to one extra pageUndefined print areaSet print area; Fit to width; previewUse a clean print preset for sheets

    Proof the fix with a one-page test

    1. Print a single text page (plain document) to confirm flow.
    2. If duplex is your default, verify orientation is correct.
    3. Send a small PDF (1–2 pages). If both succeed, resume normal work.
    Still blocked? Power-cycle the printer, then the router (for Wi-Fi paths), then the PC/Mac—in that order. Re-run the queue clear.

    Prevent stuck queues: simple habits that work

    Workflow

    • Preview first to catch overflows and blanks.
    • Batch to PDF for mixed files; print the single PDF.
    • Send once—avoid duplicate clicks while waiting.

    Device path

    • Reserve a stable IP for Wi-Fi printers (router setting).
    • Avoid deep sleep: keep the device on a reliable power plan.
    • Use a short, direct USB cable; avoid unpowered hubs.

    Teams should publish one page of “Print House Rules”: preview, send once, and where to find the queue window if something looks odd.


    Small office controls that stop repeat incidents

    • Preset cards near the device: Everyday (greyscale, duplex), Colour Lite (limited colour), Final (single-sided only when necessary).
    • Queue monitor responsibility: One person checks the queue panel at day-end.
    • Static IP & name: Lock the IP in the router; give the printer a clear, unique name.
    • Firmware routine: Update quarterly; many fixes target connectivity and spooling.

    Fast troubleshooting map (pick your symptom)

    You seeDo this nowIf still stuck
    One job refuses to cancelStop spooler → clear PRINTERS folder → start spoolerReboot PC; delete and re-add the device
    All jobs say “Error – Printing”Restart printer and spoolerReinstall full driver; check USB/Wi-Fi path
    Queue clears but jobs re-block laterStabilise IP; avoid sleep conflictsFirmware update; change print preset workflow
    macOS prints once then stallsReset printing system; re-add deviceTry AirPrint path; avoid duplicates
    Reviewing a cleared print queue before reprinting the document
    Once the queue is empty, send one small test—then resume normal work.

    Guide Axis provides brand-neutral education only. No remote access, repairs, or warranty services.

    FAQs

    Why do jobs get stuck even when the printer looks online?

    The PC/Mac queue can hold corrupted spool files or point to an old device path. Clearing the queue and restarting the spooler refreshes the pipeline.

    Is deleting files in the PRINTERS folder safe?

    Yes—those are temporary spool files. Always stop the Print Spooler first, clear the folder, then start the spooler again.

    After clearing, my jobs still don’t start. What next?

    Stabilise the device path: power-cycle the printer, ensure Wi-Fi IP is reachable, or re-add the printer. On macOS, try resetting the printing system.

    Can a big PDF block everything behind it?

    Yes. Optimise or re-export the PDF (smaller images, standard fonts) and print the lighter file. Batch mixed sources into one clean PDF first.

    What’s the fastest daily routine to avoid queue issues?

    Preview every job, send once, and keep the device on a stable path (static IP or reliable USB). One page of “House Rules” near the printer works wonders.

    Should I reinstall the driver every time this happens?

    No. Start with queue clear and spooler restart. Reinstall only if the problem repeats or if a recent OS update changed driver behaviour.

    Is there any risk to resetting the macOS printing system?

    It simply removes printers/queues so you can add them back cleanly. Password prompt is normal. Keep network details handy for re-adding.

    What’s the single best fix for shared office printers?

    Assign a static IP and publish simple presets (Everyday, Colour Lite, Final). Make one person responsible for checking the queue panel daily.