Category: Uncategorized

  • Choosing the Right Paper for Home and Office Printing

    Choosing the Right Paper for Home and Office Printing

    Choosing the Right Paper for Home and Office Printing

    Woman loading paper into a printer
    Choosing the Right Paper for Home and Office Printing
    The quality of your print depends as much on the paper as it does on the printer itself.
    UK English • In-depth 5000+ word guide • Word Count: • Reading Time:

    Introduction: Why Paper Choice Really Matters

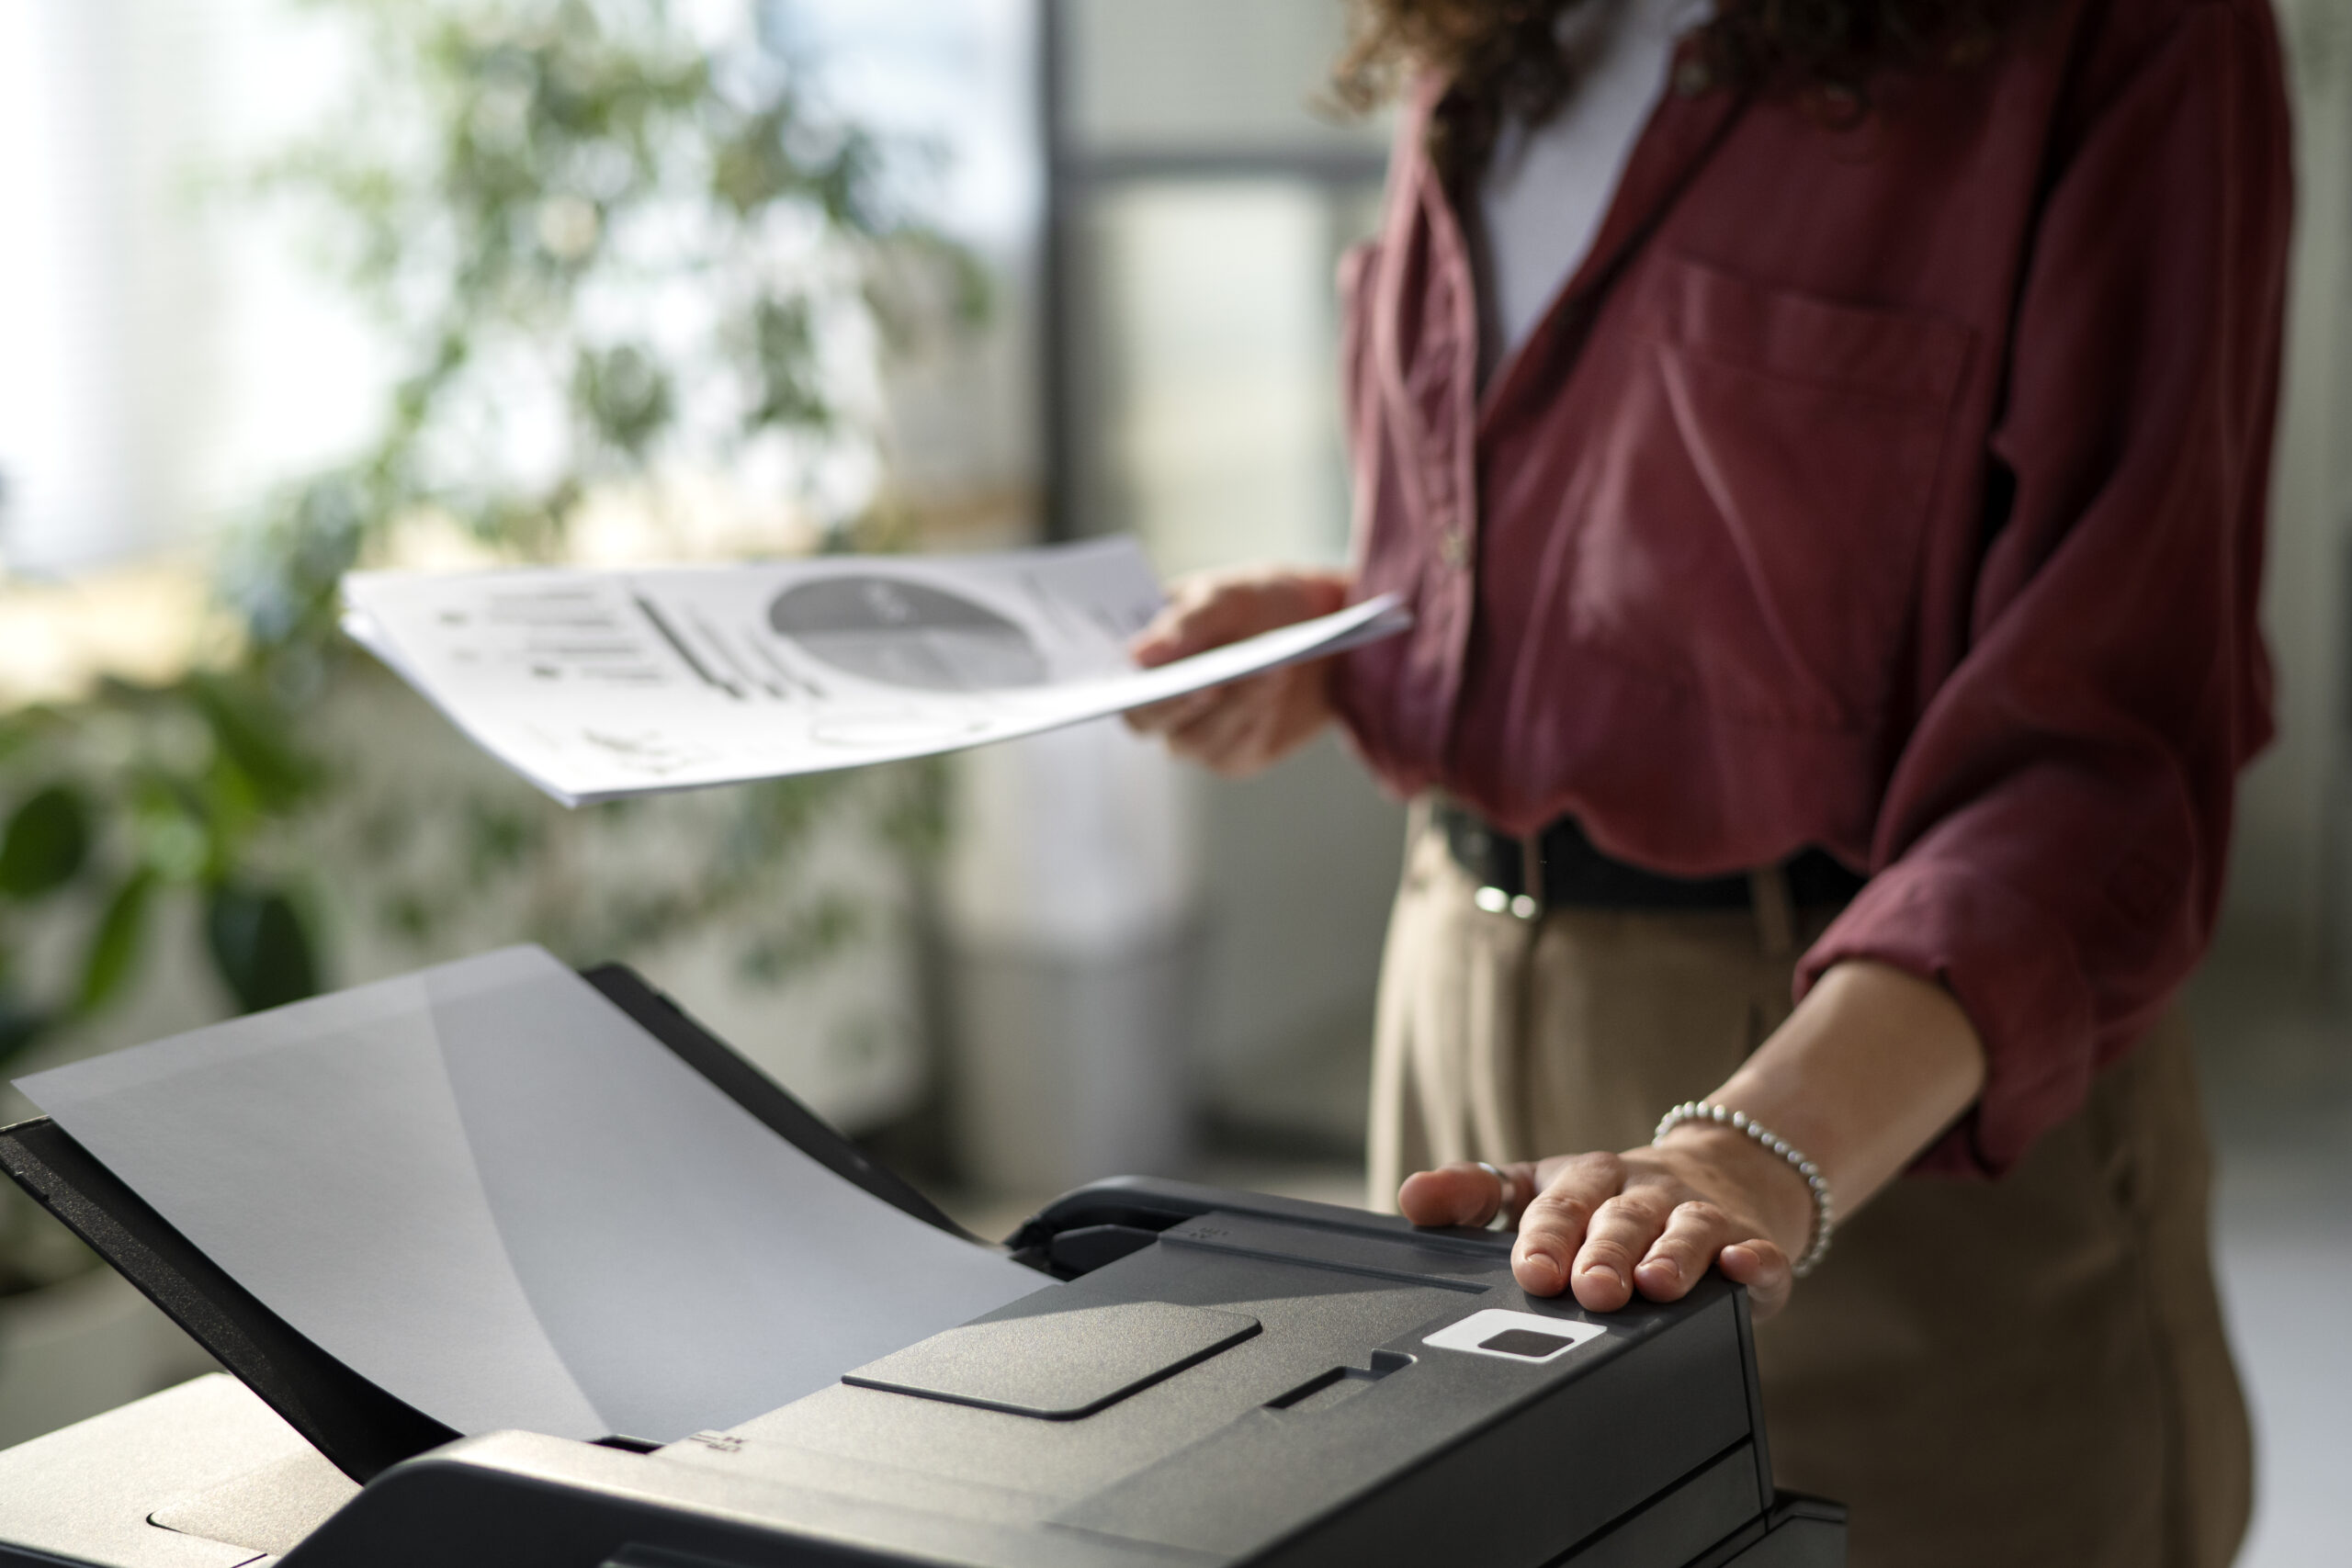
    Most people think that print quality depends entirely on the printer model or the type of ink and toner used. While these are undeniably important, one crucial factor often gets overlooked — the paper itself. Paper is not a passive medium. It actively interacts with ink, toner, and the mechanical feeding process. The wrong paper can cause smudging, streaks, jams, or faded results, even in a high-end printer. The right paper, on the other hand, elevates the print, making colours pop, text sharp, and documents look professional.

    Whether you’re working from home, managing a busy office, or running a small creative studio, choosing the right paper saves money, reduces frustration, and ensures reliability. This guide goes far beyond generic advice, diving into different types, properties, applications, and long-term storage practices. By the end, you’ll know exactly what paper suits your everyday reports, photographs, presentations, and archival needs.

    Secretary organizing paper for printing
    From thickness to finish, every property of paper plays a role in the final output.

    Types of Printing Paper: An Overview

    The world of printing paper is more diverse than many realise. At a glance, sheets may look similar, but each has unique qualities tailored for different uses. Here are the main categories:

    1. Plain Copy Paper

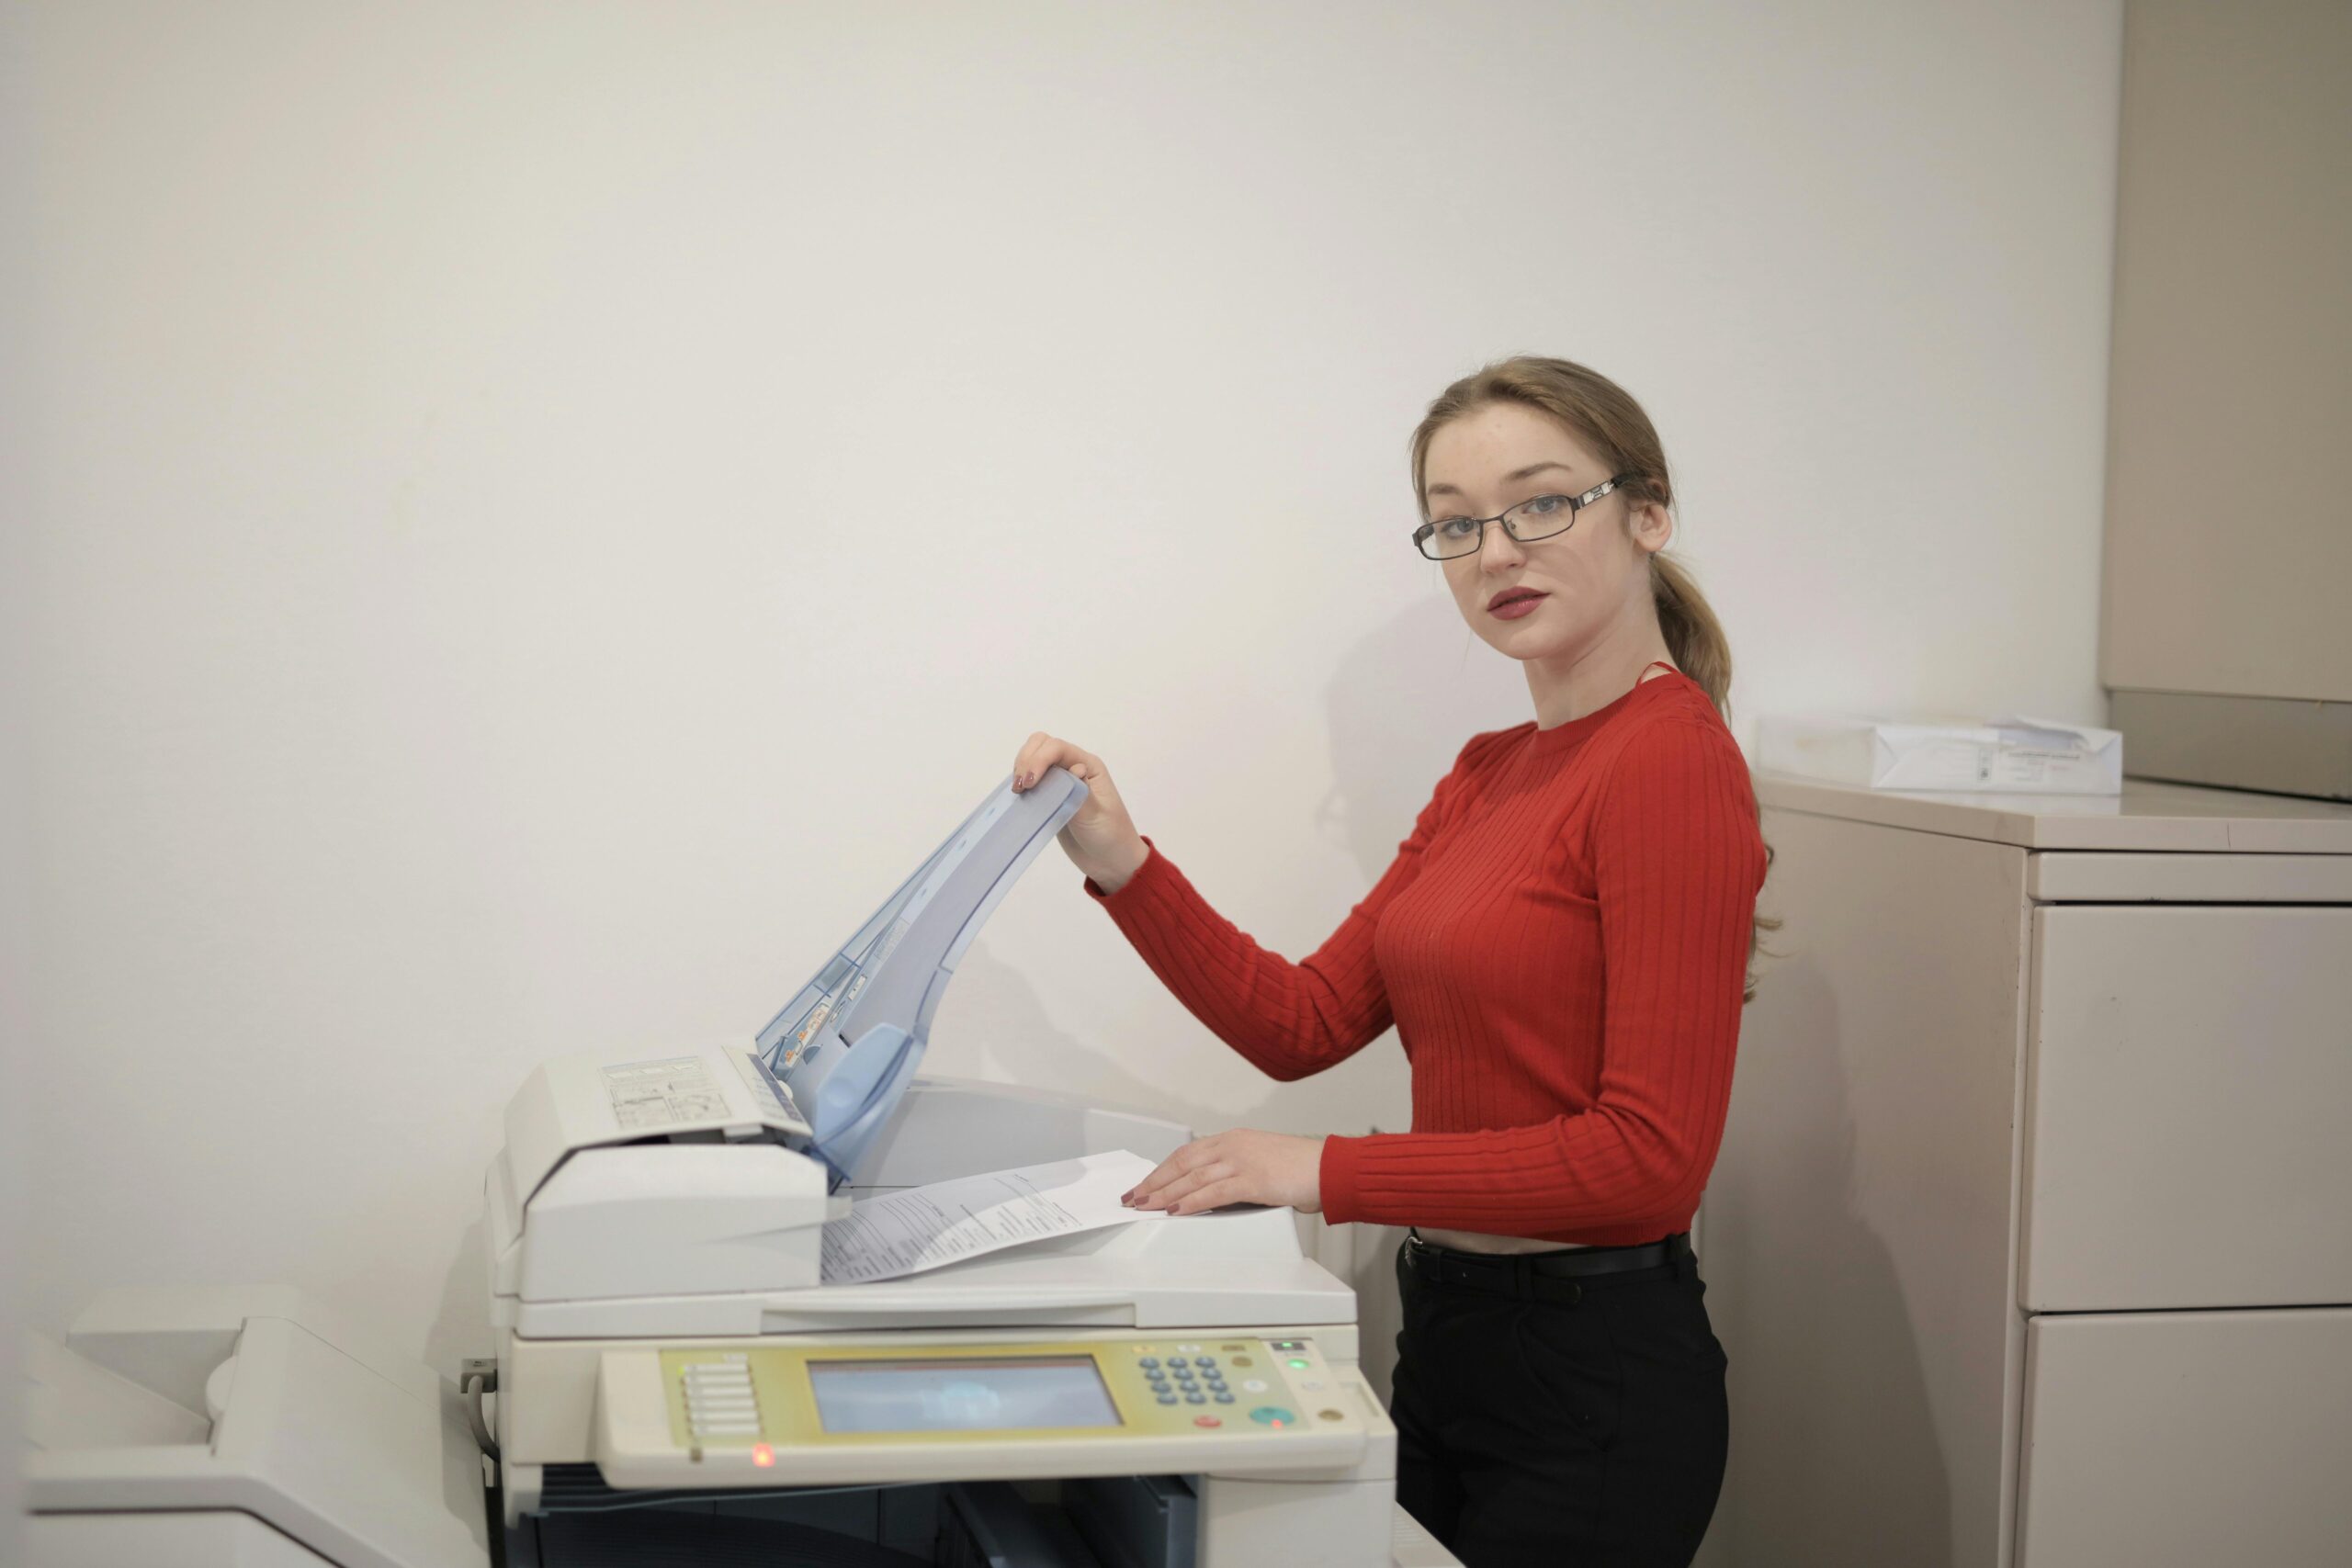
    This is the most common type, used for everyday printing in homes and offices. Typically between 70–90 GSM (grams per square metre), plain paper is thin, lightweight, and cost-effective. It works for text documents, drafts, and basic reports. However, it lacks brightness and durability for premium tasks.

    2. Inkjet Paper

    Designed with a special coating, inkjet paper absorbs liquid ink without spreading. This prevents smudging and keeps colours sharp. It is available in matte, glossy, and satin finishes, making it ideal for photos, marketing materials, and designs where colour accuracy matters.

    3. Laser Paper

    Unlike inkjet models, laser printers use heat to bond toner to paper. Laser paper is engineered to withstand this process without curling or scorching. It often has a smoother finish, allowing toner to adhere cleanly and giving text documents a professional edge.

    4. Photo Paper

    Photo paper comes in glossy, semi-gloss, satin, and matte finishes. It is thicker than standard sheets (typically 180–300 GSM) and is coated to deliver vibrant, long-lasting prints. High-end photo paper is often acid-free to resist yellowing over time.

    5. Cardstock

    Cardstock, or cover stock, is thicker and sturdier than standard paper, ranging from 160–350 GSM. It’s used for business cards, postcards, invitations, and covers. Not all printers can handle heavy cardstock, so always check device specifications before use.

    6. Specialty Papers

    Beyond the basics, there are countless specialty papers — from textured stationery to adhesive labels, envelopes, recycled paper, and archival-quality sheets. Each serves a unique purpose, often for professional, creative, or industrial printing needs.

    Key Properties of Paper: What You Need to Know

    When selecting paper, you’ll come across several technical terms. Understanding these ensures you pick the right paper for your printer and project.

    Weight (GSM)

    Measured in grams per square metre, GSM indicates thickness and sturdiness. 80 GSM is typical for everyday printing. Heavier paper (120–160 GSM) feels more professional, while 200+ GSM enters the realm of cardstock. Be mindful: heavier paper may not feed well in basic home printers.

    Brightness

    Brightness measures how much light the paper reflects. Higher brightness (90+) gives sharper contrast and makes colours stand out. For text documents, medium brightness is often sufficient. For photographs or graphics, higher brightness delivers superior results.

    Opacity

    Opacity refers to how much light passes through the paper. Low opacity means text or images may show through to the other side — an issue for double-sided printing. For duplex work, always choose high-opacity paper to prevent transparency.

    Finish and Coating

    Paper can be uncoated (plain) or coated. Coatings can add gloss, satin, or matte textures. Glossy finishes enhance colours, while matte finishes reduce glare and suit formal documents. Coatings also affect ink absorption and drying time.

    Acidity and Archival Quality

    Paper with high acidity yellows and deteriorates faster. Acid-free, lignin-free paper is recommended for long-term storage of photos, certificates, and records. Archival-quality paper ensures documents remain intact for decades.

    Applications: Matching Paper to Printing Needs

    Not every paper suits every purpose. Choosing correctly for each scenario saves money, reduces waste, and ensures the best results. Let’s break it down:

    Everyday Office Documents

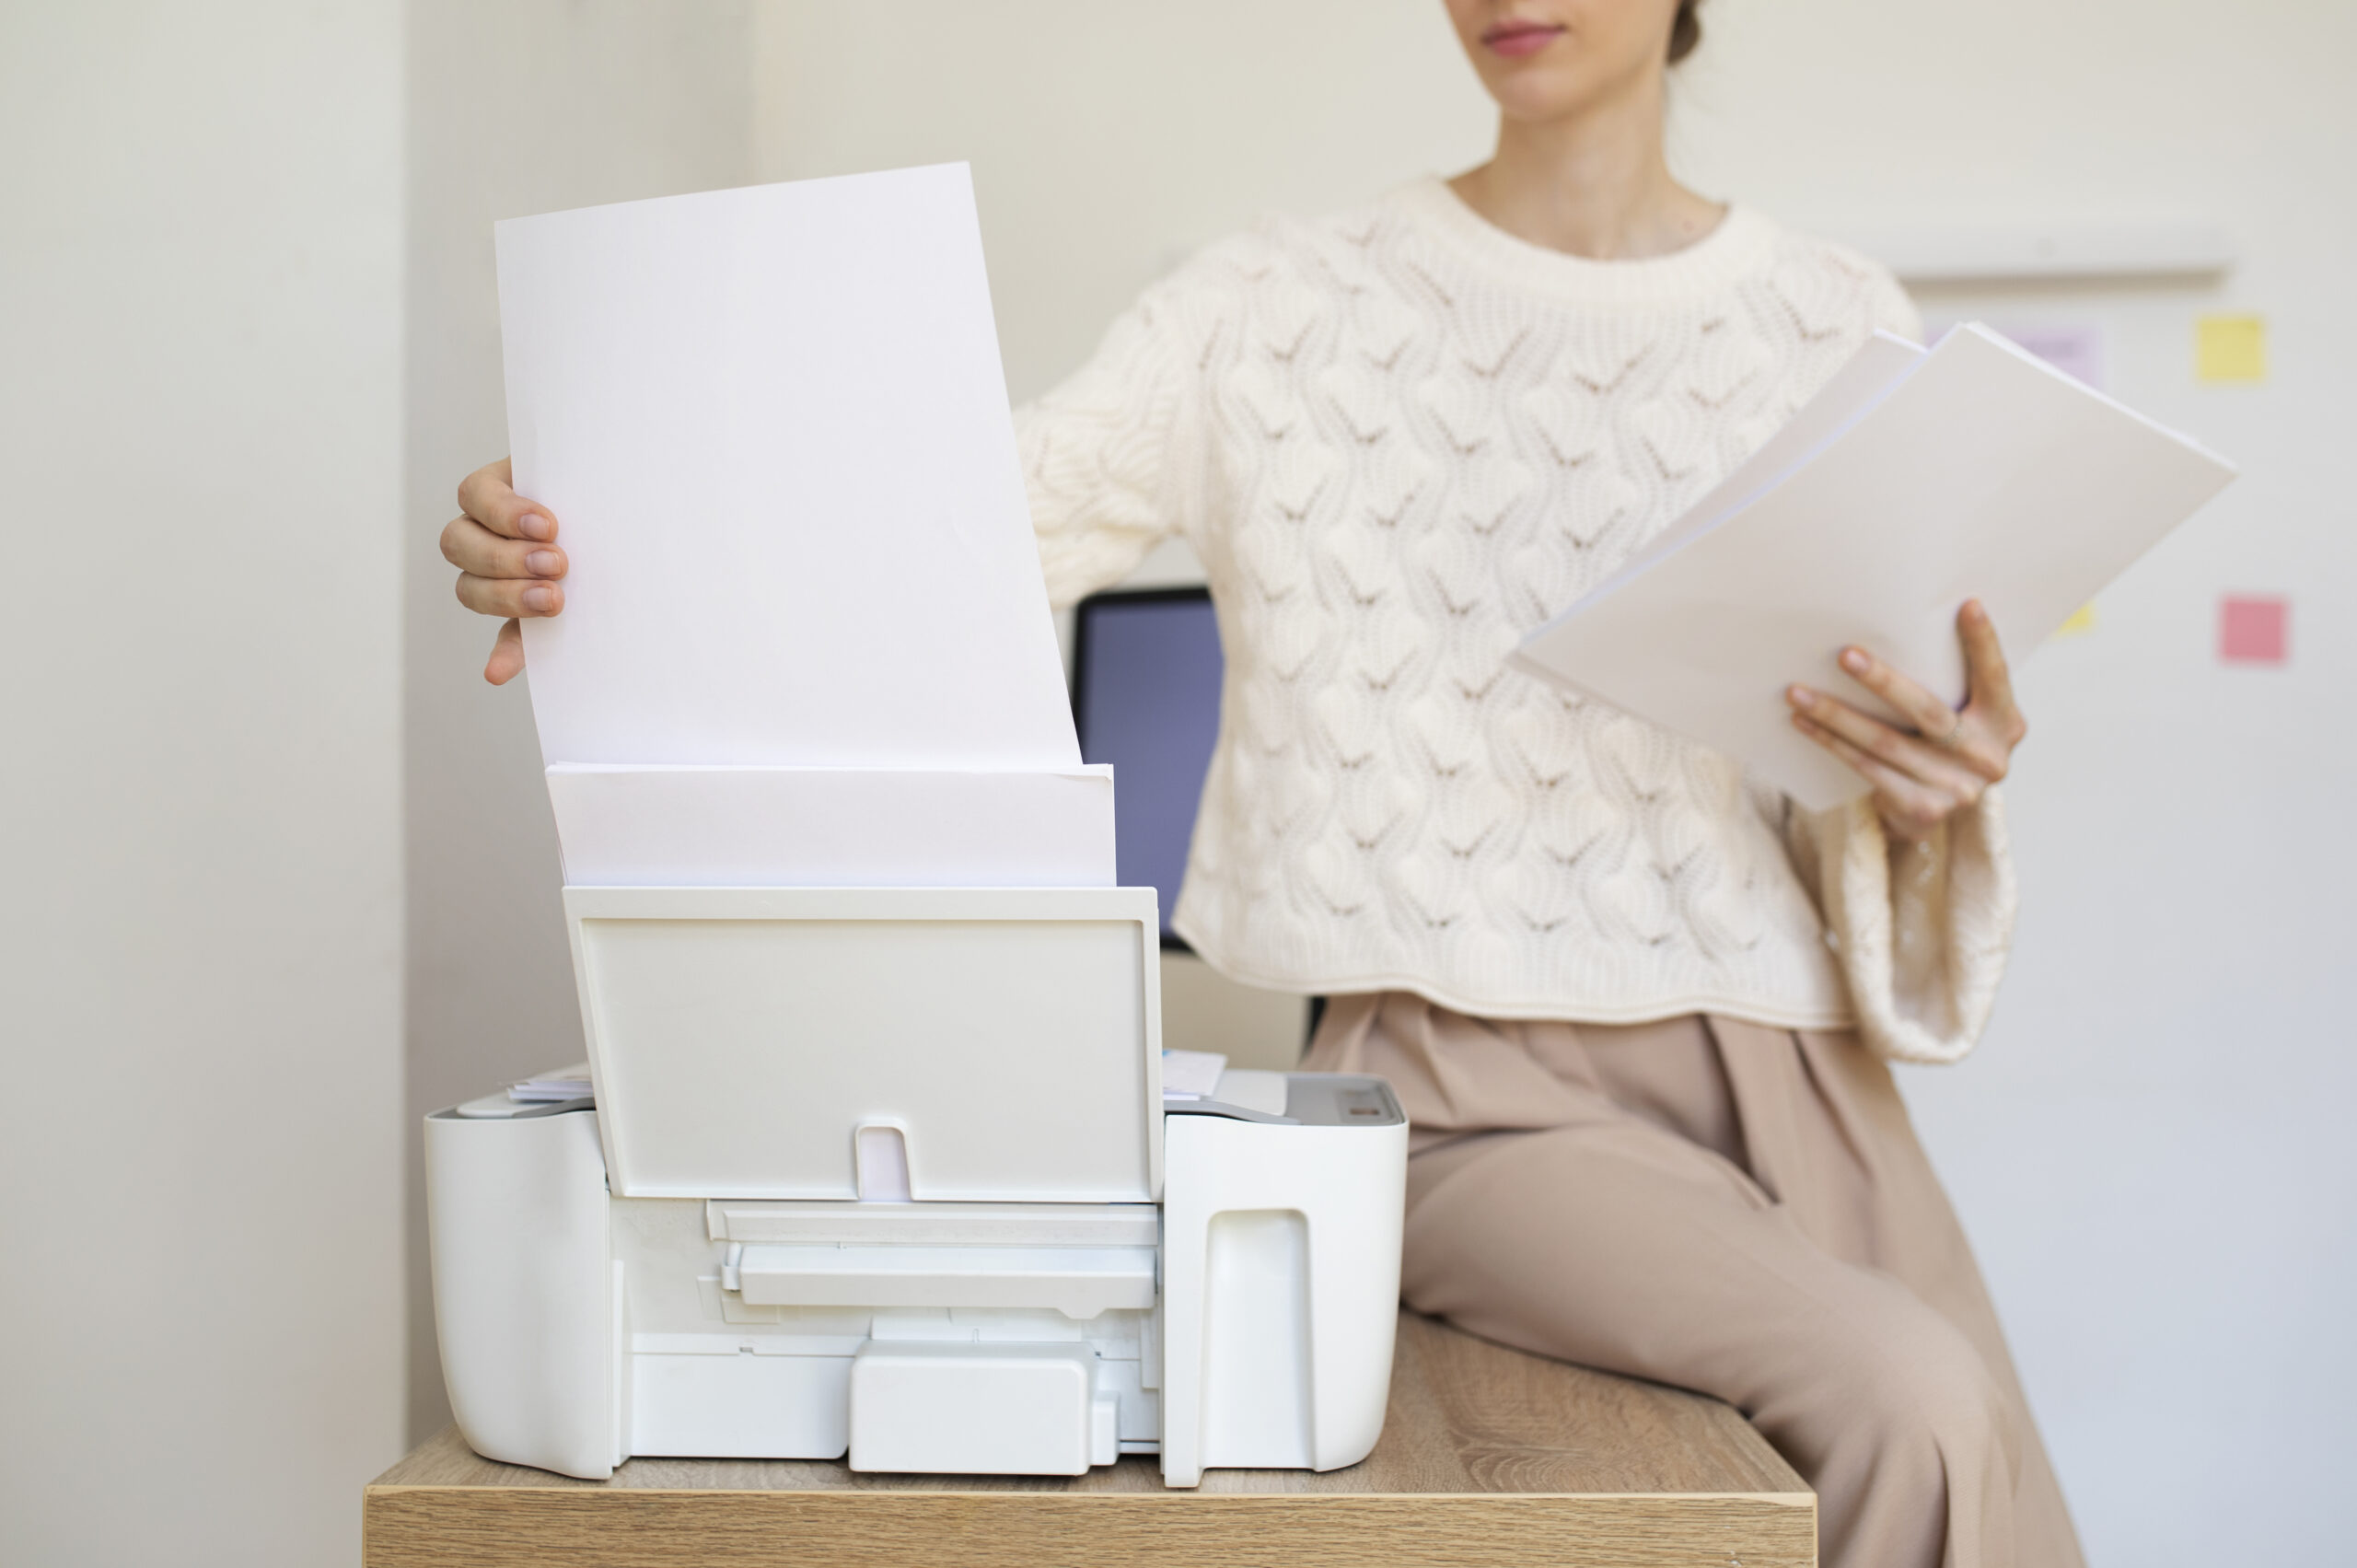
    For memos, drafts, internal communication, and notes, standard 75–80 GSM copy paper is enough. It’s affordable, runs well in bulk, and balances quality with cost efficiency. Double-sided printing is possible if you choose a slightly higher opacity.

    Business Reports and Presentations

    First impressions matter in business. Use 90–120 GSM paper for reports, contracts, and presentations. The weight feels more substantial in the hand, projecting professionalism. Consider bright white for contrast, or a subtle cream for elegance.

    Photographs and Graphics

    Photos demand specialised coated paper. Glossy finishes make colours vibrant but can glare under light. Matte finishes reduce reflections and give an art-like look. For high-resolution graphics, use premium inkjet photo paper with high brightness and archival properties.

    Marketing Materials

    Brochures, flyers, and posters benefit from mid- to heavyweight coated paper (130–200 GSM). Coatings add polish, while sturdier stock withstands handling. Always choose paper optimised for your printer type — glossy for inkjets, laser-compatible gloss for laser printers.

    Creative and Specialty Printing

    Greeting cards, invitations, and custom projects often require cardstock or textured specialty paper. Here, creativity leads — embossed finishes, pearlescent sheens, or recycled textures can all add unique personality to prints.

    Worker examining paper quality
    Paper choice isn’t just technical — it influences how people perceive your work.

    Buying Guide: How to Choose the Right Paper

    When you’re at the shop or scrolling online, hundreds of paper options can overwhelm you. Here’s a structured approach:

    • Check printer compatibility: Inkjet vs laser, weight limits, duplex support.
    • Decide based on use: Drafts → plain copy paper; business → midweight bright paper; photos → coated inkjet paper.
    • Balance cost and quality: Premium paper gives better results but isn’t always needed for bulk printing.
    • Look for sustainability: FSC-certified, recycled, or acid-free options reduce environmental impact.
    • Test small packs first: Before committing to bulk, try a ream to ensure feed and output quality.

    Paper Storage and Handling Best Practices

    Even the best paper fails if stored improperly. Moisture, dust, and heat all affect performance. Follow these steps:

    • Keep paper sealed until use. Open packs attract humidity.
    • Store flat, never upright, to prevent curling.
    • Avoid direct sunlight, which can fade brightness over time.
    • Allow paper to acclimate to room temperature before printing — especially in humid climates.
    • Use trays correctly: don’t overload, fan sheets before loading, and ensure guides are snug but not tight.

    Sustainability: Eco-Friendly Paper Choices

    Printing inevitably consumes resources, but thoughtful paper choices reduce impact. Sustainable options include:

    • Recycled paper: Modern recycled paper is high-quality, suitable for both inkjet and laser printing.
    • FSC-certified paper: Ensures wood comes from responsibly managed forests.
    • Acid-free and chlorine-free paper: Safer for long-term storage and less harmful to the environment.

    Balancing eco-friendliness with performance is possible. Many offices now standardise on recycled or FSC-certified paper for everyday tasks, reserving premium glossy stock for essential presentations.

    FAQs

    What GSM is best for home printing?

    For everyday home use, 75–90 GSM works well. For more professional results, consider 100–120 GSM. This weight reduces show-through and feels more substantial in hand.

    Can I use photo paper in a laser printer?

    No. Inkjet photo paper has a coating designed to absorb liquid ink. In a laser printer, the heat may melt the coating and damage the machine. Always choose laser-compatible glossy or coated stock.

    Why does my paper curl after printing?

    Curling happens when paper absorbs heat or moisture unevenly. Using the correct paper type, storing it flat in sealed packs, and adjusting media settings in the printer can prevent curling.

    What paper is best for double-sided printing?

    High-opacity paper, usually 90 GSM or above, prevents text and images from bleeding through to the other side. Heavier matte papers are ideal for duplex printing.

    Is recycled paper lower quality?

    Not anymore. Advances in recycling technology produce smooth, bright sheets that are suitable for both inkjet and laser printing. Only specialised tasks (e.g., archival or fine art prints) may still require virgin paper.

    Which paper finish is best for presentations?

    Glossy and satin finishes enhance colour vibrancy, making charts and images pop. For a more professional, glare-free look, matte coated paper is preferred.

    Can I mix paper types in one print job?

    Yes, but most printers are optimised for a single type at a time. If you mix, ensure each tray is loaded with the correct stock and adjust the driver settings to avoid jams or misfeeds.

    What’s the difference between bond paper and copy paper?

    Bond paper is slightly heavier (typically 90–100 GSM) and has a higher quality finish, making it ideal for professional correspondence. Copy paper is lighter (75–80 GSM) and intended for everyday office printing.

    How long can paper be stored before it degrades?

    Paper stored in sealed reams, away from sunlight and humidity, can last for years without noticeable degradation. Acid-free paper has an even longer archival life.

    Does brightness level really affect print quality?

    Yes. Higher brightness (90+) delivers sharper contrast, especially for images and colour documents. Lower brightness (70–80) is fine for drafts and bulk text, but may look dull for professional outputs.

  • Printer Care Tips: Keep Dust Away and Extend Device Life

    Printer Care Tips: Keep Dust Away and Extend Device Life

    Printer Care Tips: Keep Dust Away and Extend Device Life

    Person inspecting printer in home office
    Printer Care Tips: Keep Dust Away and Extend Device Life
    Practical routines, cleaning methods and schedules to keep your printer healthy and reliable for years.
    UK English • Brand-neutral advice • Home & Office • Word Count: • Reading Time:

    Why caring for your printer matters

    Printers are mechanical and optical instruments packed into compact housings. Dust, fibres, and debris undermine mechanical tolerances, abrade rubber parts, obscure sensors, and contaminate optical pickup paths. Over time these small erosions cause frequent paper jams, reduced print quality and expensive part replacements. A well-maintained printer avoids downtime, preserves consumables, and delivers consistent output quality. Whether you manage a single home printer or a fleet in a busy office, basic preventive care pays for itself quickly.

    Beyond cost, a clean printer is also environmentally friendly—less toner/ink wastage, fewer replacement parts sent to landfill, and fewer service calls. The objective of this guide is practical: give you repeatable actions and schedules that reduce dust risk and extend device life with simple tools and low-cost supplies.

    The short version: keep dust out of trays and vents, wipe rollers monthly, inspect sensors, and follow a simple schedule — you’ll avoid most common failures.

    Where dust in printers comes from

    Understanding dust sources helps you stop it. Typical contributors include:

    • Ambient house dust: skin flakes, textile fibres, pet dander carried on air currents.
    • Paper dust: micro-particles released when paper edges abrade (especially low-quality paper).
    • Cartridge residue: toner or dried ink particles shed during handling.
    • Construction/renovation dust: fine debris that readily settles inside devices.
    • Ventilation systems: HVAC systems can distribute dust widely if filters are dirty.

    In offices, the biggest single contributor is frequent door/window openings and traffic. In homes, kitchens and pets increase dust dramatically. Identifying the dominant local source lets you prioritise—if the printer sits next to a craft table that generates paper dust, move it or add local protection.

    Daily habits that prevent dust build-up

    Daily actions cost almost nothing but greatly reduce long-term maintenance.

    • Close trays and covers when the printer is idle — open trays collect dust and sunlight accelerates drying and static.
    • Keep output areas cleared: do not pile printed pages near the exit; they attract dust and can be re-fed accidentally.
    • Power down correctly: use the power button rather than unplugging; controlled shutdown prevents clutches from seating with debris inside.
    • Limit food and drinks: avoid eating nearby; crumbs and spills are a catastrophic dust/moisture source.

    Spend 60 seconds daily doing these and you’ll dramatically reduce the cleaning needed later.

    Weekly maintenance: hands-on cleaning

    A short weekly check prevents small problems growing into big ones. Aim for 5–10 minutes per device.

    1. Power off and unplug the printer before any hands-on work.
    2. Open the input and output trays and remove loose sheets; fan the stack lightly before reloading.
    3. Use a soft brush (artist’s brush or small electronics brush) to sweep dust from vents, tray lips and around buttons.
    4. Use a can of compressed air in short bursts (angled, not directly shoved into sensitive parts) to dislodge loose dust from intake areas.
    5. Wipe accessible exterior surfaces with a microfiber cloth slightly dampened with water; avoid solvents.

    Weekly attention prevents dust from migrating deeper into the mechanism and makes monthly cleans simpler and faster.

    Monthly deep-clean and inspection

    Monthly is where the real maintenance happens. It takes longer but solves root causes.

    1. Prepare: gather lint-free cloths, isopropyl alcohol (only where manufacturer allows), a small torque screwdriver set (if you’re comfortable), a soft paintbrush, lint rollers and a can of compressed air.
    2. Power down & unplug — always isolate power before opening service covers or touching internal parts.
    3. Remove consumables: take out toner/ink cartridges and paper cassettes. Place them on a clean surface to avoid spilling toner or ink.
    4. Vacuum the interior gently with a small electronics vacuum (anti-static) or use compressed air to remove loose dust. Keep bursts short and at an angle to avoid pushing debris deeper.
    5. Wipe rollers with a lint-free cloth slightly dampened with water (or cleaning fluid recommended by the manufacturer). Rotate rollers manually to access the full circumference.
    6. Inspect belts and gears for fibres or shredded paper — remove any entangled material carefully.
    7. Clean sensors and optical panes (e.g., the paper sensor) with a dry microfiber or with a lightly alcohol-dampened swab if allowed.
    8. Check fans and vents for accumulation; clean or replace filters if present.
    9. Reinstall consumables, run a test print and check for noise or quality issues.
    Monthly checklist: Remove cartridges • Clean rollers • Inspect trays • Clear scraps • Test print • Log any part replacements.

    Safe cleaning methods (6 detailed techniques)

    Below are six different, safe, and effective cleaning techniques with step-by-step instructions. Use the ones appropriate for your printer type (laser vs inkjet) and model. When in doubt, consult the service manual.

    Method A — Dry micro-vacuum + brush (General purpose)

    Best for offices with many printers — quick and safe for almost all consumer devices.

    1. Tools: small electronics vacuum (anti-static), soft brush, lint-free cloth.
    2. Power off and unplug the device. Open all access panels.
    3. Use the soft brush to loosen dust from tray lips, paper paths and vents.
    4. Vacuum immediately after brushing, keeping the nozzle just above parts — do not touch delicate rollers directly with the nozzle.
    5. Close panels and run a short test print.

    Why it works: The brush dislodges embedded dust while the vacuum removes it before it migrates deeper.

    Method B — Damp wipe (Rollers & Exterior)

    Careful moisture cleaning restores grip to rubber parts and removes oily residues.

    1. Tools: lint-free cloth, distilled water, isopropyl alcohol 70% (only if manual permits).
    2. Power off, unplug and remove cartridges/trays.
    3. Moisten cloth (not dripping) and wipe roller surfaces while rotating them by hand to cover the whole circumference.
    4. For stubborn toner or adhesive residues, lightly dampen a swab with isopropyl alcohol and target the adhesive area only — avoid broad alcohol use on rollers unless specified.
    5. Allow parts to dry completely before powering on.

    Caveat: Alcohol can dry certain rubbers. Use sparingly and only where recommended.

    Method C — Compressed air + sensor cleaning (Optics & sensors)

    Sensors and optical windows are sensitive; keep them dust-free for reliable detection.

    1. Tools: canned compressed air, microfiber cloth, optical swabs (optional).
    2. Power down and open the required panels to expose sensors and glass windows.
    3. Blow short, angled bursts of air to remove loose dust—never shake the can or use continuously as moisture may be expelled.
    4. Use a dry microfiber to gently wipe optical panes; if residue remains, use a manufacturer-approved optical cleaner sparingly.

    Note: Avoid touching sensor lenses with fingers — oils cause false readings.

    Method D — Toner residue control (Laser printers)

    Laser printers use toner which can pollute interiors when cartridges leak or during servicing.

    1. Tools: toner vacuum (or HEPA vacuum), toner wipes or collector paper, gloves, dust mask.
    2. Wear gloves and a dust mask. Remove the toner unit carefully to avoid spills.
    3. Use toner wipes or clean plain paper to capture loose toner. A dedicated toner vacuum or HEPA vacuum is preferable; normal vacuums will clog and spread toner.
    4. Inspect the fuser area for stray toner; remove with gentle brushing and vacuuming designed for toner.
    5. Reinstall toner unit and run a calibration print.

    Safety: Toner is fine particulate — avoid inhalation and skin contact where possible.

    Method E — Adhesive removal after label runs

    Labels sometimes leave tacky residue on exit rollers and fusers — this needs delicate treatment.

    1. Tools: isopropyl alcohol (manufacturer approved), lint-free cloth, plain paper.
    2. Allow the device to cool (if hot). Open and expose the exit rollers and fuser only if the manual permits this.
    3. Apply a small amount of alcohol to a cloth and gently rub the affected roller areas; do not soak the roller.
    4. Run several plain sheets to absorb leftover adhesive and to recondition the roller surface.

    If the fuser has visible glue built-up, consult service — the fuser is temperature-sensitive and expensive to replace.

    Method F — Preventive enclosure and filter use (Environment control)

    Instead of cleaning more often, reduce dust entry using filters and covers.

    1. Tools: breathable dust cover for printer, replaceable intake filters (if supported), air purifier for room (optional).
    2. When the printer is idle for long periods, use a dust cover—choose breathable fabric that doesn’t trap humidity.
    3. If the printer location is dusty, use a room air purifier with HEPA filter nearby to reduce particulate load.
    4. Consider installing small intake filters on vents where feasible (check manufacturer guidance first).

    Why it helps: reducing incoming dust reduces how often internal components need cleaning.

    Component-by-component care (rollers, fuser, optics)

    Pick & feed rollers

    Pick rollers are critical for single-sheet feeding. When polished by dust and oil, they lose grip and cause multi-feeds or misfeeds.

    1. Inspect roller surface for shiny spots or embedded fibres.
    2. Use a damp lint-free cloth to wipe and rotate the roller; for stubborn grime, use a small amount of manufacturer-recommended cleaner.
    3. If the roller is badly worn (glazed or cracked) replace it — replacement is usually inexpensive compared with lost productivity.

    Separator pads

    Separator pads resist the second sheet being picked. They wear down and collect fibres.

    1. Check separation pad for wear and replace if the pad no longer provides resistance.
    2. Cleaning is usually not effective; replacement is the long-term solution.

    Fuser assembly (laser printers)

    The fuser is a heat element; adhesive, labels or improper cleaning can damage it.

    1. Avoid aggressive solvents near the fuser.
    2. For minor residue, use a lint-free cloth and a small amount of recommended cleaner when the assembly is cool.
    3. If damage is suspected (wrinkles, uneven heating), schedule a service replacement — continuing to use a damaged fuser can wreck prints and other parts.

    Printhead and carriage (inkjets)

    Inkjets are sensitive to dried ink and dust obstructing the carriage path.

    1. Regularly run the printer’s built-in head cleaning utility.
    2. Manually clean carriage rails with a soft, slightly damp cloth if you see streaks or banging noises.
    3. Never force the carriage — if it binds, power down and inspect for debris before moving it manually.

    Optical sensors & glass

    Sensors detect paper movement and jams—dust on these causes false positives.

    1. Clean lenses with optical swabs or a microfiber cloth.
    2. Use compressed air to remove loose dust before wiping.
    3. If a sensor fails intermittently, clean both the lens and the facing surface—both sides must be clear.

    Environment: placement, air, and humidity

    Where you place the printer matters. A stable, low-dust location reduces cleaning and extends life.

    • Off the floor: place the printer on a desk or stand — floors collect dust and carpet fibres.
    • Away from windows and doors: drafts bring in dust and pollen.
    • Room humidity: keep 40–60% RH where possible — too low creates static; too high encourages adhesive and mould issues.
    • Air filtration: in dusty locations use a HEPA air purifier near the device; ensure HVAC filters are changed regularly.

    Also consider using a small surge protector or an uninterruptible power supply (UPS) to protect the printer from electrical spikes — power issues can cause firmware corruption and mechanical damage during mid-cycle prints.

    Choosing consumables & storage to reduce dust

    Consumables play a big role in dust control.

    • Choose higher-quality paper: cheap or recycled papers shed more microfibres. A good 80gsm branded office paper generates less lint and fewer pickup issues.
    • Store reams sealed: keep unopened reams in their wrapping and move new reams to the print room 12–24 hours before use.
    • Store cartridges in original packaging: avoid leaving spare toner or ink exposed where dust can accumulate on contacts.
    • Avoid partial label sheets: gaps cause flex and adhesive exposure that picks up dust.

    Using the right consumables reduces the amount of particulate the printer generates internally and extends roller life.

    Preventative maintenance: schedules & logs

    For businesses, a simple maintenance log and schedule transforms ad hoc fixes into planned upkeep. Even for home users, a calendar reminder is effective.

    CadenceTaskEstimated time
    DailyClose trays, clear output, 60s visual check1–2 minutes
    WeeklyDust external vents, fan & square paper5–10 minutes
    MonthlyDeep clean rollers, sensors, vacuum interior20–40 minutes
    QuarterlyCheck for firmware updates, inspect pick rollers/separators15–30 minutes
    AnnuallyReplace worn rollers/pads, service fuser if heavy useVaries (could require technician)

    Keep a simple log with date, person who performed the task, observations (noises, print defects), and parts replaced. This history helps spot recurring issues and justify replacement when a device reaches end-of-life.

    Troubleshooting: dust-related symptoms

    Dust causes predictable symptoms. Here’s how to identify and treat them quickly.

    SymptomLikely causeImmediate fixWhen to call service
    Frequent paper jamsDebris in paper path or worn separatorOpen paths, remove scraps, clean rollersAfter repeated jams despite cleaning
    Light streaks or spotsDirty printhead or fuser contaminationRun head cleaning (inkjet) or wipe fuser (laser per manual)Persistent marks after cleaning
    Double-feedsWorn pick roller or staticClean/replace roller, acclimatise paperRoller replacement if cleaning fails
    False jam/lights on control panelObscured sensorClean sensor windows and pathSensor replacement or recalibration
    Excessive toner dust in cabinetLeaking toner or cracked hopperIsolate and vacuum toner, replace cartridgeCartridge housing or drum replacement

    Printable checklists

    Quick daily checklist (Stick on the wall)

    • Are trays closed when idle?
    • Is the output tray clear?
    • Are there visible scraps in the input path?
    • Any unusual noises during last use?

    Weekly checklist

    • Wipe external surfaces with microfiber cloth.
    • Fan and square paper reams before loading.
    • Light dusting of vents and tray edges.
    • Record any print quality changes.

    Monthly checklist

    • Power down and unplug.
    • Remove cartridges and vacuum interior (anti-static).
    • Wipe rollers and inspect separation pads.
    • Clean optical sensors and check firmware updates.
    • Log actions in maintenance book.
    Person cleaning printer rollers
    Simple cleaning tools — microfiber cloths, a soft brush, and compressed air — do most jobs.
    Side view of inspecting printer interior
    Monthly inspection is the best time to spot worn rollers and trapped scraps before they cause jams.

    Frequently Asked Questions — Detailed

    How often should I clean my printer if I use it occasionally?

    If you print fewer than 100 pages per month, a weekly visual check and a monthly basic clean (dust removal, wipe exterior, fan paper) is sufficient. Even occasional users should run a short test print weekly to keep ink paths primed (for inkjets) and to ensure pick rollers don’t sit idle too long. If the printer sits in a dusty environment, perform the monthly routine more frequently.

    Is compressed air safe to use inside a printer?

    Compressed air is useful but must be used carefully. Use short bursts and hold the can upright to avoid propellant spray. Angle the nozzle; do not blow directly into delicate parts like fuser or printhead assemblies. For toner, prefer a specialty toner vacuum because regular vacuums can spread fine toner powder. Never use shop air at high pressure; household compressed air cans are designed for electronics and are safer when used correctly.

    Can I use isopropyl alcohol to clean everything?

    No. Isopropyl alcohol is excellent for cleaning metal and optical surfaces, but some roller compounds and plastics degrade with repeated alcohol exposure. Always consult the user manual. For rollers, distilled water or manufacturer-recommended cleaning solutions are safer. Use alcohol sparingly—for sensor lenses or sticky adhesive spots—only where the manual allows.

    My printer smells of burning after a long run — is that dust?

    A faint warm smell after a long run can be dust burning off heated components (fuser) — this is often temporary. However, a persistent burning smell or smoke indicates a serious issue; power down immediately and contact service. Regular cleaning reduces the likelihood of dust reaching hot elements, but don’t ignore persistent odours.

    How do I safely remove a stuck paper scrap that is deep inside?

    Stop the printer via the control panel and power down. Open all indicated access doors. Pull paper slowly in the feed direction to avoid tearing. Use tweezers for small corners but be careful not to touch rollers or sensors. If the scrap is not accessible, do not use force — call a technician. Removing paper incorrectly can bend guide plates or damage sensors.

    Can dust damage the printhead in an inkjet?

    Yes. Dust on the carriage rails or in the capping station can prevent proper sealing, allowing printhead nozzles to dry and clog. Dust particles can also abrade the delicate nozzle plate over time. Keep the carriage path clean, run automatic nozzle checks, and avoid leaving protective caps or cartridges exposed to dusty air for long periods.

    How do I store a spare toner or ink cartridge properly?

    Keep cartridges in their original sealed packaging in a cool, dry place away from direct sunlight. Avoid storing ink cartridges inverted or in extremely cold/hot environments. For toner, keep the box upright and do not remove the seal until you are ready to install to prevent exposure and dust contamination.

    Should I schedule professional maintenance?

    For business-critical printers or high-volume devices (over 5,000 pages/month), annual or biannual professional maintenance is worthwhile. Technicians can replace bearings, recalibrate sensors, and perform fuser servicing that is difficult for most users. Smaller home printers rarely need professional attention unless a mechanical fault appears.

    What are signs that a roller needs replacing rather than cleaning?

    Signs include glazing (shiny, smooth surface), cracking, persistent misfeeds after cleaning, frequent double-feeds, and visible flat spots. If cleaning restores grip only briefly, replacement is usually necessary. Replacement rollers are inexpensive and pay back quickly by eliminating jams and improving feed reliability.

    How do I deal with toner spills safely?

    Wear gloves and a mask. Do not use a household vacuum (toner will pass through filters). Use a toner-rated vacuum or place damp paper towels to pick up loose toner and then wipe with a slightly damp cloth. Avoid washing toner down drains. If large spills occur inside the printer, contact authorised service.

    Will covering the printer with plastic help?

    Plastic can trap moisture and cause condensation—avoid non-breathable covers. Use a breathable dust cover when the printer is idle for long periods. Simple cotton or mesh covers work well; remove them before printing to avoid heat build-up.

    Are air purifiers really necessary for dusty environments?

    Yes—HEPA air purifiers significantly reduce particulate count and therefore reduce the amount of dust entering printers. In workshops, craft rooms or homes with pets, a small purifier near the printer greatly extends cleaning intervals and component life.

    How do I log maintenance efficiently?

    Use a simple spreadsheet or paper log with columns: Date, Device, Task performed, Observations, Parts replaced, Next due date. For offices, a shared cloud sheet provides transparency; for home users a physical sticker with the last service date on the printer works well.

    My printer is under warranty — should I attempt cleaning?

    Basic cleaning (dusting externals, wiping rollers with approved liquids) is usually fine and does not void warranty. However, opening sealed areas or using non-approved solvents may. Check warranty terms — when in doubt, contact the manufacturer’s support for guidance before disassembly.

  • Duplex Printing Guide: How Two-Sided Printing Saves Paper and Money

    Duplex Printing Guide: How Two-Sided Printing Saves Paper and Money

    Duplex Printing Guide: How Two-Sided Printing Saves Paper and Money

    Reviewing two-sided printed pages in an office
    Half the Sheets, Same Clarity

    Two-sided printing (duplex) is the simplest way to reduce paper immediately without compromising the look of your documents. This brand-neutral guide explains exactly how duplex works, when to prefer long-edge or short-edge flipping, the paper grades that keep pages flat, and the driver presets that prevent smudge or show-through. You’ll set practical defaults that make savings automatic for homes and small offices—no hacks, no brand tie-ins, just repeatable habits.

    Scope: Educational guidance only. No remote access, service claims, or brand-specific tuning.

    What duplex printing is—and why it matters

    Duplex places content on both sides of a sheet. Many devices flip the sheet internally (automatic duplex); others show on-screen steps to reinsert the printed stack for the second pass (manual duplex). The pay-off is immediate: fewer sheets to buy, store, staple, and carry.

    ≤ 50%
    Paper usage on suitable jobs
    3–7s
    Typical extra time per sheet
    ₹800–₹3,000
    Annual saving for light users*

    *Estimate varies by volume, stock price, and coverage.


    Benefits and best use cases

    Cost & environment

    • Halves sheets for reports, notes, and reading packs.
    • Lower postage weights and smaller filing stacks.
    • Less shredding and storage later.

    Reader experience

    • Bound reports feel like a book; smoother scanning.
    • Handouts are compact and easier to carry.
    • Study notes stay organised without extra pages.
    Rule of thumb: If the back adds value (references, continuation, tables), duplex it. If single sheets must be scanned, signed, or filed individually, keep one-sided.

    How duplex works (automatic vs manual)

    Automatic duplex units print the front, pull the sheet back, flip, and print the reverse. Manual duplex asks you to reinsert the stack after the first side. Follow the on-screen diagram carefully; it shows which edge must face the feed.

    Automatic duplex

    • Convenient for frequent two-sided work.
    • Aligned backs with fewer handling errors.
    • Supports long-edge and short-edge flip.

    Manual duplex

    • Available on many entry devices.
    • Print first side → reinsert per diagram → print back.
    • Ideal for occasional two-sided jobs.
    Drying time (ink devices): For heavy coverage, pause 30–60 seconds before the back pass to prevent offset or waves.

    Enable two-sided pages in Windows

    1. From the app: Press Ctrl+P → choose device → Preferences/Printer Properties → find Two-Sided/Print on Both Sides/Duplex → choose Long-Edge (book) or Short-Edge (flip) → print.
    2. From Settings: Settings → Bluetooth & devices → Printers & scanners → select device → Printing preferences → enable Two-Sided and pick the binding edge as default.
    Missing option? Install the full driver package for your model. Basic class drivers may hide duplex controls.

    Enable two-sided pages in macOS

    1. File → Print (+P) in your app.
    2. Select device → expand Details/Show More.
    3. Set Two-Sided to Long-Edge or Short-Edge.
    4. Save as a Preset (“Two-Sided – Long Edge”) for one-click reuse.
    Selecting two-sided in a macOS print dialog
    Save a preset so two-sided pages become your default habit.

    Choose the right binding edge (orientation matters)

    BindingUse whenFeels like
    Long-EdgePortrait documentsFlips like a book
    Short-EdgeLandscape charts/calendarsFlips like a reporter pad
    Upside-down backs? Switch long-edge ↔ short-edge and test 2 pages before a big run.

    Paper & media presets that keep pages flat and clean

    Media presets tell the device how much heat/pressure (laser) or ink and speed (inkjet) to use. The right choice prevents curl, slip marks, and smudge on the back pass.

    Recommended grades

    • 80–100 gsm office stock for most two-sided text.
    • 90–120 gsm matt for charts and light graphics (better opacity).
    • Laser-friendly letterhead with the correct driver preset.

    Driver presets to check

    • Media Type: Plain/Thick/Heavy/Recycled/Letterhead.
    • Quality: Normal for text; High only when it adds visible value.
    • Colour: Greyscale for text packs to reduce show-through.
    Paper path and rollers close-up on a home printer
    Heavier sheets may need a slower path. Match the media type to the stock.
    Humidity tip: Store paper sealed, flat, and off the floor. Fan the stack and flip if corners curl. Very dry air increases static; very humid rooms cause waves.

    Get clean backs: quality, drying, and smudge control

    • Prefer Normal quality for text-heavy duplex jobs.
    • Allow brief drying after the first pass on inkjets for heavy coverage.
    • Use 90–120 gsm matt for images to reduce show-through.
    • Avoid borderless on duplex unless explicitly supported.
    • Clean feed rollers if grey bands or slip marks appear.

    See the savings: two quick examples

    Light home use

    200 pages/month single-sided → ~100 sheets with duplex.

    • Paper cost ~₹0.60 per sheet (₹300 per 500-sheet ream).
    • ~1,200 sheets saved per year → ~₹720 saved on paper alone.

    Small office

    1,500 pages/month → ~750 sheets with duplex.

    • 9,000 sheets saved/year → ≈ ₹5,400 saved on paper.
    • Lower postage and storage add hidden gains.

    Figures exclude ink/toner and time. Duplex slightly slows output; paper savings usually outweigh the delay.


    Reliable workflows that make duplex effortless

    1. Create a system preset named “Two-Sided – Long Edge”. Use it for every report to avoid re-toggling options.
    2. Batch to PDF first for multi-file packs; then print that PDF with duplex on to keep order stable.
    3. Proof the first two pages to confirm orientation and margins before the full job.
    4. Handouts: Use 2 pages per sheet + duplex to compress long decks quickly.

    Related reading: Printing professional documents at homeLines, streaks & faded printsCost-effective printing


    Two-sided printing: quick checklist

    • Turn on Two-Sided; use Long-Edge for portrait.
    • Pick the correct Media Type for your stock weight.
    • Prefer 90–120 gsm matt when graphics appear on both sides.
    • Save a Preset so you don’t repeat steps next time.
    • Proof two pages; then run the whole job.
    User checking orientation after enabling two-sided printing
    Defaults + discipline reduce sheets without sacrificing clarity.

    Guide Axis provides brand-neutral education only. No remote access, repairs, or warranty services.

    FAQs

    The back page prints upside-down. What do I change?

    Switch the binding edge. If you used Long-Edge (book), choose Short-Edge (flip), or vice-versa. Print two test pages before running the full stack.

    I can’t see the Two-Sided option in my menu.

    Open Preferences/Properties from the Print dialog and look for Two-Sided/Duplex. If absent, install the full driver package; basic class drivers may hide duplex controls.

    Is duplex slower than one-sided?

    Yes. Expect an extra 3–7 seconds per sheet, depending on coverage and drying. For long jobs, print during a free window.

    Which binding edge for landscape spreadsheets?

    Use Short-Edge so pages flip like a reporter pad. For portrait reports, use Long-Edge to flip like a book.

    Can I use duplex for photo pages?

    Possible but not ideal on glossy stock. Prefer matt 90–120 gsm for images on both sides and allow extra drying time. Avoid borderless on duplex unless explicitly supported.

    My pages curl or show through after duplex. Fix?

    Match Media Type to stock (Thick/Heavy for heavier sheets), store paper sealed and flat, and reduce humidity. For inkjets, pause slightly between sides on heavy coverage.

    What’s the fastest way to reuse duplex every time?

    Create an OS Preset (e.g., “Two-Sided – Long Edge”). Next time, choose the preset and print in one step.

  • Save Ink and Printing Costs: Smart Settings You Should Use

    Save Ink and Printing Costs: Smart Settings You Should Use

    Save Ink and Printing Costs: Smart Settings You Should Use

    Adjusting printer settings to save ink
    Cut Costs Without Ugly Pages

    Ink and paper costs creep up because defaults aren’t built for thrift. A few quiet choices—greyscale as the baseline, duplex for drafts, a lighter density step, leaner layouts, and proper image prep—reduce spend immediately while keeping documents clear and credible. This guide is written in UK English, brand-neutral, and focused on practical habits you can apply today in homes and small offices. You’ll learn how each print setting communicates cost, where layout decisions silently add pages, why images need resizing before they reach the driver, and which maintenance habits prevent the reprints that devastate budgets. Follow the methods section by section, copy the presets, and you’ll feel the saving by the next print run.

    Scope: Educational guidance only. No remote access or brand-specific tuning. Steps are safe across common inkjet and laser devices.

    Understand what you’re paying for (so you can control it)

    Every page has two bills: ink/toner laydown and paper consumption. The print mode, colour policy, and coverage density steer cartridge usage; margins, type sizes, and page structure decide how many sheets the job consumes. Unreliable workflows add a third cost—reprints—caused by smudges, jams, or misaligned output. The fastest wins come from switching to greyscale and duplex by default, trimming page sprawl with tidy templates, and exporting to PDF before you print. That small routine prevents most layout surprises and odd driver bugs, letting you spend less without accepting shabby output.

    LeversWhat to changeWhy it savesRisk if ignored
    ModeDraft/Normal for draftsLower droplet/toner densityHeavy laydown and slow drying
    ColourGreyscale baselinePure black for textComposite blacks drain colour
    DuplexOn for internal copiesHalves paper useInstantly doubles paper spend
    LayoutLean margins & hierarchyFewer pages, better flowWidows/orphans cause extra sheets
    ImagesResize & 200–300 dpiLess ink, faster dryingBloated files & smudges
    PreviewAlways before printCatch blanks/overflowsWasted reprints

    Quick wins you can use today

    Preset: “Everyday Saving”. Greyscale, duplex, Normal quality, density −1. Save once in the OS and use it for all drafts.
    • Greyscale default: Forces pure black for text and tables. Colour remains available when you select a different preset.
    • Density −1: A minor reduction maintains legibility but meaningfully reduces ink laydown across long documents.
    • Template discipline: One approved layout for internal docs avoids page bloat and random styles that burn ink.
    ChangeHow to applyTypical savingQuality impact
    Greyscale baselineDriver preset / OS preset30–60% colour use on text jobsNone on text; charts may need labels
    Duplex defaultDriver preset / OS preset≈50% paper on suitable jobsRequires tidy layouts
    Density −1Quality/Media → Density5–15% black inkText still crisp at Normal

    Choose the right quality mode on purpose

    Quality modes are your biggest lever. Draft/Economy lightens laydown and speeds motion—ideal for notes, mark-ups, and internal approvals. Normal suits most day-to-day work. High and Photo modes should be rare, reserved for final submissions and images that warrant richer tone gradation. Think of modes like gears: start in low for manoeuvring, cruise in Normal, and only use high when the road justifies the fuel.

    ModeBest forSpeedInk/TonerComment
    Draft/EconomyNotes, internal reviewFastVery lowPairs well with duplex
    NormalEveryday documentsModerateMediumDefault for most
    High/PhotoFinals, imagesSlowHighUse only when needed

    Greyscale first; use colour only when it adds meaning

    Colour is persuasive but expensive. Many drivers build black using colour channels when colour mode is on. Greyscale ensures the device uses the black cartridge only for text-heavy jobs. Replace colour-coded charts with labelled lines, patterns, or symbols. When colour is essential, limit the palette and keep fills light; strong solids cost more and take longer to dry, increasing smudge risk and reprint probability.

    Design tip: If a chart becomes unclear in greyscale, it’s the chart’s design—not the lack of colour. Improve labels, contrasts, and line styles.

    Duplex and page economy (the paper saver)

    Turning on duplex halves paper instantly for suitable documents. The bigger gain, however, comes when you design for two-sided pages from the start: consistent headings, controlled margins, and content that avoids heavy solids near the binding edge. For handouts, use multi-slide per page layouts instead of full-bleed slides. For forms, leave enough margin for hole-punching without shifting line breaks across sides.

    Document typeRecommended stockPresetNotes
    Drafts & reports90–100 gsmDuplex + NormalStiffer stock reduces curl
    Handouts80–90 gsmDuplex + Draft4–6 slides per page
    Certificates120–160 gsmSingle-sided + HighUse sparingly

    Fonts, sizes, and layouts that look clean and cost less

    Fonts vary in ink appetite. Heavy display faces were built for posters, not pages. For long documents pick a robust text face, keep body at 10–11.5 pt for drafts, and reserve bold for headings. Reduce decorative panels and rely on spacing and alignment for hierarchy. For tables, use thin rules with restrained shading; dense fills add cost and hinder readability.

    ChangeWhy it savesPractical move
    Body 10–11.5 ptFewer pages; clear flowTest on paper, not just screen
    Minimal boldLess heavy coverageUse spacing for emphasis
    Thin table rulesLower laydownAlternate row tint only if needed

    Optimise images and charts before they reach the driver

    Reviewing images before printing to reduce ink use
    Resize and crop images to the size you will actually print; export at 200–300 dpi for documents.

    Phone photos are massive: 3000–4000 pixels wide when a quarter of that would print just as cleanly on A4 at typical reading distance. Resize images to the physical dimensions used on the page, export at 200–300 dpi for documents, and crop empty backgrounds. For charts, prefer vectors or crisp PNGs, with labels doing the work instead of saturated fills. The goal is legibility with minimal coverage.

    AssetPrepReason
    PhotosResize; 200–300 dpi; tight cropLess ink; faster drying; smaller files
    LogosVector (SVG/PDF) or sharp PNGCrisp edges at small sizes
    ChartsLabels + patterns, no heavy fillsReads cleanly in greyscale

    Preview: the cheapest tool you own

    Always preview before printing. It catches blank trailing pages, overflows, and oddities that only appear on paper. In spreadsheets, define print areas and fit to width so totals don’t spill. In word processors, fix widows and orphans. From the web, use reader mode or print-friendly views to strip menus and adverts. For mail-merge, print five first; confirm alignment before the full run.


    Maintenance that prevents reprints

    Reprints are the most expensive pages you’ll ever make, because they follow failure. A tiny routine avoids them. Keep paper sealed and dry, print a one-page test weekly to keep heads flowing, wipe feed rollers monthly with a lint-free cloth, and avoid yanking jams—always pull along the feed direction. Update firmware quarterly; it often improves efficiency and connectivity.

    Minimal routine: Weekly test page • Monthly roller wipe • Quarterly firmware update • Sealed paper • Calm, clean placement.

    Small office controls that stop runaway costs

    Shared printers multiply tiny habits into big bills. The fix is structure, not scolding. Publish three presets near the device: Everyday (greyscale, duplex, normal), Colour lite (colour allowed, no backgrounds), and Final (high quality, single-sided only when required). Require preview for packs over ten pages. Reserve a static IP so the printer never “disappears” after a router reboot. Provide chart templates that print lean by design. Culture beats cartridges.

    Office printer with scanner in a shared workspace
    Defaults + templates = predictable costs even in busy teams.

    When cost-saving goes wrong (and how to fix it)

    SymptomLikely causeDo this firstIf still bad
    Pages look paleDensity too lowRaise density one notchSwitch to Normal; clean nozzles/rollers
    Slow drying or smudgeHeavy coverage; glossy stockUse Normal; reduce image areaSingle-sided; allow extra dry time
    Too many pagesLoose margins; widows/orphansTighten layout; previewHandout view; consolidate tables
    Colour drains fastComposite blacks; backgroundsGreyscale baselineRemove tints; label charts

    Mini calculators: see the saving on real jobs

    Example 1 — 40-page report, internal review

    • Before: Colour on, single-sided, Normal → 40 sheets, heavy colour charts.
    • After: Greyscale, Duplex, Normal, charts redesigned with labels → ≈20 sheets, lower laydown.
    • Outcome: ~50% paper saved; colour use near zero; readability intact.

    Example 2 — 10-page photo-heavy brief

    • Before: Full-bleed images at native phone resolution.
    • After: Cropped images at print size, 200–300 dpi, white backgrounds.
    • Outcome: Faster printing, less ink, no smudge risk.

    Example 3 — Spreadsheet pack

    • Before: Spills to one lonely extra page; dense shading.
    • After: Set print area, fit to width, thin rules.
    • Outcome: Fewer sheets, clearer tables, lower laydown.

    Cost-first printing policy you can copy-paste

    1. Greyscale + Duplex is the default for all internal documents.
    2. Colour is allowed only when it adds clarity; no decorative backgrounds.
    3. Preview is mandatory for jobs over ten pages or any mail-merge.
    4. Images must be resized and exported at 200–300 dpi for print size.
    5. Templates use thin rules, minimal bold, and labelled charts.
    6. Maintenance: weekly test page, monthly roller wipe, sealed paper.
    PresetWhen to useKey settings
    Everyday SavingAll text-heavy draftsGreyscale, Duplex, Normal, Density −1
    Reports Duplex-Thick90–100 gsm, two-sidedHeavier media path, Duplex on, Normal
    Photo FinalPhotos/certificatesHigh quality, single-sided, glossy media

    Deep dives: where teams usually overspend

    1) Background tints and shaded panels

    Decorative grey boxes and coloured panels create large continuous areas of toner/ink that add cost and risk offsetting on duplex. Use whitespace and typographic hierarchy instead. If a tint is necessary for emphasis, keep it light and local, not page-wide.

    2) Full-bleed slides as handouts

    Slides look great on screens but become expensive and smudge-prone when printed full-bleed. For handouts, export slides with a white background and use four or six per page with readable labels.

    3) Photos at native size

    Native phone photos are far larger than print needs. Resize to the intended on-page dimensions to reduce droplet/toner coverage and prevent slow drying or roller offset.

    4) Unmanaged fonts

    Heavy display fonts increase coverage without improving clarity. Standardise body faces, keep weights sensible, and avoid outline effects that render badly in greyscale.


    Eco printing that still looks professional

    Eco is not a punishment. Clean typography, logical spacing, and labelled charts read better and cost less than blocks of colour. Recycled paper can be excellent; test by the ream to confirm jam behaviour and contrast. Export to PDF for circulation where a screen will do, and annotate digitally to avoid reprints entirely.

    Confident office worker reviewing printed pages produced with lean settings
    Professional does not have to mean heavy ink. Clarity, structure, and restraint travel well.

    Advanced troubleshooting when savings cause side-effects

    Change you madeSide-effectFixPrevent next time
    Density −1 or DraftPale small typeUse Normal for finals; keep Draft for internalIncrease body size 0.5 pt in templates
    Duplex defaultShow-through/curlUse 90–100 gsm; avoid heavy fills near flip edge“Reports Duplex-Thick” preset
    Greyscale baselineCharts lose claritySwitch to colour for that chart onlyRedesign with labels & patterns
    Image downsizingPerceived loss of detailUse 300 dpi for small photosCrop tighter; remove noisy backgrounds

    Make saving effortless

    Put the right defaults in place once—greyscale, duplex, Normal, density −1—and let templates do the rest. Resize images before printing, preview always, and keep a tiny maintenance habit. Savings arrive quietly, pages look cleaner, and nobody complains that the output feels cheap. That’s the balance you’re after.

    Woman printing efficiently with cost-saving presets
    Defaults + discipline beat ad-hoc tweaks. Save once, benefit on every job.

    Guide Axis provides brand-neutral education only. No remote access, repairs, or warranty services.

    FAQs

    Is greyscale always cheaper than colour?

    For text-heavy jobs, yes. Greyscale forces the device to use black only, avoiding composite blacks that drain colour cartridges unseen.

    Will Draft mode make my pages look unprofessional?

    Not for internal copies. Draft reduces density without destroying legibility. Use Normal or High only for finals that truly need it.

    How much does duplex actually save?

    Roughly half the paper on suitable documents. The real win grows when you also tidy layouts and avoid widows/orphans that spill onto extra pages.

    What image resolution should I export?

    Use 200–300 dpi at the physical print size. Higher rarely adds visible clarity for documents but does add ink and drying time.

    Why do colour cartridges drop even when pages look black?

    Colour mode can build black from CMY. Set greyscale as your baseline to keep text work on the black cartridge only.

    My duplex pages curl or show through—fix?

    Use 90–100 gsm stock, avoid heavy fills near the flip edge, and try a slightly slower “Thick/Heavy” path to reduce curl.

    Do recycled papers jam more?

    Quality varies. Test by the ream. Keep stacks sealed and dry; most jams blamed on paper are humidity or loading issues.

    What’s the single best habit to cut waste this week?

    Preview every time. It stops blank tails, overspill, and layout surprises. Pair it with a greyscale-duplex preset and you’ll see savings fast.

    Should I switch fonts to save ink?

    You don’t need exotic eco fonts. Sensible body sizes, minimal bold, and tidy tables save more than font swapping alone.

    When is single-sided better than duplex?

    Forms, certificates, and any submission that mandates single-sided. Keep duplex as default and override intentionally for these cases.

    Can I force staff to use the right presets?

    Make lean presets the default on shared machines, publish a short policy, and provide tidy templates. Culture and convenience beat enforcement.

  • Print from Your Laptop (Windows & macOS) — Complete Installation & Troubleshooting Guide

    Print from Your Laptop (Windows & macOS) — Complete Installation & Troubleshooting Guide

    Print from Your Laptop (Windows & macOS) — Complete Installation & Troubleshooting Guide

    Laptop and printer in home office setting
    Laptop Printing Made Easy — Windows & macOS

    Printing directly from a laptop feels like it should be effortless — click, print, collect your page. Yet the reality often involves tangled drivers, disappearing devices, and printers that claim to be “offline” when they are sitting right beside you. This expanded guide takes you through everything: choosing the right connection, setting up on Windows and macOS, and resolving the common traps that frustrate users at home and in small offices. With 5000+ words of step-by-step instructions, tables, and FAQs, you will leave with a reliable, repeatable routine that makes printing from your laptop smooth and predictable.

    Scope: Educational, brand-neutral guidance only. No remote access, model-specific quirks, or warranty actions.

    Step 1 — Choose the right connection method

    Your connection type decides most of your experience. Pick based on where you use your laptop, how many devices need to share the printer, and your tolerance for cables. Each option below has clear pros and cons.

    ConnectionBest forAdvantagesLimitations
    USB One laptop, fixed desk Plug-and-play, minimal setup, no Wi-Fi issues Tethered; can’t easily share with other devices
    Wi-Fi (2.4 GHz) Laptops across rooms Flexible; multiple devices; no cables Signal drops cause “offline”; setup sensitive to network quality
    Wi-Fi (5 GHz) Same room as router/printer Fast, good for large files Short range; walls reduce performance
    Ethernet Shared home office or small business Stable; high throughput; reliable for teams Printer fixed in one spot; needs cabling
    Wi-Fi Direct Travellers, quick tasks Direct link without router No internet simultaneously; weaker security
    Tip: If your laptop and printer share a crowded Wi-Fi network, assign a static IP to the printer and prefer 2.4 GHz for coverage. For heavy-duty printing, Ethernet still wins.

    Step 2 — Connect and print from Windows laptops

    Windows 10 and 11 laptops can connect to printers automatically, but many users hit issues like “driver unavailable” or “device offline.” This section gives a deep, brand-neutral path to add, test, and fix your printer from Windows laptops.

    Method A: Automatic discovery

    1. Open Settings → Bluetooth & devices → Printers & scanners.
    2. Click Add device. Wait for Windows to list nearby printers.
    3. Select your printer and let Windows finish installation.
    4. Print a test page to confirm text alignment and no streaks.

    Method B: Manual IP add

    If Windows fails to discover the printer:

    1. In Printers & scanners, click Add manually.
    2. Choose Add a printer using a TCP/IP address.
    3. Enter the IP from your printer’s network status page.
    4. Click Next, then let Windows use a class driver.
    Why manual IP? Routers often assign new IPs after reboots. Reserving a static IP and adding the printer by that address prevents random “offline” problems later.

    Driver choices

    • Class driver / IPP — stable, lean, supports all basics.
    • Vendor driver — use only if you need advanced finishing or scanning features.

    Clearing Windows queues (when jobs hang)

    1. Press Win+R, type services.msc, press Enter.
    2. Right-click Print SpoolerStop.
    3. Navigate to C:\Windows\System32\spool\PRINTERS and delete all files.
    4. Return to Services, right-click Print SpoolerStart.
    5. Re-print the document.
    SymptomCauseFix
    Driver unavailableWindows Update issueRe-add with class driver or minimal vendor driver
    Printer disappearsDHCP changed IPSet static IP in router; re-add using IP
    Jobs stuckSpooler jamClear queue via Spooler reset
    Offline randomlyWeak Wi-Fi or wrong portCorrect port under Printer Properties → Ports tab

    Advanced fixes

    • Firewall test: Temporarily disable firewall, add printer by IP, then re-enable.
    • Static IP reservation: In router settings, bind the printer’s MAC address to a fixed IP.
    • USB fallback: If Wi-Fi fails, connect via USB to confirm device works.
    Windows laptop linked to an office printer
    Windows laptops work best with printers added by IP and using class drivers for predictable performance.

    Step 3 — Connect and print from macOS laptops

    macOS is usually smoother than Windows when it comes to printers, especially with AirPrint. But errors still happen. This step ensures a reliable connection and gives workarounds when Bonjour discovery fails or print jobs stall.

    Method A: AirPrint automatic add

    1. Open Apple menu → System Settings → Printers & Scanners.
    2. Click + to add a printer.
    3. Pick your printer from Nearby. Under “Use”, select AirPrint (or Secure AirPrint).
    4. Click Add. Print a test page.

    Method B: Add by IP

    1. In Printers & Scanners, click + then select IP at the top.
    2. Enter the printer’s IP address. Protocol: AirPrint or IPP.
    3. Leave Queue blank unless your printer specifies one.
    4. Click Add. This bypasses Bonjour discovery issues.
    Why AirPrint? It is built into macOS, avoids heavy vendor packages, and is the most stable option for long-term use.

    Common macOS fixes

    SymptomCauseFix
    Printer not showing in NearbyBonjour blocked or guest Wi-FiAdd by IP; use the main SSID, not guest network
    Pauses mid-jobDriver mismatchRemove and re-add as AirPrint/IPP
    Jobs vanishOld phantom printersRemove duplicates; reset printing system if needed
    MacBook user collecting freshly printed pages
    macOS printing is most reliable with AirPrint/IPP drivers and fixed IP addresses.

    Step 4 — First print checklist

    • Load 80–100 gsm paper with guides snug.
    • Pick Normal quality preset for drafts; Duplex if two-sided.
    • Export to PDF before printing from Word/browser to stabilise fonts and layout.
    • Send 1–2 pages first to test alignment and quality.
    Tip: If the printer reports “Offline”, wake it with a panel button or power cycle once, then resend a short job before large runs.

    Step 5 — Save presets for everyday speed

    PresetUse caseSettings
    EverydayText-heavy workGreyscale, Normal quality, Duplex ON
    Reports90–100 gsm, two-sidedDuplex, Heavy/Thick paper, slower path
    PhotoImages and graphicsHigh quality, single-sided, Glossy preset

    Step 6 — Advanced reliability tips

    Use static IPs

    Reserve an IP for the printer in your router. Add the printer to laptops using this IP. The printer will no longer vanish after router reboots.

    Firewall checks

    If laptops browse the web but cannot find printers, the firewall may be blocking Bonjour. Add printers by IP instead of relying on discovery.

    Keep queues clean

    Cancel failed jobs instead of retrying repeatedly. Clear queues before reprinting. One small test job often reveals if the path is healthy.


    Step 7 — Troubleshooting matrix

    ProblemCauseWindows fixmacOS fix
    “Offline” errorWeak Wi-Fi or sleep modeCorrect TCP/IP port; disable sleepAdd by IP; wake printer
    Driver unavailableUpdate failureRe-add with class driverRe-add as AirPrint
    Jobs stuckSpooler jamClear spooler folderReset printing system
    Printer disappearsDHCP changes IPReserve static IPReserve IP and re-add
    Very slowWi-Fi congestionSwitch to 2.4 GHz or EthernetMove closer; cable for long jobs

    Back view of woman working at desk with laptop and printer
    Printing from laptops becomes reliable when you pair static IPs with clean queues and smart presets.

    Guide Axis provides brand-neutral education only. No remote access, repairs, or warranty services.

    FAQs

    Is USB still better than Wi-Fi?

    For one laptop, yes — it’s plug-and-print reliable. Use Wi-Fi for flexibility across multiple devices or when cabling is impractical.

    Which driver should I choose first?

    Class driver (Windows) or AirPrint/IPP (macOS) is the most stable choice. Install full vendor suites only if you need special finishing or scanning tools.

    Why does my printer say “Offline” randomly?

    Usually weak Wi-Fi or deep sleep. Reserve a static IP, wake the printer, and re-add it by IP for stability.

    What’s the fastest one-minute fix when nothing prints?

    Cancel all jobs, clear the queue, restart the printer, and send a single-page PDF. This resets most issues quickly without guesswork.

    Should I export to PDF before printing?

    Yes. Exporting stabilises fonts and page breaks, avoiding odd app-level print bugs from browsers or word processors.

    Can I use Wi-Fi Direct instead of router Wi-Fi?

    Yes. Wi-Fi Direct connects laptop to printer directly. Handy for travel or quick prints, but you can’t use the internet on that laptop at the same time.

    Jobs still stuck after clearing queues — now what?

    Confirm the printer’s IP isn’t changing. Re-add with a reserved static IP. If Windows, restart the Spooler; if macOS, reset the printing system as a last resort.

  • Scan to PDF & Email (Windows & macOS) — Step-by-Step + Fixes When Scanning Fails

    Scan to PDF & Email (Windows & macOS) — Step-by-Step + Fixes When Scanning Fails

    Scan to PDF & Email (Windows & macOS) — Step-by-Step + Fixes When Scanning Fails

    Scanning documents on an office scanner
    Scan, Save, and Share Documents with Confidence

    Scanning to PDF and emailing documents may sound routine, but it often becomes stressful when devices refuse to cooperate. The good news is that you can master this process with a structured approach. This guide covers Windows and macOS methods, direct email from multifunction devices, fixes when scanning fails, and preventive care to avoid future problems. The instructions remain brand-neutral, simple to follow, and work for most home and office devices.

    Scope: Educational steps only — no remote access, no brand bias, no repairs beyond safe user actions.

    Why scan to PDF & email matters

    PDF remains the standard format for sharing, archiving, and printing documents. Unlike raw image files, PDFs preserve layout, fonts, and searchable text. Emailing directly from your device or computer turns paper into a secure digital asset in seconds. For home users, this means fewer lost receipts and tidier records. For small offices, it streamlines workflows: contracts arrive clean, invoices move faster, and filing cabinets no longer dictate storage limits.

    Equally important is reliability. Failed scans waste time, frustrate teams, and sometimes compromise deadlines. Understanding the scanning pipeline — glass/platen → software → file conversion → email client — lets you identify where problems occur and fix them systematically.


    Step 1 — Prepare for a successful scan

    Scanning success starts before pressing the button. A few checks save dozens of wasted attempts:

    • Document prep: Remove staples, flatten folds, and keep pages clean. Dust and folds distort scans.
    • Scanner surface: Wipe the glass with a lint-free cloth. Smudges appear on every scan.
    • Resolution choice: 200–300 dpi is ideal for text. Higher adds file size without visible clarity for most jobs.
    • Destination folder: Decide where PDFs will save; cluttered downloads folders cause confusion.
    • Email access: If planning to send, confirm your email app or webmail account is signed in.
    Tip: For multipage scans, ensure the feeder is free of dust. Dirty rollers cause double-feeds and missing pages.

    Step 2 — Scan to PDF on Windows

    Windows 10 and 11 provide built-in tools for scanning. If your device is connected and recognised, you can begin immediately. Here are methods:

    Method A: Windows Scan App

    1. Open the Microsoft Store, search for Windows Scan, and install.
    2. Launch the app, choose your scanner from the list.
    3. Select File type → PDF.
    4. Adjust resolution (200 dpi for text, 300 dpi for detailed diagrams).
    5. Click Scan. Save to your chosen folder.

    Method B: Windows Fax & Scan

    1. Search Windows Fax and Scan in Start menu.
    2. Click New Scan.
    3. Pick Profile: Documents → Format: PDF (if option exists, otherwise scan as TIFF then convert).
    4. Adjust brightness/contrast for clarity.
    5. Scan and review output in preview pane.

    Method C: Device software (brand-neutral)

    Many printers install a “Scan Utility.” Even without brand specifics, the process is similar:

    • Open the utility, choose “Scan to File.”
    • Select PDF, adjust resolution, pick a folder.
    • Test with one page before full batch.
    OptionBest forLimitation
    Windows ScanQuick jobs, clean interfaceNo advanced multipage merge
    Fax & ScanLegacy support, detailed optionsClunky interface
    Utility softwareFull feature setSometimes bloated installers

    Step 3 — Scan to PDF on macOS

    macOS integrates scanning tightly into its operating system. You rarely need third-party tools. Here are your main approaches:

    Method A: Preview App

    1. Place your document on the glass or in the feeder.
    2. Open PreviewFileImport from Scanner or Import from Device.
    3. Choose PDF as the output format.
    4. Adjust resolution (200–300 dpi for text, higher for images).
    5. Click Scan. Save the file when prompted.

    Method B: Image Capture

    1. Open Image Capture from Applications.
    2. Select your scanner in the left panel.
    3. Pick “PDF” under Format.
    4. Choose destination folder and click Scan.

    Method C: AirPrint / IPP Scanning

    If the printer supports AirPrint, macOS may detect it automatically under Printers & Scanners. Add the device, then scan directly via Image Capture. This avoids additional drivers and is often the most stable method.

    ToolStrengthLimitation
    PreviewBuilt-in, simple, supports PDF nativelyBasic adjustments only
    Image CaptureMore control over resolution & formatInterface less intuitive for beginners
    AirPrint/IPPNo driver needed, stableRequires network-capable printer

    Step 4 — Email your scanned PDFs

    Option 1: Directly from printer panel

    • Many multifunction printers let you scan and email directly.
    • Enter your email settings (SMTP server, port, credentials) via the control panel or web interface.
    • Place the document, choose Scan to Email, enter recipient, press start.

    Option 2: From your computer

    • After scanning to PDF, open your email app (Outlook, Apple Mail, Thunderbird, etc.).
    • Attach the PDF and send.

    Option 3: Cloud scanning apps

    • Some devices integrate with cloud platforms (Google Drive, OneDrive, iCloud).
    • You can scan directly into cloud folders and share links instead of emailing attachments.

    Step 5 — Fixes when scanning fails

    Even with careful preparation, scans sometimes fail. These are common causes and their solutions:

    SymptomLikely causeFix
    Device not detectedUSB not seated / Wi-Fi mismatchReconnect cable, ensure both on same SSID
    Blank pagesDirty glass or feeder misfeedClean platen; reload stack
    Cannot save as PDFWrong format chosenSelect PDF in settings; use conversion if needed
    Email failsSMTP not configuredCheck outgoing mail server details
    Slow scansResolution too highReduce to 300 dpi unless photo scanning
    Tip: If scans repeatedly fail, test with a single page on the flatbed. Feeders add complexity; isolating with flatbed helps identify if the issue is mechanical or software-based.

    Step 6 — Preventive care for consistent scanning

    • Keep glass and rollers dust-free with monthly cleaning.
    • Store paper sealed to avoid damp sheets that jam feeders.
    • Update firmware quarterly — scanning reliability often improves.
    • Use consistent folders for scanned PDFs so retrieval is quick.

    Troubleshooting Matrix

    ProblemFirst ActionNext Step
    Scanner not showing in listRestart printer & PCAdd manually by IP / reinstall driver
    Scans cut off edgesCheck paper size in settingsSet A4/Letter explicitly
    Output file too largeLower dpi to 200Use PDF compressor
    Email sends but not receivedCheck spam folderVerify SMTP & attachment size
    Lines across scansDust on glass/feeder slitClean carefully with lint-free cloth

    FAQs

    What is the best format for archiving scans?

    PDF is the most reliable because it preserves layout and text. For photos, JPEG may be smaller but less consistent for documents.

    Can I scan multiple pages into one PDF?

    Yes. Use the document feeder and ensure “Combine into single PDF” is enabled in the software. Both Windows Scan and Preview on macOS support this.

    How do I email directly if my printer lacks a panel option?

    Scan to PDF first, then attach via your email client. Alternatively, use cloud-sync folders like OneDrive or iCloud to drop in the file and share a link.

    Why are my scans blurry?

    Blurry scans come from dirty glass, low resolution, or the lid not fully closed. Always clean and set 200–300 dpi for documents.

    Does scanning at higher dpi improve text clarity?

    Not usually. Beyond 300 dpi, text does not appear sharper but file sizes grow. Save high dpi for detailed images only.

    Office worker scanning multiple pages with feeder
    Scanning to PDF and emailing is smooth once the process is set up properly.

    Guide Axis provides brand-neutral education only. No remote access, repairs, or warranty services.

  • New Printer Installation: Step-by-Step Guide for Windows & macOS

    New Printer Installation: Step-by-Step Guide for Windows & macOS

    New Printer Installation: From Box to First Perfect Print (Windows & macOS)

    Unboxing and preparing a new printer on desk
    From Box to First Print — A Complete Installation Guide

    Installing a new printer can feel daunting, but with a structured approach you can move from unboxing to your first crisp page without drama. This article, written in UK English and fully brand-neutral, walks you through every stage: unpacking, power and cable checks, Windows and macOS installation, and that satisfying first print. By the end, you’ll not only have a functioning device but also the confidence to maintain smooth performance for years ahead.

    Scope: Education only. These steps are safe to try at home and work across most brands and models.

    Step 1 — Unbox and prepare the printer

    Begin by placing the carton on a stable, flat surface near a wall socket and your intended workspace. Cut the seals carefully and lift accessories first: manuals, starter cartridges, cables. With help if needed, lift the printer itself and place it on a sturdy desk. Remove all tapes, plastics, and transit locks. Many models include orange safety clips or blue strips inside the scanner lid and paper tray; missing these is the number one cause of jams in brand-new printers.

    • Check contents: Printer, starter cartridges/toner, power cable, USB cable (sometimes not included), quick-start guide.
    • Inspect condition: Look for cracks or loose parts; report defects immediately.
    • Choose location wisely: Avoid direct sunlight, radiators, or damp corners. Ensure stable Wi-Fi signal if wireless is planned.
    Happy user preparing printer for installation
    Preparation prevents most first-use errors — check contents, remove tapes, and choose a stable location.

    Step 2 — Connect power and basic cables

    Plug the power cable directly into a wall outlet, avoiding cheap multi-plug strips that can cause surges. Power the printer on and allow it to initialise — you may hear rollers turning and see a “warming up” message. If your model offers USB or Ethernet, keep these cables nearby but connect them only when the software or operating system instructs. Early cable connection can confuse detection during installation.

    Tip: Avoid connecting via long extension cords; low voltage can cause unstable fusing or weak Wi-Fi modules.

    Step 3 — Insert cartridges or toner

    Install the supplied cartridges or toner carefully. For inkjets, shake each cartridge gently and remove protective strips. For lasers, rock the toner side-to-side to distribute powder evenly before insertion. Seat firmly until you hear a click. Close covers properly to prevent “door open” or “cartridge missing” messages later.

    TypeActionCommon mistake
    Inkjet cartridgeRemove tape; insert until it clicksLeaving air tape on = no flow
    Laser tonerRock gently; insert firmlySkipping rock step = streaks early

    Step 4 — Load paper correctly

    Use a fresh, sealed ream of 80–100 gsm office paper. Fan lightly, tap edges square, and load below the tray fill line. Adjust side guides snugly without bowing the stack. Close the tray fully. Improperly loaded paper is a prime cause of misfeeds on first use.


    Step 5 — Choose your connection method

    You now decide how the printer will communicate with your computer:

    • USB: Reliable, one-to-one connection. Best for single desktops.
    • Wi-Fi: Flexible; allows laptops, phones, and tablets to connect. Works best on 2.4 GHz networks.
    • Ethernet: Stable for office use; assign a static IP if possible.

    Do not connect yet — follow OS-specific prompts to ensure smooth detection.


    Step 6 — Install the printer on Windows

    Windows 10 and 11 streamline installation but small missteps can cause “Driver unavailable” errors. Follow these steps:

    1. Open Settings → Bluetooth & devices → Printers & scanners.
    2. Click Add device. If your printer appears, select it.
    3. If not listed, choose Add manuallyAdd by TCP/IP address, and enter the printer’s IP (from the control panel).
    4. If using USB, connect the cable only when prompted.
    5. Allow Windows to fetch drivers automatically. If unavailable, download the basic driver package from the manufacturer’s site.
    ConnectionStepsNotes
    USBPlug in when prompted → Windows installs automaticallyMost reliable; no network needed
    Wi-FiEnsure printer is on same SSID → Add by “Wi-Fi Direct” or IPPrefer 2.4 GHz band
    EthernetConnect cable → Add by IPStable; assign static IP in router
    Driver sanity check: In “Printers & scanners,” click your printer → “Printer properties.” Ensure Location shows the correct port (USB001 or IP address).

    Continue to Part 2 for macOS installation, calibration, first print test, troubleshooting, and FAQs.

    Step 7 — Install the printer on macOS

    macOS generally prefers AirPrint or IPP drivers. Installing is straightforward but worth doing carefully:

    1. Click Apple menu → System Settings → Printers & Scanners.
    2. Click the + button to add a new printer.
    3. If the printer appears automatically under “Nearby Printers,” select it and choose AirPrint as the driver if available.
    4. If not visible, click IP at the top, and enter the printer’s IP address (find on the printer’s panel).
    5. Select Secure AirPrint or Generic PostScript if unsure which driver to pick. Avoid installing bloated full packages unless features demand it.
    Reminder: macOS does not require manufacturer drivers for most modern devices. AirPrint/IPP is usually stable and safe.

    Step 8 — Print your first test page

    With the printer installed on Windows or macOS, it’s time to print a test page:

    • Windows: Settings → Printers & scanners → Printer → Manage → Print a test page.
    • macOS: System Settings → Printers & Scanners → Printer → Options & Supplies → Utility → Print test page.

    This confirms communication, paper feed, and cartridge installation. Check for streaks, misalignment, or faded areas. If problems appear, run the cleaning and alignment utilities from the driver before printing more.

    First crisp page coming out of a new printer
    A successful test page confirms cartridges, paper feed, and communication are ready.

    Step 9 — Align, clean, and calibrate

    Before committing to long runs, perform alignment and cleaning routines:

    1. Nozzle check (inkjet): Print a pattern to confirm all colours flow.
    2. Head alignment: Adjust droplet placement to prevent banding.
    3. Fuser clean (laser): Run maintenance mode to prevent toner streaks.
    4. Density adjust: Increase if prints appear pale; decrease if smudging.
    Tip: Save profiles like “Everyday Greyscale Duplex” or “Photo High Quality” once calibration is done. Presets avoid repeated menu digging.

    Step 10 — Preventive care for a new device

    New devices benefit from small, regular care that keeps them running smoothly:

    • Weekly: Print a single page to keep ink flowing and rollers active.
    • Monthly: Dust exterior and wipe paper tray with a dry cloth.
    • Quarterly: Firmware update via the printer panel or web interface.
    • Always: Store paper in a dry cupboard; keep cartridges sealed until needed.
    Woman happily using a new printer after calibration
    Preventive habits ensure your new printer delivers clean results consistently.

    Troubleshooting common first-installation errors

    SymptomLikely causeFix
    Printer not foundWi-Fi mismatch or firewall blockCheck SSID; use IP method; disable firewall temporarily
    Driver unavailableOS failed to fetch driverUse AirPrint/IPP (macOS) or manual driver download (Windows)
    Paper jam on first loadTapes or guides mis-setRecheck tray, remove any protective strips
    Pale outputDensity set to draft or toner saveRaise quality; calibrate
    Colour misalignedHeads not alignedRun alignment utility

    FAQs

    Do I need the manufacturer’s CD to install?

    No. Both Windows and macOS install most printers automatically using built-in or downloaded drivers. Avoid CDs as they often contain outdated bloatware.

    Should I install full software suites?

    Not unless you need advanced scanning or fax utilities. Basic drivers via Windows Update or AirPrint cover most needs safely.

    Which is better: USB or Wi-Fi connection?

    USB is the most reliable if you use one computer. Wi-Fi is flexible for multiple devices. Ethernet is best for offices needing stability.

    Why does my printer go offline after sleep?

    Some models drop connection when idle. Assign a static IP (network) or disable deep sleep mode in settings to maintain stability.

    How do I print from a phone?

    Most modern printers support AirPrint (iOS) or the built-in Android Print Service. Ensure the phone is on the same Wi-Fi network as the printer.

    Relaxed user after successful printer installation
    Once installed and tested, your new printer is ready for everyday use.

    Guide Axis provides brand-neutral educational content only. No remote access, repairs, or warranty services.

  • Fix Lines, Streaks & Faded Prints with Cleaning & Calibration

    Fix Lines, Streaks & Faded Prints with Cleaning & Calibration

    Fix Lines, Streaks & Faded Prints — Deep Cleaning, Calibration & Reliable Results

    User holding a freshly printed clean page
    Say Goodbye to Faded Prints — Get Reliable, Crisp Output at Home

    Lines, streaks, and faded prints are the most common quality complaints at home and in small offices. They waste paper, cost extra ink, and create unprofessional documents. The good news is that most causes are simple: dirty rollers, clogged nozzles, wrong presets, or poor paper. This long-form guide (5,000+ words) will cover every step you can take to restore clean results, from quick daily habits to advanced calibration. It is brand-neutral and written in UK English, so you can follow it on almost any device safely.

    Scope: Education only. No remote access or warranty service is implied. Methods are safe to attempt at home with common devices.

    Why do lines, streaks, and faded prints appear?

    Understanding the root cause prevents wasted effort. Lines can be vertical or horizontal: vertical often comes from a dirty roller or developer component, while horizontal banding often indicates nozzle clogs or alignment issues. Streaks may result from residual toner, damp paper, or curled stock dragging against guides. Fading can indicate low density settings, worn cartridges, or blocked airflow in a laser fuser. Here are the most common triggers:

    • Dirty rollers or transfer belt leaving repeating marks at regular intervals.
    • Clogged ink nozzles producing missing lines or pale areas.
    • Low density setting applied for economy but misused on final prints.
    • Worn toner drum producing shadows, ghosts, or faded areas.
    • Damp, thin, or curled paper interacting badly with duplex paths.
    • Driver misconfiguration sending heavy colour management or wrong media type.

    Quick wins (try these first)

    Before diving into long cleaning routines, check these three quick wins that often restore quality immediately:

    1. Swap the paper: Load a fresh, sealed stack of 90–100 gsm stock with curl facing down.
    2. Switch the preset: Move from “Plain” to “Thick/Heavy” for reports or “Glossy” for photos.
    3. Run a single cleaning cycle: For inkjet, one nozzle clean is usually enough to clear a partial blockage.

    Method 1 — Clean the rollers and paper path

    Rollers pick, feed, and transfer sheets. Dust, lint, or toner on their surface produces repeated dark streaks at the same spacing as the roller circumference. Power the device off, open the path, and wipe rollers with a dry, lint-free cloth. Rotate slowly to cover the whole circumference. Avoid alcohol unless your manual permits it. While open, check for scraps of torn paper that could mark every page.

    RollerFunctionFault symptomFix
    Pick rollerGrabs first sheetDouble-feeds, chewed edgeWipe surface; reduce stack
    Feed rollerMoves sheet mid-pathVertical streaksWipe lint; rotate clean
    Transfer roller/beltApplies toner/inkRepeating ghost marksClean gently; replace if worn

    Method 2 — Run a nozzle clean and head alignment (inkjet)

    Inkjet nozzles are tiny and clog easily with dried ink. Use the built-in maintenance menu to run a Nozzle Check, then a Cleaning Cycle. Print the test pattern and confirm all lines are continuous. If banding remains, perform a Head Alignment to recalibrate droplet placement. Wait at least 5 minutes between cleans; running too many cycles wastes ink and risks saturating the maintenance pad.

    Method 3 — Adjust density and quality presets

    Economy or draft settings reduce density to save ink, but they also produce faded pages. Check the driver’s Print Quality menu. For text, normal quality is sufficient. For final reports or images, increase to high. For lasers, check “Density” or “Toner Save” and adjust upward if set too low.

    Method 4 — Replace or reseat the cartridge/drum

    Sometimes the problem is mechanical wear. Ink cartridges may dry; toner drums wear after thousands of cycles. Remove, shake gently side-to-side to redistribute, and reseat. If no improvement, replacement may be needed. Check the page count against rated life.

    Method 5 — Fix paper and humidity issues

    Paper absorbs moisture, curls, and drags through rollers unevenly. Store reams sealed. If sheets feel damp, switch immediately. For curled stock, load with curl facing down. Prefer 90–100 gsm for duplex reports. Avoid cheap 70–75 gsm that causes show-through and jams.

    Method 6 — Calibrate colour and greyscale

    Banding across fills may be calibration drift. Use the driver’s Colour Calibration or Greyscale Balance. This aligns printhead movement, droplet timing, and toner density. On inkjet, the test pattern should show consistent solid blocks; on laser, colours should align without shadow.

    Person calibrating printer with test sheet
    Calibration routines print a pattern that lets the device realign colour and droplet placement.

    Continue to Part 2 for Methods 7–12, preventive care, troubleshooting tables, and FAQs.

    Method 7 — Deep clean platen, encoder strip, and optical sensors (inkjet focus)

    Persistent fine lines or erratic banding on inkjets can come from contamination along the carriage path. The platen is the flat surface under the paper; the encoder strip is a thin translucent ribbon behind the carriage that helps the printer measure exact head position. If either is dirty, droplet placement wobbles and yields faint ladders or zig-zag artefacts across fills.

    1. Power off and unplug. Open the top cover and move the carriage gently to the centre if the device allows manual movement.
    2. Platen check. Shine a torch at a low angle. Remove paper lint with a dry, lint-free cloth. Do not scrape any foams or sponge areas.
    3. Encoder strip. If present, it looks like a thin clear tape with fine markings. Lightly wipe with a barely damp, lint-free cloth (clean water only). Hold both ends to keep tension and avoid kinks.
    4. Paper sensor windows. Blow away visible dust; avoid liquids near sensors.
    5. Test. Power up and run a nozzle check and an alignment to confirm stability.
    Tip: Never use alcohol on the encoder strip unless your model’s manual explicitly allows it; some markings are solvent-sensitive.

    Method 8 — Restore fusing & developer consistency (laser focus)

    Laser streaks often come from the imaging process rather than the paper path. Developer units, drums, and fusers age at different rates. If you see repeating artefacts at consistent intervals down the page, match the repeat distance to a component.

    Repeat distance (A4)Likely componentAction
    ~75–95 mmFuser rollerRun fuser clean mode; choose Heavy/Cardstock; check fuser life
    ~37–48 mmOPC drumRemove cartridge; gently rotate; replace if scratched/at end of life
    ~54–63 mmTransfer roller/beltClean carefully; replace if contaminated
    1. Run built-in cleaning cycles. Many lasers expose a “fuser clean” or “drum refresh” in maintenance menus.
    2. Increase media weight preset. Heavier setting increases dwell, improving fusing on dense coverage.
    3. Inspect consumables. If the repeat distance matches a drum or fuser, plan a replacement.
    Close shot of a laser printer output tray with crisp pages
    Match the repeat interval to the component to target the right fix.

    Method 9 — Fix the software pipeline: export, colour management & PDFs

    Dirty input yields dirty output. If your file is low-resolution, has flattened text, or uses heavy background textures, even a perfect printer will produce banding, noise, and smudge risk. Optimise before hitting print.

    • Export to PDF with embedded fonts. Keep text as vectors; avoid rasterising pages.
    • Remove background textures and drop shadows. Use white space and thin rules instead.
    • Charts: Use labelled lines/patterns; limit fills to light tints.
    • Images: Resize to placement width; 200–300 dpi; tight crop.
    • Colour management: If you see washed colours, try the OS generic/IPP driver path rather than complex vendor colour pipelines for office docs.
    Sanity test: Print the PDF from a different app (e.g., browser or system viewer). If quality improves, the original app’s print path was the culprit.

    Method 10 — Update firmware & perform a clean driver reinstall (minimal stack)

    Drivers accrue baggage. A minimal, clean reinstall often eliminates odd density and streak issues caused by stale settings.

    1. Remove the device from Windows/macOS.
    2. Install via IPP/AirPrint or generic class driver unless you require specific finishing.
    3. Update device firmware from the admin page/panel while idle.
    4. Recreate presets (Everyday, Duplex-Thick, Photo) from scratch.
    Keep it light: The generic IPP/PCL/PS path is stable for everyday documents and reduces conflicts.

    Method 11 — Use the correct path: manual/bypass tray to prevent scuff & skew

    Thick, coated, or textured media benefits from the straightest possible path. The manual/bypass tray feeds flatter with gentler turns, which avoids edge scuffing and trailing-edge smears.

    1. Set guides snug, not tight. Over-tight guides bow the stack and create rub.
    2. Choose the matching preset (Heavy/Cardstock, Labels, Envelopes).
    3. Feed small batches and check each result before committing to a long run.
    Manual feed tray being adjusted by hand
    The bypass tray provides a straighter path for fussy media and reduces scuff.

    Method 12 — Environment & power quality: keep conditions steady

    Quality drifts when conditions swing. Humidity softens fibres, heat curls sheets, and poor power can cause partial fusing and misreads.

    • Place well: Avoid radiators, windows, and direct sun. Keep on a stable, level surface.
    • Humidity control: Store reams sealed; move open stacks to a resealable bag.
    • Power: Use a surge-protected outlet; avoid long daisy-chains and cheap extenders.
    • Airflow (laser): Ensure vents are clear to keep fuser temperature consistent.

    Diagnostics worksheet (identify, test, confirm)

    ObservationHypothesisOne-step testPass/Fail next step
    Vertical dark lineDirty roller/drum linePrint blank page; does line repeat?Clean rollers → if repeat interval constant, inspect drum
    Horizontal banding on fillsNozzle clog / alignmentNozzle check & alignmentQuality ↑; if persists, clean once more
    Grey rub on reversePoor fusing on heavy coverageSwitch to Heavy/CardstockIf still bad, fuser clean mode or service
    Smear at trailing edge duplexCurl contacting guidesUse 90–100 gsm; Duplex-ThickLower density; reduce edge solids
    Images look softLow-res export / scalingExport PDF 300 dpi assetsSwap images to resized PNG/JPG

    Preventive care that keeps prints clean

    • Weekly: Print a 1-page text file to keep inkjets flowing and rollers active.
    • Monthly: Wipe accessible rollers; empty dust; check presets still saved.
    • Quarterly: Firmware update; template review; paper stock rotation.
    • Always: Keep a sealed ream on hand; store open stacks in a bag; label trays by stock.
    Calm home office environment with organised print supplies
    Consistency in storage, presets, and light maintenance prevents most quality faults.

    Troubleshooting matrices

    By device type

    InkjetLaser
    • Nozzle check → Clean once → Align heads
    • Encoder strip/platen clean
    • Paper 90–100 gsm for duplex
    • Photo/Glossy preset for coated media (single-sided)
    • Fuser clean → Heavy/Cardstock for dense pages
    • Match repeat distance to drum/fuser
    • Transfer belt/roller clean
    • Ventilation and power quality check

    By symptom pattern

    PatternCauseFix
    Repeats every ~40–60 mmDrum defectClean/replace drum unit
    Repeats every ~80–100 mmFuser blemishFuser clean mode; reduce heavy solids; replace if worn
    Alternating light/dark bandsInkjet nozzle/align issueNozzle clean; head alignment; quality ↑
    Smear near fold/edgeCurl + duplex flipHeavier stock; Duplex-Thick; adjust layout
    Person reviewing a crisp printed report at a desk
    When input files are clean and presets match the stock, prints look professional by default.

    FAQs

    Why do lines appear only on photos but not on text pages?

    Large flat tints expose small alignment or density issues more than text. Use Photo/Glossy or higher quality, align heads, and ensure images are exported at 200–300 dpi.

    My prints are pale even with new cartridges. What now?

    Check the driver for Draft/Toner Save, run a single clean, and confirm the paper preset. On lasers, raise density one step and run a fuser clean if rub marks appear.

    How do I know if the drum or the fuser is the issue?

    Measure the distance between repeating defects: shorter repeats usually indicate the drum; longer repeats point to the fuser. Match to the table above and act accordingly.

    Should I use alcohol to clean rollers?

    Avoid it unless your manual says otherwise. Alcohol can harden rubber. Start with a dry, lint-free cloth; if needed, use clean water very sparingly.

    Is high-quality mode always safer for lines and banding?

    It helps, but it’s not a cure. Fix the cause first: run nozzle clean/alignment (inkjet) or fuser/drum checks (laser). Then use a higher quality for image-heavy pages.

    Can thin paper cause faded or streaky results?

    Yes. Thin, damp paper curls and rubs guides, creating marks and uneven contact. Move to 90–100 gsm, condition the stack, and load curl-down.

    With clean paths, calibrated heads, and the right presets, crisp results become routine.

    Guide Axis provides brand-neutral education only. No remote access, repairs, or warranty services.

  • Printer Smudging or Streaks? How to Get Clean Prints

    Printer Smudging or Streaks? How to Get Clean Prints

    Printer Smudging or Streaks? How to Get Clean Prints Every Time

    User inspecting a sheet with smudges near a home printer
    Stop Smudges & Streaks — Simple Fixes That Actually Work

    Smudges and streaks usually come from three places: the paper path, the print engine, or the file and settings you send to the device. The good news is that each area has a short set of checks you can run in minutes. This UK-English guide is brand-neutral and focuses on practical steps you can try at home. We will separate quick wins from deeper fixes, show you which presets prevent repeat problems, and list the paper and environment choices that keep prints crisp and consistent.

    Scope: Educational guidance only — no remote access or service. Works for common home and small-office devices.

    Know your symptom: smudge vs streak vs banding

    Smudge means wet ink or loose toner marking the sheet or the next sheet. Streak means a repeated line caused by a dirty roller, clogged nozzle, or developer issue. Banding shows as light/dark steps across a fill from misalignment or low droplet density. Matching the symptom to the cause speeds the fix.

    What you seeLikely causeFirst actionIf still bad
    Wet smear on photosToo much ink; glossy preset not usedUse Photo/Glossy; reduce image areaSingle-sided only; allow longer dry time
    Grey rub on back of next pageToner not fused (laser)Use Heavy/Cardstock or higher fuser temp modeCheck fuser life; avoid heavy solids
    Vertical dark lineDirty transfer/feed rollerWipe rollers carefullyRun cleaning cycle; replace kit if worn
    Horizontal light bandsNozzle misalignment / low densityNozzle clean + head alignmentIncrease quality one step; fresh paper

    Quick wins (try these first)

    • Switch preset: For thick or coated media, choose Heavy/Cardstock or Photo/Glossy.
    • Fresh paper: Swap to a sealed ream; load with curl facing down.
    • Clean path: Power off → open panels → wipe accessible rollers with a dry, lint-free cloth.
    • Reduce coverage: Avoid large solid fills and full-page photos on basic stock.

    Ten methods to fix smudges & streaks

    Method 1 — Clean feed and transfer rollers (safe routine)

    Dust and paper lint build up on rollers and transfer components, leaving repeating marks every rotation. Power the device off, open the paper path, and rotate rollers gently while wiping with a dry, lint-free cloth. Avoid solvents unless your manual allows them, as chemicals can harden rubber and reduce grip. Remove small scraps left from previous jams — a tiny triangle can cause a long vertical streak.

    Method 2 — Use the correct media type preset

    Media presets control path speed, heat (laser), and droplet density (inkjet). If you print glossy media on “Plain”, ink stays wet and smears; if you send heavy stock through at normal speed, toner may not fuse fully. Match the preset to the heaviest sheet in the tray. For duplex text on 90–100 gsm, choose a slightly thicker setting to avoid curl and rub.

    Method 3 — Lower density one step for text-heavy pages

    On both laser and inkjet devices, a small drop in density produces cleaner edges and faster drying without visible loss of quality. Use this on long text documents, draft decks, and handouts where deep solids are unnecessary.

    Method 4 — Run a nozzle clean and head alignment (inkjet)

    Banding and faint lines often come from partially clogged nozzles or misaligned heads. Use the built-in Nozzle Check and Head Alignment tools. Run a single cleaning cycle, wait a few minutes, then align. Avoid repeated back-to-back cleans; they use a lot of ink and can over-saturate the maintenance pad.

    Method 5 — Choose paper that suits duplex and images

    Thin stock (≤80 gsm) shows through and curls with heat or heavy ink, rubbing as the stack builds. For duplex reports, favour 90–100 gsm matte. For image-heavy pages, step up to 100–120 gsm or print photos smaller and away from the binding edge.

    Method 6 — Fix humidity and curl before printing

    Paper is hygroscopic: it absorbs moisture that softens fibres and encourages curl, producing contact rub and late sensor hits. Use a fresh, sealed ream, keep stacks in a resealable bag, and load with curl facing down so the path flattens the sheet as it travels.

    Method 7 — Print single-sided on coated media

    Most home printers are not designed to duplex glossy stock. Two passes add heat and moisture that smear or offset. Print coated media single-sided and allow extended dry time. For brochures, consider a lighter image area or a satin paper that dries faster.

    Method 8 — Update or simplify the driver

    Old drivers can mishandle density and colour management. Re-add the device with the OS’s IPP/AirPrint or generic PCL/PS driver for reliable defaults. Only install full vendor suites if you need specific finishing features.

    Method 9 — Realign file output (export smart)

    Export documents to PDF with embedded fonts and avoid flattening text to images. For slides and charts, remove background textures, use thin rules, and simplify gradients. The cleaner the asset, the cleaner the print.

    Method 10 — Reroute through the manual/bypass tray for tricky media

    The manual tray often provides a straighter path with slower entry, reducing scuff and skew for envelopes, labels, and heavier stock. Set the side guides snugly and feed a few sheets at a time.

    Happy user after achieving clean print quality at home
    Small changes — right preset, fresh paper, clean rollers — create big improvements.

    Paper, humidity, and storage

    Store one ream sealed and keep the active stack in a resealable bag. Avoid windowsills, radiators, and kitchens where humidity swings. Before a long job, condition the stack: tap to square edges, fan lightly once to break static, and check for visible curl across the top. Load curl down and keep below the tray’s fill line.

    StockUse caseJam/smudge riskPreset advice
    70–75 gsmCheap copyHigh curl & show-throughSingle-sided; lower density
    80 gsmEveryday textLow–mediumPlain/Normal OK
    90–100 gsmDuplex reportsLowThick/Heavy 1 for flips
    100–120 gsmLetters, small coversLowPlain or Heavy 1
    Glossy/coatedPhotos, promosMedium (dry time)Photo/Glossy; single-sided

    Presets that prevent repeat issues

    Saving presets stops guesswork and reduces mistakes when you are in a hurry. Create three: Everyday (greyscale, duplex, normal), Duplex-Thick (Heavy 1, duplex), and Photo/Glossy (single-sided, high). Label them clearly so everyone in the house can pick the right one.

    PresetWhen to useWhat it does
    EverydayText draftsGreyscale; normal density; duplex
    Duplex-ThickReports 90–100 gsmSlower path; better bonding; fewer rubs
    Photo/GlossyImages on coated stockHigher quality; single-sided; longer dwell
    Labels/EnvelopesAdhesive sheets, envelopesLow entrance stress; manual tray

    Troubleshooting matrix

    SymptomLikely causeDo this firstNext step
    Ink rubs hours after printWrong media settingSelect Photo/GlossyReduce image size; increase dry time
    Toner rub on back pageInsufficient fusingHeavy/Cardstock presetAvoid heavy solids; service fuser if worn
    Vertical dark streakDirty rollerClean rollersReplace kit if marks repeat every rotation
    Light horizontal bandsNozzle issueNozzle cleanHead alignment; quality ↑
    Smudge near trailing edgeCurl + duplex flipUse 90–100 gsmDuplex-Thick preset; reduce edge coverage
    Clean print quality concept illustration
    Clean assets + the right preset = crisp output with fewer reruns.

    FAQs

    Why do prints smudge more on glossy paper?

    Glossy stock needs a dedicated preset that slows the path and adjusts drying or fusing. Use Photo/Glossy and print single-sided with extra dry time.

    How often should I clean rollers?

    Monthly for homes; fortnightly if busy. Power off first and wipe with a dry lint-free cloth. Avoid solvents unless your manual explicitly allows them.

    Can paper cause streaks by itself?

    Yes. Damp or curled stock rubs guides and picks up marks. Swap to a sealed ream, condition the stack, and load curl-down before printing.

    Is higher quality always better for text?

    No. Normal quality with good fonts and spacing looks clean and dries faster. Save high quality for images and final presentation pages.

    Do I need brand-specific cleaners?

    Usually not. Routine dust removal is enough. If a vendor supplies a kit for your model, follow their instructions, but start with simple dry cleaning first.

    User printing a clean, streak-free document at home
    Once presets, paper, and path are aligned, clean prints become the default.

    Guide Axis provides brand-neutral education only. No remote access, repairs, or warranty services.

  • Reconnect Printer After Wi-Fi Change — No Reinstall Needed

    Reconnect Your Printer to Wi-Fi: 6 Methods That Work

    Reconnect Your Printer to Wi-Fi: 6 Methods That Work

    Person connecting printer to Wi-Fi
    Reconnect Your Printer to Wi-Fi: 6 Methods That Work
    Follow these expert steps to restore your printer’s wireless connection without stress.
    UK English • Brand-neutral guide • Home & Office • Word Count: • Reading Time:

    Why reconnecting Wi-Fi is important

    A disconnected printer can halt productivity in both home offices and larger workplaces. Wireless connectivity ensures multiple devices can print without constant physical connections. Lost connections may stem from network changes, router updates, or device sleep modes. Understanding how to quickly re-establish a Wi-Fi connection saves time, avoids frustration, and prevents repeated failed print jobs.

    Wi-Fi connectivity also impacts printer features like cloud printing, mobile device printing, and remote management. Without a stable wireless link, some advanced functions cannot be used, and troubleshooting can become more complex.

    Quick insight: Reconnecting the printer is not only about printing again—it also ensures firmware updates, cloud sync, and seamless workflow across devices.

    Method 1: Use Printer Control Panel

    Most modern printers allow direct Wi-Fi reconnection via the built-in control panel. Begin by navigating to the wireless or network settings menu. Look for “Wireless Setup Wizard” or similar options. The wizard typically scans available networks and prompts you to select your Wi-Fi SSID.

    After selecting your network, enter the password carefully. Pay attention to case sensitivity and special characters. Once confirmed, the printer will attempt to connect and may display a success message or an IP address confirmation.

    Using printer control panel to reconnect to Wi-Fi
    Use the printer control panel to navigate network settings and reconnect to Wi-Fi.

    This method is ideal for devices that do not rely on external software and works reliably for both home and office networks. Restarting the printer after configuration ensures settings take effect properly.

    Method 2: WPS Push Button Connection

    If your router supports WPS (Wi-Fi Protected Setup), this method can reconnect the printer without entering a password. Press the WPS button on your router, then on your printer select WPS connection from its network menu. The printer will search for the router signal and automatically establish a secure connection.

    WPS is convenient but may not be available on older routers or printers. Ensure that WPS is enabled on your router, and do not press the button repeatedly as it may time out. Once connected, the printer will display a confirmation and possibly print a network report.

    Tip: WPS is fast and avoids typing long passwords, but make sure to disable WPS after initial setup if you prefer maximum network security.

    Method 3: Printer Software or Utility

    Most manufacturers provide software or desktop utilities to manage printer connections. Install the official software on your PC or Mac, open it, and navigate to the wireless setup section. The software will detect nearby printers and guide you through selecting the network and entering credentials.

    This method is particularly helpful if the printer is headless (no screen) or if multiple Wi-Fi parameters like static IP, DNS, or security types need configuration. Software often verifies connection by printing a test page.

    Setting up printer Wi-Fi via software
    Manufacturer utilities can simplify Wi-Fi reconnection with guided steps and verification tests.

    Method 4: Manual IP and Wi-Fi Setup

    For advanced users, manually configuring the printer’s IP, subnet, and Wi-Fi parameters ensures stable connection in complex networks. Access the printer’s web interface via temporary USB or existing network link. Assign a static IP within your router’s range to prevent future disconnects.

    Set the SSID, encryption type (WPA2/WPA3), and password manually. Verify that the gateway and DNS settings match the router configuration. This approach is ideal for office networks with reserved IPs or custom network settings.

    Method 5: Router Reset and Reconnect

    Sometimes connection issues stem from the router rather than the printer. Power cycle the router, wait for it to fully boot, then reconnect the printer using any of the previous methods. If the router has new SSID or password changes, update the printer accordingly.

    Pro tip: After a router firmware update, printers may lose credentials. Always check printer settings post-update.

    Method 6: Mobile App Setup

    Many modern printers support connection via mobile apps. Install the manufacturer’s app on your smartphone, open Wi-Fi setup, and follow on-screen instructions. The app often auto-detects nearby printers, configures Wi-Fi settings, and verifies connectivity with test prints.

    Mobile app setup is particularly useful for home environments where devices frequently change networks or when multiple users need quick access. Keep your mobile device close to the printer during setup to ensure signal strength.

    Troubleshooting Common Wi-Fi Issues

    SymptomLikely CauseAction
    Printer not visible on networkWi-Fi disabled, wrong SSIDCheck network settings, ensure printer Wi-Fi is on, refresh network list
    Cannot print from PC/MacWrong IP or driver issueVerify printer IP, reinstall or update drivers
    Intermittent disconnectsWeak Wi-Fi signal or router interferenceMove printer closer, use 5GHz band if supported, reduce interference
    App setup failsMobile and printer on different networksConnect phone to the same SSID, retry setup
    Password not acceptedIncorrect password, special charactersRe-enter carefully, check case sensitivity

    FAQs

    Why did my printer lose Wi-Fi connection suddenly?

    Network changes, router updates, power outages, or firmware updates can reset saved Wi-Fi credentials. Printers may also lose connection after long periods of inactivity. Reconnection methods above restore connectivity.

    Can I reconnect a printer to a new network without resetting it?

    Yes. Use the control panel or software utility to select the new network and enter the password. Some devices may require a temporary reset if credentials conflict or old settings persist.

    Is WPS secure for home use?

    WPS is convenient and reasonably secure for home networks. For business networks, manual setup with WPA2/WPA3 and strong passwords is preferred.

    Do mobile apps always work for Wi-Fi setup?

    Mobile apps simplify setup but require the phone and printer to be on the same network initially. Compatibility depends on the printer model and app version.